Picture this: a stormy Sunday afternoon, the kitchen clock ticking, and the pantry humming with potential. I opened the fridge, craving something comforting yet quick, and the idea of Instant Pot chili flashed like a neon sign. The aroma of simmering spices promised a hug in a bowl, while the clock whispered urgency. I dared you to taste this and not go back for seconds, because this sauce coats the beans like velvet. The instant pot's pressure seals in flavor faster than a magician's trick. My friend, a skeptic of slow cooking, challenged me to prove the instant pot's worth. I accepted the dare, armed with a handful of spices and a vision of creamy, smoky goodness. The kitchen lights flickered, setting the stage for a culinary showdown. With every stir, the scent of cumin and chili powder rose, teasing the senses. By the time the pot clicked shut, the room smelled like a summer campfire, yet it was ready in under an hour.
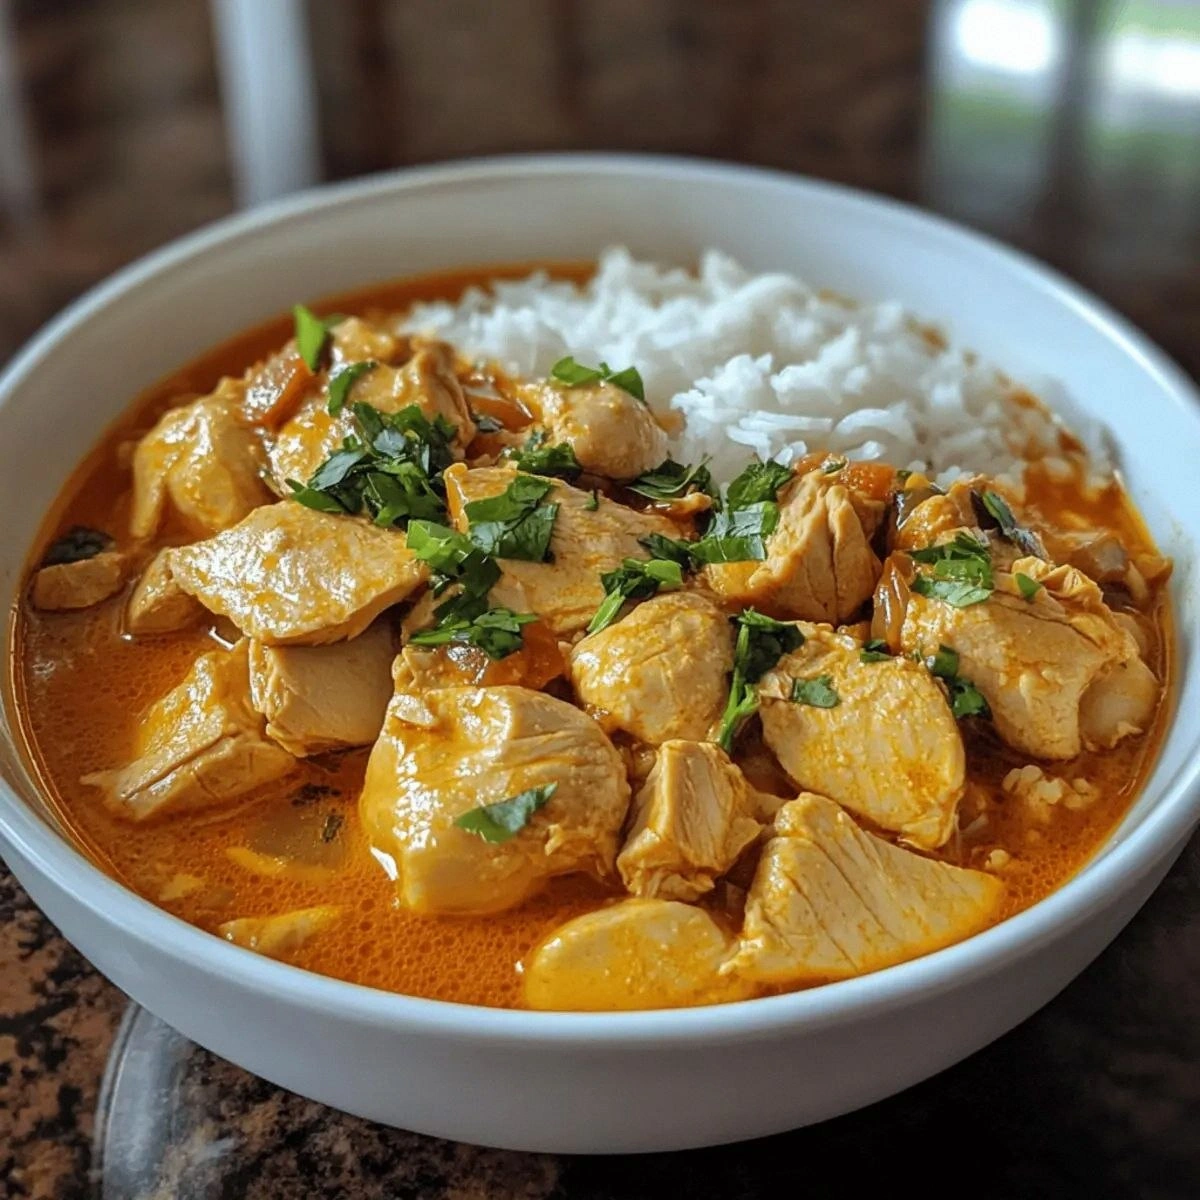
Now, let me walk you through every single step — by the end, you'll wonder how you ever made it any other way. The first thing you notice is the bright, glossy chicken, marinated in a whisper of lime and garlic, turning it into a flavor sponge. The pressure cooker transforms the chicken in minutes, releasing juices that mingle with the beans. The result? A thick, velvety sauce that clings to every grain of rice or spoonful of noodles. Imagine biting into a bite of this and feeling the heat dance across your tongue, followed by a mellow sweetness from the tomatoes. The texture is a paradox: tender meat, creamy beans, and a hint of crunch from fresh cilantro. When you ladle the chili into a bowl, the steam curls like a warm halo, inviting you to dig in. I promise you, this is hands down the best version you'll ever make at home, even if you’ve tried canned chili before. The secret lies in the slow simmer of spices, which unlocks depth without the need for hours of waiting. And if you’re still skeptical, just look at the steam— it’s practically a cloud of pure comfort.
Most recipes get this completely wrong. They either overcook the chicken or under-season the broth, resulting in a bland, watery mess. In contrast, my version balances the acidity of tomatoes with the earthiness of cumin, creating a symphony of flavors. The key is to let the chili rest for a few minutes after pressure release; this allows the flavors to marry like a well-aged wine. The result is a sauce that coats the pasta like velvet, a texture that feels indulgent yet light. Picture yourself pulling this out of the pot, the whole kitchen smelling incredible, and knowing that your guests will be asking for the recipe. If you've ever struggled with this, you're not alone — and I've got the fix. The trick is to keep the pot at a steady pressure and not rush the release, otherwise you risk a watery mess. The best part? It’s incredibly forgiving, so even a first-timer can pull off a masterpiece. The aroma alone will have your entire house buzzing with anticipation. And the taste? Pure, comforting bliss.
Okay, ready for the game-changer? The next step is to add a splash of olive oil to the pot before searing the onions. This small detail prevents sticking and adds a subtle depth that elevates the entire dish. As the onions caramelize, they release a sweet, almost buttery flavor that becomes the base of the chili. Then, the garlic joins the party, sizzling for just a minute before the spices come in. The chili powder and cumin are added next, their aromas filling the kitchen like a fragrant storm. This is the moment of truth; the spices should turn the onions golden, not brown. The next step? Adding the chicken, beans, tomatoes, and broth, then sealing the pot for pressure cooking. The instant pot’s safety features mean you can focus on the aroma without worrying about splatter. When the timer dings, the pot releases pressure naturally, preserving the tender texture of the chicken. Finally, a dash of salt and pepper finishes the dish, balancing the flavors like a seasoned chef.
Let’s talk about the ingredients that make this chili a standout. The chicken breast is the star, but its lean nature means you need to add moisture, which the broth and tomatoes provide. The kidney beans add protein and fiber, but you can swap them for black beans for a different flavor profile. The diced tomatoes bring acidity and a touch of sweetness, balancing the heat of the spices. The onions and garlic create a flavor base that is both aromatic and comforting. The chili powder and cumin are the backbone, delivering warmth and depth. The olive oil adds richness, preventing the chili from feeling too dry. Finally, the optional shredded cheese and cilantro add texture and freshness, turning the dish from simple to spectacular.
Everything’s prepped? Good. Let's get into the real action. The first step is to turn on the Instant Pot and select the 'Sauté' function. Add the olive oil and let it shimmer, then toss in the diced onions. Sauté until translucent, which should take about three minutes. Next, add the minced garlic and let it cook for another minute, watching it release its aromatic oils. Then, sprinkle in the chili powder and cumin, stirring constantly to avoid clumping. The spices should toast slightly, creating a nutty aroma that signals readiness. Once the base is fragrant, add the chicken pieces, ensuring they’re coated in the spice mixture. After searing, pour in the broth and canned tomatoes, stirring to combine. Finally, add the kidney beans and seal the Instant Pot lid. Set the pressure cook to high for 10 minutes, then allow the pressure to release naturally for 10 minutes before quick‑releasing any remaining pressure.
After the cooking cycle, open the lid carefully, ensuring the steam has fully dissipated. Give the chili a good stir, allowing the flavors to mingle. Taste and adjust seasoning with salt and pepper; sometimes a pinch of cayenne can add a subtle kick. If the chili feels too thick, add a splash of water or broth to reach your desired consistency. Let it rest for a few minutes; this resting period allows the flavors to settle, giving the chili a richer taste. Meanwhile, you can toast some bread or prepare a side of rice, but the real focus is the chili’s aroma filling the kitchen. When you ladle it into bowls, garnish with shredded cheese and cilantro for a pop of color and freshness. The result is a hearty, comforting dish that feels like a hug in a bowl. Serve hot, and watch the steam curl around the spoon like a warm halo.
That's it — you did it. But hold on, I've got a few more tricks that'll take this to another level. The first trick is to use a mix of fresh and canned beans for added texture. Fresh beans will have a firmer bite, while canned beans soften the overall mouthfeel. The second tip is to finish the chili with a splash of lime juice; the acidity brightens the dish and balances the richness. Third, consider adding a handful of chopped roasted red peppers for a sweet, smoky undertone that complements the chili powder. Fourth, if you’re a fan of extra heat, sprinkle in some crushed red pepper flakes after the pressure release; this will keep the heat alive without overwhelming the dish. Finally, serve the chili with a side of cornbread or over a bed of fluffy rice for a complete meal.
Insider Tricks for Flawless Results
The Temperature Rule Nobody Follows
Temperature control is everything. If the pot’s temperature dips too low during cooking, the chicken will become dry. Keep the pot sealed and let the pressure build naturally; avoid opening the lid prematurely. Use a thermometer to confirm the internal temperature reaches 165°F for safe consumption. This simple check ensures a moist, tender result every time.
Why Your Nose Knows Best
Your sense of smell is a powerful guide. If the chili smells too acidic, add a pinch of sugar to balance. If it’s too heavy, a splash of broth or water can lighten it. Trust your nose; it’s the chef’s best friend.
The 5-Minute Rest That Changes Everything
After pressure release, let the chili sit untouched for five minutes. This resting period allows the flavors to settle and the sauce to thicken slightly. A friend once skipped this step, and the result was a watery, unbalanced dish. Don’t make the same mistake.
Adding a Creamy Twist
Stir in a dollop of Greek yogurt or sour cream just before serving. The dairy adds creaminess and a subtle tang that pairs perfectly with the spices. It also helps cut through the richness, making the dish lighter on the palate.
Stirring in the Finish
Finish the chili with a drizzle of olive oil or a swirl of melted butter. The added fat enhances the mouthfeel and gives the sauce a silky sheen. It also helps the spices cling to each other, creating a richer flavor profile.
Creative Twists and Variations
This recipe is a playground. Here are some of my favorite ways to switch things up:
Smoky Chipotle Version
Swap the chili powder for chipotle powder and add a can of chipotle in adobo. The smoky heat turns the dish into a bold, adventurous flavor profile, perfect for game‑day gatherings.
Mexican Street Taco Chili
Serve the chili in a warm corn tortilla, topped with diced onions, cilantro, and a squeeze of lime. The tortilla adds a chewy texture, while the fresh toppings brighten the dish.
Vegan Chili Boost
Replace chicken with a mix of tofu and tempeh. Use vegetable broth and skip the dairy for a plant‑based version that still delivers hearty protein.
Cheesy Baked Chili
Transfer the chili to a baking dish, top with shredded cheddar and breadcrumbs, then bake at 375°F until bubbly. The crusty topping adds a delightful crunch.
Breakfast Chili
Add a splash of milk, fold in scrambled eggs, and serve over toast. The creamy texture and protein make it a satisfying morning meal.
Quick One‑Pot Meal
Cook the chili directly in a skillet, adding all ingredients at once, then simmer for 30 minutes. This method saves the pot and still delivers flavor.
Storing and Bringing It Back to Life
Fridge Storage
Cool the chili completely before refrigerating. Store in an airtight container for up to 4 days. The flavors deepen, making leftovers even more delicious.
Freezer Friendly
Divide the chili into freezer‑safe portions and freeze for up to 3 months. Thaw overnight in the fridge, then reheat gently on the stove or in the microwave.
Best Reheating Method
Reheat over low heat, stirring frequently. Add a splash of water or broth to maintain moisture. A tiny splash of water before reheating steams back to perfection, preventing dryness.