Remember that night when the kitchen became a battlefield after a midnight taco craving? I had a bag of chicken, a bottle of BBQ sauce, and a ranch dressing that had been sitting in my fridge like a forgotten relic. I tossed the chicken into the sauce, added a splash of ranch, and thought I had found the ultimate quesadilla secret. But the first bite was underwhelming, the cheese stuck to the tortilla, and my taste buds felt like they’d been left at a bland buffet. I swear, the moment I realized the missing ingredient was a little crunch and a lot of flavor, I was already plotting my next culinary conquest.
Picture this: the air thick with the sweet, smoky perfume of barbecue mingling with the sharp tang of ranch. The sound of sizzling tortillas on a hot skillet is like applause from the kitchen. The sight of melted cheese glistening like molten gold against a golden tortilla makes your stomach rumble even before you take a bite. The first bite delivers a burst of smoky sweetness that dances on your tongue, followed by a creamy ranch whisper that lingers like a secret. The final crunch of a lightly toasted edge gives a satisfying snap that feels like a tiny celebration in your mouth.
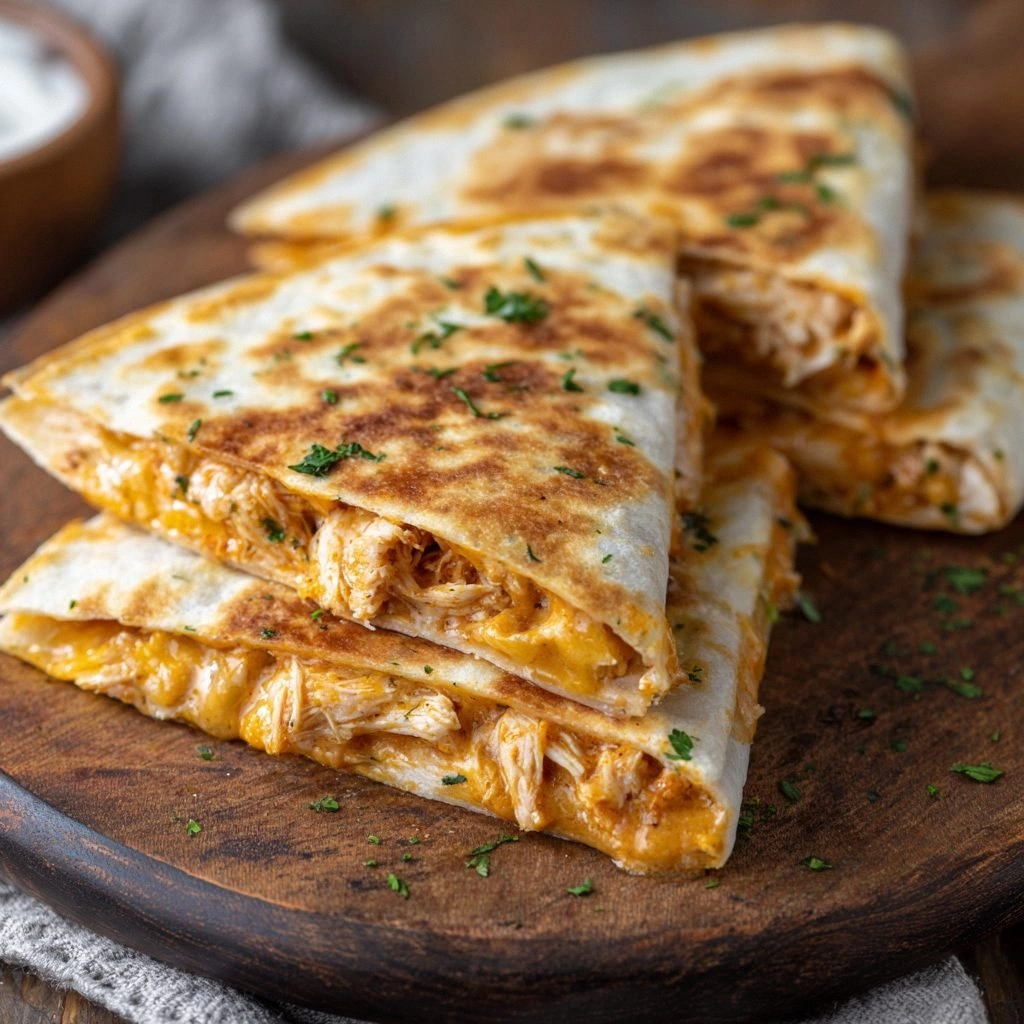
What makes this version stand out is that I discovered a way to balance the smoky and the creamy without drowning the chicken in sauce. I used shredded rotisserie chicken for its natural moisture, a low‑fat ranch for a clean finish, and a blend of cheddar and pepper jack to create a cheese layer that melts but doesn’t become greasy. The tortillas are brushed with a light coat of olive oil before grilling, giving them a buttery crunch that holds everything together. And the secret sauce? A swirl of smoky barbecue and a splash of buttermilk that cuts through the richness like a fresh breeze. This combination turns an ordinary quesadilla into a flavor explosion that makes every bite worth the wait.
I dare you to taste this and not go back for seconds. I promise, this is hands down the best version you'll ever make at home. If you've ever struggled with soggy tortillas or bland fillings, you're not alone — and I've got the fix. Picture yourself pulling this out of the oven, the whole kitchen smelling incredible, and the moment your guests bite into the first crispy edge. Stay with me here — this is worth it. Let me walk you through every single step — by the end, you'll wonder how you ever made it any other way.
What Makes This Version Stand Out
Alright, let's break down exactly what goes into this masterpiece.
- Flavor: The marriage of smoky barbecue and creamy ranch creates a layered taste that feels both comforting and adventurous. This duo is the heart of the dish and elevates each bite to a savory crescendo. It’s the kind of flavor that lingers long after the last tortilla is gone.
- Texture: A buttery, crisp tortilla paired with a molten cheese blend delivers a mouthful that oscillates between crunch and melt. The slight snap of the crust balances the creamy interior, preventing any single element from overpowering the other.
- Convenience: Using rotisserie chicken means you’re saving time without sacrificing flavor. The assembly is a quick 5‑minute process that makes this a perfect weeknight dinner or a last‑minute party hit.
- Versatility: This base can be swapped with different proteins or cheeses, allowing you to tailor it to dietary preferences or pantry staples.
- Presentation: The golden edges and gooey cheese make for Instagram‑ready photos that will have your friends double‑tapping.
- Heat Management: The technique of lightly brushing tortillas with oil before grilling ensures a caramelized crust without excessive oil absorption.
- Balance: The combination of sweet BBQ sauce, tangy ranch, and savory cheeses creates a harmonious flavor profile that satisfies both sweet and savory cravings.
Inside the Ingredient List
The Flavor Base
BBQ sauce is the soul of this dish. Its smoky, sweet undertones set the stage for everything that follows. The sauce should be thick enough to cling to the chicken but not so thick that it clumps. When you stir it into the chicken, watch for the glaze to coat every shred, ensuring a burst of flavor with each bite.
Ranch dressing brings a creamy counterpoint that tempers the heat of the BBQ sauce. Opt for a low‑fat version to keep the quesadillas from becoming too greasy while still providing that signature tang. The ranch also helps bind the cheese, creating a cohesive melt that feels indulgent without overwhelming the palate.
The Texture Crew
Shredded rotisserie chicken is the star protein. Its natural moisture keeps the filling juicy, and the pre‑cooked nature saves precious minutes. If you prefer a firmer bite, use a dry‑roasted chicken breast, but be prepared to add a splash of broth to compensate for dryness.
Cheese is the glue that holds everything together. A blend of cheddar and pepper jack offers a balance of sharpness and subtle heat. The cheddar provides depth, while the pepper jack adds a mild kick that echoes the BBQ sauce’s smoky warmth. The cheeses should be shredded finely to ensure quick, even melting.
The Unexpected Star
Buttermilk is the secret weapon that gives the filling a silky texture. It reacts with the BBQ sauce’s acidity, creating a smooth, velvety consistency that coats the chicken without making it soggy. A tablespoon is enough to elevate the entire dish, and if you’re dairy‑free, a splash of almond milk works surprisingly well.
The Final Flourish
Optional add‑ons like diced red onion, bell pepper, or a squeeze of lime juice add bright, fresh contrast to the rich base. The onions contribute a subtle crunch, the peppers bring color and mild sweetness, and lime juice offers a zesty lift that brightens the overall flavor profile. These toppings are optional but highly recommended for a well‑rounded experience.
Everything's prepped? Good. Let's get into the real action.
The Method — Step by Step
- Step 1: Preheat the Skillet. Place a heavy‑bottom skillet on medium heat and let it heat until a drop of water sizzles and evaporates in seconds. This ensures a quick sear and prevents sticking. Keep the heat steady to avoid burning the tortillas.
- Step 2: Warm the Tortillas. Lay each tortilla on a separate plate and cover with a clean kitchen towel. This prevents them from drying out and makes them pliable. Warmed tortillas are easier to fold and less likely to tear during assembly.
- Step 3: Combine the Filling. In a bowl, mix shredded chicken, BBQ sauce, ranch dressing, and a tablespoon of buttermilk. Stir until the chicken is evenly coated. The mixture should look glossy and slightly thick; if it’s too runny, add a pinch more BBQ sauce.
- Step 4: Assemble the Quesadilla. Place a tortilla on the skillet, brush lightly with olive oil, and sprinkle a thin layer of cheddar, pepper jack, and a handful of the filling. Fold the tortilla over itself, creating a half‑moon shape. The oil helps the tortilla crisp up beautifully.
- Step 5: Cook the First Side. Let the quesadilla cook for 3–4 minutes until the bottom is golden brown and the cheese begins to melt. Use a spatula to lift the edge and check the color. The cheese should be bubbly, indicating a perfect melt.
- Step 6: Flip with Care. Gently slide a spatula under the quesadilla and flip it. Cook the other side for another 3–4 minutes. Keep the heat moderate to avoid burning while ensuring the cheese fully melts. The flip should be smooth; a sudden flip can cause the filling to spill.
- Step 7: Watch Out for Overcooking. The cheese will start to brown heavily after about 6 minutes total. If the edges turn dark brown, reduce the heat immediately. Overcooked cheese can become rubbery and bitter.
- Step 8: Rest Before Slicing. Remove the quesadilla from the skillet and let it rest for 1 minute. This allows the cheese to set slightly, making slicing easier. A short rest also lets the juices redistribute, enhancing flavor.
- Step 9: Slice and Serve. Cut the quesadilla into wedges with a sharp knife or pizza cutter. Serve immediately with a side of fresh salsa, a dollop of ranch, or a squeeze of lime. The heat from the cheese will keep the wedges warm for a few minutes.
Insider Tricks for Flawless Results
The Temperature Rule Nobody Follows
Many cooks set their skillet to high heat and risk burning the tortilla before the cheese melts. The trick is to start at medium heat, let the skillet reach the right temperature, and then adjust slightly lower after placing the quesadilla. This ensures a slow, even melt and a golden crust.
Why Your Nose Knows Best
As soon as the cheese starts to bubble, the aroma will signal that the filling is ready. Trust that scent; it’s the quickest indicator of doneness. If you’re unsure, gently lift the edge to see if the cheese is uniformly melted.
The 5‑Minute Rest That Changes Everything
Letting the quesadilla rest for just 60 seconds before cutting keeps the cheese from spilling out. This short pause also allows the internal temperature to even out, preventing a hot spot that can burn your mouth.
Use a Heavy‑Bottom Skillet
A cast iron or stainless steel skillet distributes heat evenly, preventing hot spots that cause uneven browning. If you’re using a non‑stick pan, add a small amount of oil to maintain a consistent sear.
Keep the Tortilla Warm
After cooking one quesadilla, place it on a warm plate or wrap it loosely in foil. This prevents the tortilla from cooling and becoming soggy before you finish the batch.
Don’t Skimp on Cheese
A generous amount of cheese creates a gooey, satisfying center. If you prefer a lighter version, use half the cheese and add a sprinkle of shredded mozzarella for extra stretch.
Creative Twists and Variations
Southwest Fiesta
Swap the ranch for a cilantro lime crema and add black beans and corn to the filling. The bright lime and cilantro cut through the smoky BBQ, creating a fresh, vibrant flavor. This version is perfect for a summer gathering or a quick weeknight twist.
Veggie‑Rich Delight
Omit the chicken and replace it with sautéed mushrooms, spinach, and zucchini. Use a plant‑based ranch and a blend of vegan cheeses. The earthy vegetables pair beautifully with the smoky sauce, offering a hearty, meatless option.
Cheese Lover’s Paradise
Double the cheese quantity and include a drizzle of blue cheese crumbles on top after flipping. The sharpness of the blue cheese balances the sweetness of the BBQ sauce, creating a sophisticated palate.
Breakfast Breakfast
Use a breakfast sausage or bacon instead of chicken, add a fried egg on top before folding, and sprinkle with chives. The savory sausage and runny yolk make this a breakfast‑style quesadilla that’s both filling and flavorful.
Spicy Kick
Stir in a tablespoon of sriracha or chipotle paste into the BBQ sauce. Add sliced jalapeños to the filling for an extra burst of heat. This spicy version is a crowd‑pleaser for those who love a fiery bite.
Low‑Calorie Fix
Use whole‑wheat tortillas, low‑fat cheese, and a sugar‑free BBQ sauce. Reduce the amount of olive oil to a light spray. The result is a lighter, still delicious version that doesn’t compromise on flavor.
Storing and Bringing It Back to Life
Fridge Storage
Cool the quesadillas to room temperature, then wrap each in parchment paper followed by a foil layer. Store in an airtight container for up to 3 days. The parchment prevents condensation, keeping the tortilla crisp.
Freezer Friendly
Wrap each quesadilla tightly in plastic wrap and place in a freezer bag. Freeze for up to 2 months. When ready to eat, thaw overnight in the fridge and reheat in a skillet for 3 minutes on each side.
Best Reheating Method
To revive the crispness, heat a non‑stick skillet over medium heat and place the quesadilla in. Cover loosely with foil for 2 minutes, then flip and cover again. Add a splash of water to the skillet before covering to create steam, which keeps the tortilla from drying out.