Picture this: it’s a frosty Saturday night, the wind howls outside, and you’re stuck in a kitchen that smells like a bakery that just exploded with butter and sugar. I was halfway through a marathon of holiday movies when a sudden craving for something that felt both nostalgic and utterly fresh hit me like a snowball to the gut. I rummaged through the pantry, found a half‑used stick of butter, a jar of maple syrup that had been waiting for a moment like a shy guest, and a bag of pecans that whispered promises of crunch. Most cookie recipes I’d tried either fell flat like a deflated snowman or turned out as hard as a frozen pond, but I was determined to crack the code for the ultimate holiday cookie. I dared myself to create a cookie that could stand shoulder‑to‑shoulder with the classic gingerbread and still feel like a brand‑new love affair.
When that butter finally hit the pan, it sang a deep, nutty note that reminded me of toasted marshmallows on a campfire—only richer, more sophisticated. The maple syrup swirled in, turning the mixture a gorgeous amber, and the pecans, once toasted, added a buttery crunch that sounded like a chorus of tiny applause with every bite. I could hear the faint crackle of the butter as it browned, feel the warm glow of the oven radiating through the kitchen, and taste the sweet‑savory dance before the cookies even left the tray. This version isn’t just a cookie; it’s a sensory experience that wraps you in a cozy blanket of flavor, making the whole house feel like a winter wonderland.
Most recipes get the butter wrong—either they melt it, or they keep it cold, and the result is a cookie that either spreads too thin or stays stubbornly dense. Here’s what actually works: I brown the butter to a nutty, caramel‑kissed perfection, then blend it with two layers of powdered sugar that give the dough a silky, melt‑in‑your‑mouth texture. The maple extract amplifies the syrup’s natural depth, while the half‑and‑half adds a luxurious moisture that keeps the cookies tender for days. And the secret weapon? A splash of water in the glaze that makes it glossy without turning it gummy.
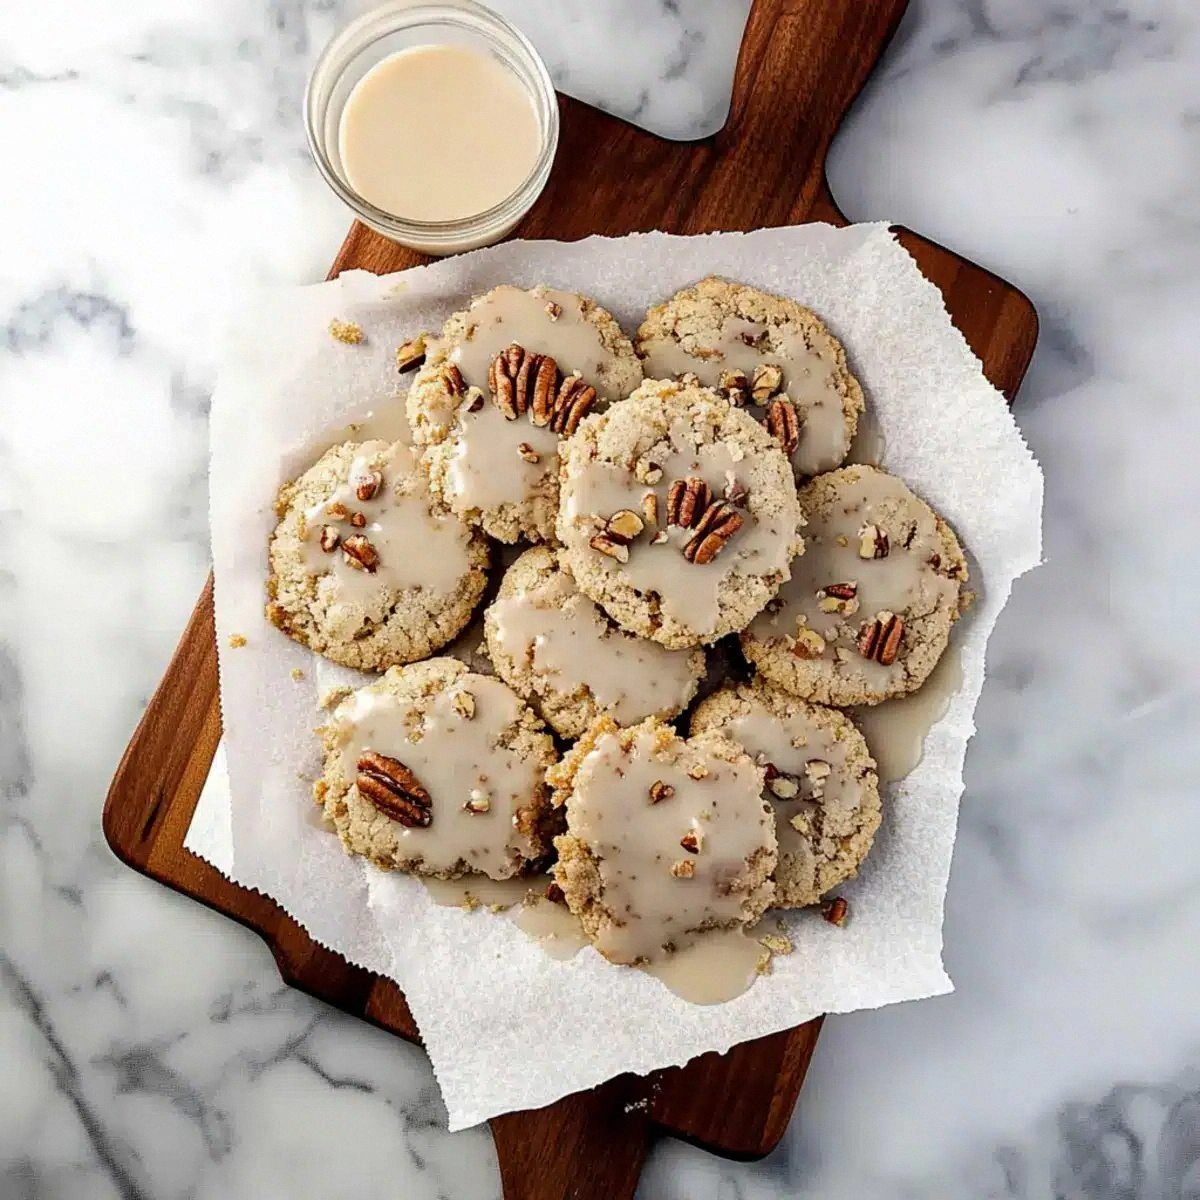
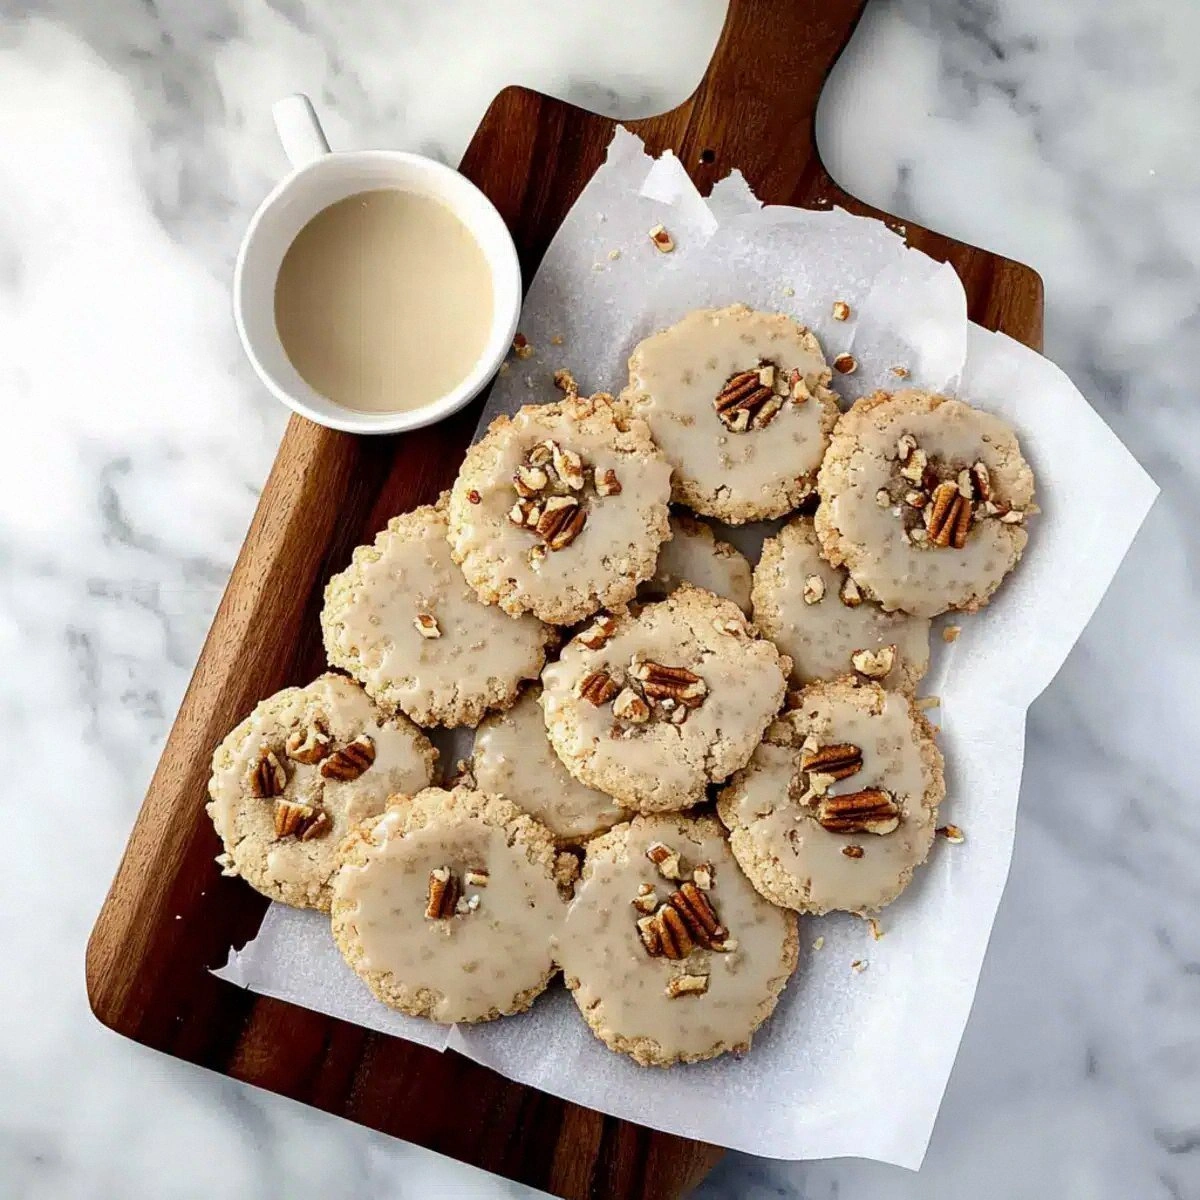
Okay, ready for the game‑changer? The glaze. I’ll be honest — I ate half the batch before anyone else got to try it, because that glossy maple‑pecan finish is pure, unadulterated joy. I dare you to taste this and not go back for seconds. Picture yourself pulling this out of the oven, the whole kitchen smelling incredible, the cookies glistening like tiny amber jewels, and your friends crowding around, eyes wide, mouths already watering. Let me walk you through every single step — by the end, you’ll wonder how you ever made it any other way.
What Makes This Version Stand Out
- Taste: The buttery, caramelized base married with the deep, earthy sweetness of maple creates a flavor that feels both familiar and exotic.
- Texture: A crisp edge that shatters like thin ice, contrasted with a chewy, melt‑in‑your‑mouth center that keeps you reaching for more.
- Simplicity: Only twelve ingredients, all pantry‑friendly, and no fancy equipment—just a skillet and a whisk.
- Uniqueness: The double‑powdered‑sugar method gives a silk‑smooth dough, while the brown butter adds a toasty depth most recipes miss.
- Crowd Reaction: Guests invariably ask for the recipe, and you’ll see that look of “I need to make this for every holiday” light up their faces.
- Ingredient Quality: Real maple syrup (not the pancake‑house imitation) and fresh, toasted pecans make all the difference.
- Cooking Method: Browning butter is a quick, low‑risk step that transforms the entire cookie profile.
- Make‑Ahead Potential: The glaze can be pre‑made and stored, and the cookies stay perfect for up to a week.
Inside the Ingredient List
The Flavor Base
Unsalted Butter (1 cup): This is the heart of our cookie. By browning it, we coax out the milk solids, creating a nutty, caramel‑like foundation that no plain melted butter can match. If you skip the browning step, you’ll miss that deep flavor and end up with a bland, one‑dimensional cookie. For the best results, use a high‑quality European butter that has a higher butterfat content.
Powdered Sugar (1 cup) & Powdered Sugar (1 cup): Two cups of powdered sugar give the dough a silk‑smooth texture and a subtle sweetness that lets the maple shine. Using powdered sugar instead of granulated prevents grainy pockets and ensures the glaze adheres beautifully. If you only have granulated sugar, pulse it in a blender for a few seconds to achieve a fine powder.
Fine Sea Salt (½ teaspoon): A pinch of salt amplifies the sweet and nutty notes, balancing the richness of the butter and maple. Too much salt would overpower the delicate maple, so measure carefully.
The Texture Crew
All‑Purpose Flour (2 cups): The flour provides structure, but because we’re using a high‑fat dough, we keep it at a moderate amount to stay tender. If you substitute with whole‑wheat flour, expect a denser cookie with a nuttier undertone—great for a rustic twist.
Pecans (1 cup, toasted and finely chopped): Toasted pecans bring a crunchy contrast and a buttery depth that mirrors the browned butter. If you’re allergic to nuts, try toasted pumpkin seeds for a similar crunch without the nut flavor.
The Unexpected Star
Maple Syrup (½ cup) & Maple Syrup (2 tablespoons): The larger portion sweetens the dough, while the smaller amount in the glaze adds a glossy, caramelized finish. Using pure, Grade A maple syrup ensures a clean, robust flavor; lower‑grade syrups can taste burnt.
Maple Extract (1 tsp) & Maple Extract (½ tsp): The extracts intensify the maple aroma, making every bite smell like a fresh drizzle of syrup on a stack of pancakes. A little goes a long way—overdoing it can make the flavor artificial.
The Final Flourish
Cream or Half‑and‑Half (¼ cup): This adds a luxurious moisture that keeps the cookies soft after cooling. If you’re dairy‑free, substitute with full‑fat coconut milk for a subtle coconut note.
Water (1 tablespoon): Just enough to help the glaze set without becoming runny. Skipping this step can lead to a glaze that stays sticky rather than glossy.
Everything's prepped? Good. Let's get into the real action...
The Method — Step by Step
Start by melting the unsalted butter in a medium saucepan over medium heat. As the butter melts, it will foam—this is the water evaporating. Keep stirring; after a minute or two, the foam will subside and the butter will turn a golden amber color, releasing a nutty aroma that fills the kitchen. This is the moment of truth—if you see brown specks, you’re on the right track. Once it reaches a deep caramel hue, remove it from the heat and let it cool for about two minutes.
While the butter is cooling, whisk together the two cups of powdered sugar, fine sea salt, and the maple extracts in a large mixing bowl. The mixture should look like a fluffy cloud; this is the sweet base that will carry the butter’s flavor. I dare you to taste a spoonful now—it's sweet, but not overwhelming. Then, slowly pour the browned butter into the sugar mixture, stirring constantly to avoid lumps. The batter will become glossy and thick, a sign that the butter and sugar have fully emulsified.
In a separate bowl, whisk together the all‑purpose flour and toasted pecans. The pecans should be finely chopped, but still retain a tiny bite. Toss the flour‑pecan mixture into the butter‑sugar blend, folding gently until just combined. Over‑mixing will develop gluten, leading to a tougher cookie, so stop as soon as you no longer see streaks of flour.
Now, add the half‑and‑half and the remaining ½ cup of maple syrup to the dough, stirring until the mixture is smooth and glossy. This is where the magic happens—the dough becomes slightly sticky, but still manageable. Watch Out: If the dough feels overly wet, sprinkle in an extra tablespoon of flour; too much flour will make the cookies dry.
Preheat your oven to 350°F (175°C) and line two baking sheets with parchment paper. Using a tablespoon or a small ice‑cream scoop, drop rounded mounds of dough onto the sheets, spacing them about 2 inches apart. The dough will spread slightly, but the edges will stay defined. For uniform size, use a cookie scoop; it also ensures even baking.
Slide the trays into the oven and bake for 12‑14 minutes, or until the edges turn a light golden brown and the centers look set but still soft. You’ll hear a faint crackle as the butter continues to caramelize—listen for that, it’s a good indicator. The cookies should smell like a blend of toasted nuts and maple caramel, filling your kitchen with a holiday perfume.
While the cookies bake, prepare the glaze. In a small saucepan, combine the remaining 2 tablespoons of maple syrup, the second teaspoon of maple extract, and the tablespoon of water. Bring to a gentle simmer, stirring constantly until the mixture thickens just enough to coat the back of a spoon. Remove from heat and let it cool slightly; it should be glossy but not too runny.
When the cookies are done, let them cool on the sheet for five minutes, then transfer to a wire rack. While they’re still warm, drizzle the glaze over each cookie using a spoon or a small pastry brush. The glaze will set quickly, creating a shiny, caramel‑kissed finish. Allow the cookies to cool completely before storing; this ensures the glaze hardens into a perfect snap.
That's it — you did it. But hold on, I've got a few more tricks that'll take this to another level...
Insider Tricks for Flawless Results
The Temperature Rule Nobody Follows
Never bake cookies straight from the fridge unless you specifically want thicker, chewier edges. Let the dough sit at room temperature for 10‑15 minutes before scooping; this helps the butter spread evenly, giving you those coveted crisp edges. I once tried skipping this step, and the cookies turned out flat and dense—lesson learned. A slightly warmer dough also ensures the glaze spreads more uniformly.
Why Your Nose Knows Best
Don’t rely solely on the timer. The aroma is a reliable indicator: when the butter‑nutty scent deepens into a caramel note, the cookies are near perfection. If you smell a faint burnt smell, pull them out immediately—over‑browning will make the glaze bitter. Trusting your nose can shave minutes off the baking time and prevent disaster.
The 5‑Minute Rest That Changes Everything
After baking, let the cookies rest on the baking sheet for five minutes before moving them. This brief pause allows the interior to finish setting and the edges to firm up, preventing them from cracking when transferred. Skipping this step often leads to crumbly cookies that fall apart when you try to glaze them.
Glaze Consistency is Key
When making the glaze, aim for a consistency that coats the back of a spoon but still runs slowly. If it’s too thick, it will clump; too thin, and it will run off the cookies. A quick test: dip a spoon into the glaze; if it forms a slow‑dripping ribbon, you’re golden. Adding that single tablespoon of water is the secret to achieving that perfect sheen.
Storage Savvy
Store the cookies in an airtight container with a slice of fresh bread; the bread releases moisture that keeps the cookies soft for up to a week. If you notice the glaze losing its shine, a quick flash in a 300°F oven for two minutes revives that glossy finish. Trust me, the extra effort makes the cookies taste like they just came out of the oven.
Creative Twists and Variations
This recipe is a playground. Here are some of my favorite ways to switch things up:
Chocolate‑Swirl Delight
Replace half of the maple syrup with dark chocolate melted into the butter. The result is a bittersweet cookie with pockets of molten chocolate that melt on your tongue. Perfect for chocolate lovers who still crave that nutty crunch.
Spiced Autumn Version
Add a teaspoon of pumpkin spice and swap the pecans for toasted pumpkin seeds. The warm spices blend with the maple, turning the cookie into a cozy autumn treat that pairs beautifully with a cup of chai.
Salted Caramel Crunch
Stir in a tablespoon of flaky sea salt into the glaze and sprinkle a pinch on top before the glaze sets. The salty contrast elevates the sweet maple, creating a sophisticated sweet‑and‑salty experience.
Vegan Friendly
Swap the butter for coconut oil, use maple‑sweetened coconut cream instead of half‑and‑half, and ensure the maple syrup is pure. The cookies will have a subtle coconut aroma that complements the maple beautifully.
Gluten‑Free Adaptation
Replace the all‑purpose flour with a 1:1 gluten‑free flour blend. Add a teaspoon of xanthan gum to mimic the elasticity of gluten, and you’ll have a cookie that’s just as tender and crumbly.
Storing and Bringing It Back to Life
Fridge Storage
Place the cooled cookies in a sealed plastic container and store them in the refrigerator for up to five days. The cool environment keeps the glaze firm and prevents the cookies from becoming overly soft.
Freezer Friendly
Layer cookies between parchment sheets, then seal them in a freezer‑safe zip‑lock bag. They’ll stay fresh for three months. When you’re ready to enjoy, let them thaw at room temperature for 20 minutes, then pop them in a 300°F oven for five minutes to revive the crisp edge.
Best Reheating Method
Before reheating, add a tiny splash (about a teaspoon) of water to the container and seal it loosely. The steam generated will restore the interior’s softness while the oven’s dry heat revives the glaze’s shine. This trick works wonders for cookies that have been stored for a while.