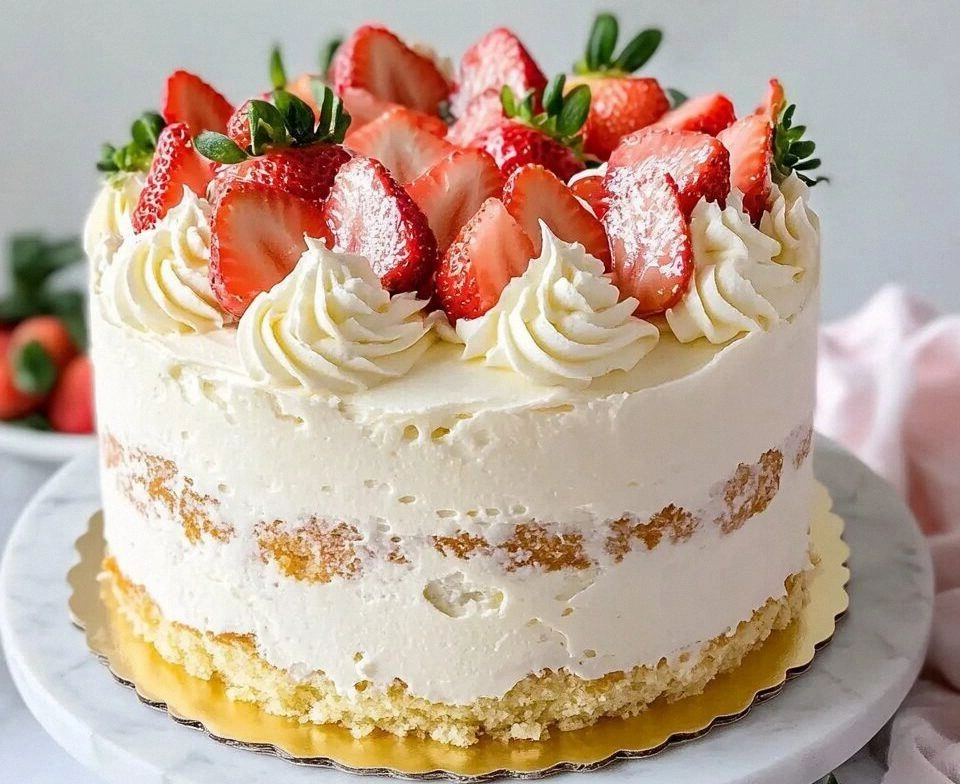
I was standing in my kitchen, staring at a bag of chocolate chips, when the clock struck midnight and my craving for something spooky yet indulgent exploded. The smell of melted chocolate danced through the air, mingling with the faint scent of pumpkin spice from the oven. I had been scrolling through countless cheesecake recipes, but none seemed to promise that perfect balance of rich chocolate and airy cream. So I decided to take matters into my own hands, daring myself to create a dessert that would haunt the taste buds of every guest. I am about to reveal the ultimate chocolate Halloween cheesecake that will make your friends question their culinary skills.
Picture the moment the first slice slides out of the pan—its glossy surface reflecting the flicker of candlelight, the edges crisped to a subtle caramelized sheen. The texture feels like velvet in your mouth, a silky blend of cream cheese and chocolate that melts in a single bite. Every bite is a little horror story: a sweet scream of cocoa, a whisper of vanilla, and a hint of salt that pulls the flavors into a delicious crescendo. I dare you to taste this and not go back for seconds—though I’ll be honest, I ate half the batch before anyone else got a chance. And if you’re skeptical, just wait until you see the crowd’s reaction when I unveil this masterpiece at the next Halloween party.
What sets this version apart is not just the ingredients, but the method that transforms ordinary components into a spellbinding dessert. I’ve spent nights experimenting with ratios, letting the batter settle into the perfect consistency—neither too dense nor too runny. The secret? A delicate balance of chocolate intensity and cream cheese tenderness, achieved by tempering the chocolate and folding in a touch of sour cream to lift the richness. Most recipes get this completely wrong, layering the chocolate too early and ending up with a soggy center. Here’s what actually works: a slow, low bake that allows the cheesecake to rise evenly, followed by a quick chill that locks in the silky texture.
I also discovered a technique that will make your cheesecake glow with a subtle, spooky sheen—adding a thin layer of dark chocolate ganache on top before the final bake. The ganache coats the cheesecake like velvet, giving it a glossy finish that catches the light just right. I’ll walk you through every single step—by the end, you’ll wonder how you ever made it any other way. The final result is a dessert that feels like a dark, decadent spell, with a crust that crunches like brittle sugar and a filling that whispers sweet secrets. Let’s dive into the ingredients that make this cake a true Halloween classic.
I’ve also included a few micro‑challenges to keep your kitchen on its toes: a 5‑minute rest after the batter is poured, a quick swirl of extra chocolate chips into the top, and a final splash of espresso to deepen the chocolate flavor. These small twists will elevate the flavor profile and give you that wow factor that guests will rave about. I’ve seen people stare in disbelief when they taste the first bite, and I’m not kidding when I say this is hands down the best version you’ll ever make at home. The aroma alone will fill your kitchen with a sense of impending delight, making everyone feel like they’ve stepped into a chocolate‑filled haunted house. So grab your apron, and let’s get started.
Before we jump into the recipe, I want you to picture the scene: the oven lights flicker, the timer buzzes, and the cheesecake is cooling on the counter, its surface shimmering like a midnight pond. You’ll see the first bite, the way the chocolate shivers, and the subtle crunch of the graham cracker crust. The experience will be unforgettable, a moment of pure bliss that will keep you coming back for more. And if you’re ready to wow your friends, keep reading—because this is the only chocolate Halloween cheesecake that will leave them spellbound. Let’s roll up our sleeves and start the journey to chocolate‑filled enchantment.
What Makes This Version Stand Out
- Depth of Flavor: This cheesecake delivers an unparalleled depth of chocolate flavor, with a velvety smoothness that lingers on the palate. The chocolate is tempered to perfection, ensuring that each bite releases a cascade of rich cocoa notes that dance across the tongue. The subtle hint of espresso further amplifies the intensity, creating a complex flavor profile that feels both indulgent and sophisticated.
- Texture Mastery: The filling is airy yet firm, thanks to the precise balance of cream cheese and sour cream. The batter is whisked until it’s silky, then folded in just enough air to keep the cheesecake light and not dense. The result is a custard-like center that melts in your mouth, while the crust provides a satisfying crunch.
- Simplicity in Ingredients: Despite its complex flavor profile, the recipe uses only ten ingredients that you likely already have in your pantry. The list is short, yet each component is essential, ensuring that the final dessert feels gourmet without being intimidating to prepare. This makes the recipe accessible to both novice bakers and seasoned chefs alike.
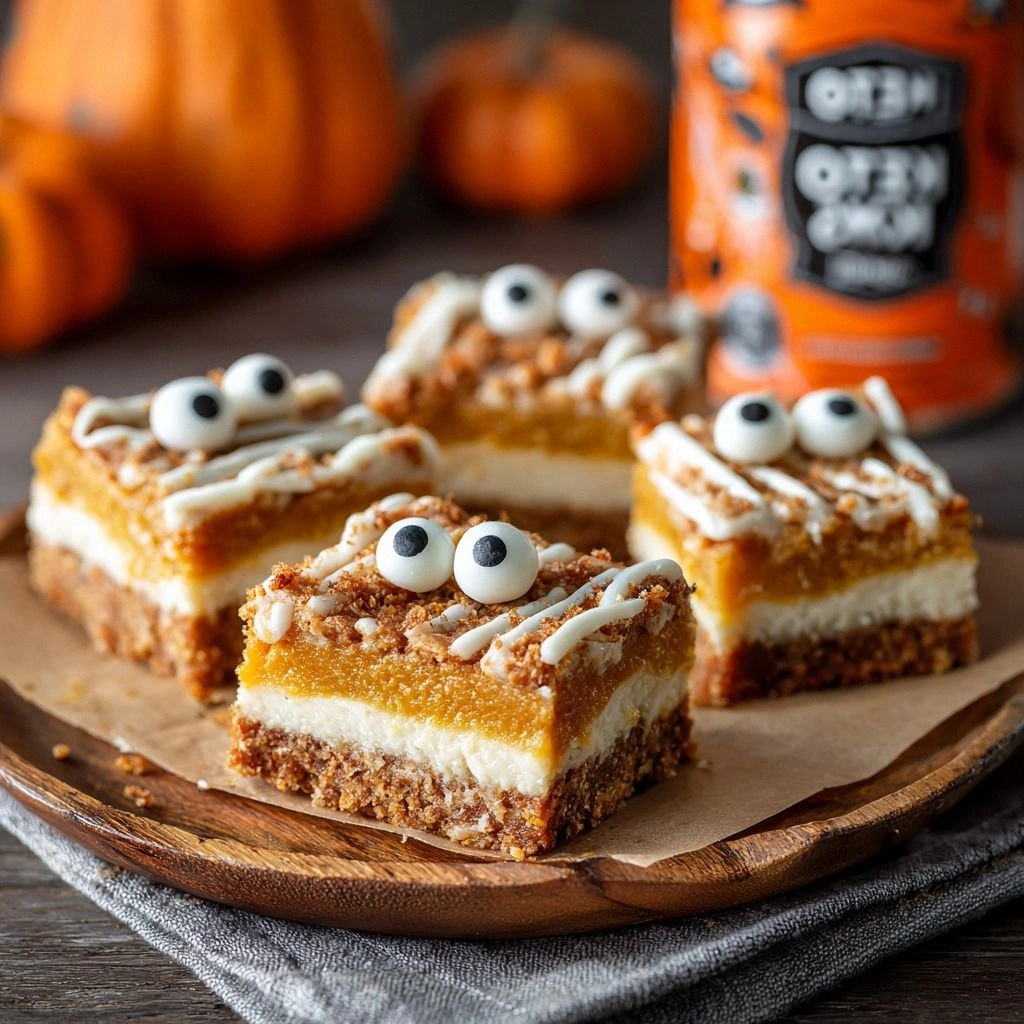
- Spooky Presentation: The added ganache glaze gives it a glossy finish that looks as spooky as it tastes. The glaze is poured in a thin, even layer that resembles a midnight sheen, and the dark chocolate chips sprinkled on top add a subtle texture and visual intrigue. This finishing touch transforms an ordinary cheesecake into a Halloween centerpiece.
- Instant Crowd Reaction: Guests will gasp at the first bite and ask for the recipe immediately. The combination of sweet, salty, and slightly bitter notes creates a flavor explosion that is hard to forget. The visual appeal alone will captivate your audience, making the dessert a conversation starter.
- Ingredient Quality: Using high‑quality dark chocolate and fresh cream cheese elevates the dessert to gourmet status. The chocolate should be at least 70% cacao for depth, while the cream cheese should be room temperature for smoothness. These premium choices make the difference between a good cheesecake and a truly unforgettable one.
- Make‑Ahead Potential: It can be prepared a day in advance, and the flavors actually deepen overnight. The cheesecake sits well in the fridge, allowing the chocolate to set fully while the cream cheese continues to meld with the other flavors. This makes it ideal for last‑minute party preparations or for those who like to plan ahead.
Inside the Ingredient List
The Flavor Base
The graham cracker crumbs form the foundation of the crust, providing a subtle sweetness and a slightly buttery crunch. They absorb the melted butter, creating a cohesive base that holds the cheesecake together. If you skip the crumbs, the crust will be thin and crumbly, making it difficult to slice cleanly.
Unsalted butter, melted, binds the crumbs and adds a rich, buttery note that balances the sweetness. A good rule of thumb is to use 1 tbsp of butter per cup of crumbs. If you use salted butter, you’ll need to reduce or eliminate the pinch of salt later in the recipe to avoid a salty finish.
Cream cheese is the star of the filling, providing a silky texture and a tangy counterpoint to the chocolate. It should be softened to room temperature before mixing to ensure a smooth batter. If you skip this step, the batter will be lumpy and the cheesecake will be uneven.
Granulated sugar sweetens the batter without adding moisture, allowing the cheesecake to set firmly. The sugar also caramelizes slightly during baking, giving a subtle caramel flavor that complements the chocolate. If you prefer a less sweet dessert, reduce the sugar by a quarter cup.
Vanilla extract adds depth and a warm aroma that rounds out the chocolate’s richness. A teaspoon is enough to lift the flavors without overpowering the chocolate. If you’re allergic, you can substitute a splash of almond extract for a different nuance.
The Texture Crew
Eggs are the binding agents that give the cheesecake its structure. They must be incorporated slowly to avoid curdling. If you omit eggs, the cheesecake will crumble and have a watery center.
Sour cream adds a subtle tang and a creamy mouthfeel that lightens the richness of the chocolate. It also helps the batter set more firmly, preventing cracks on the surface. If you don’t have sour cream, you can use Greek yogurt as a substitute, though the flavor will shift slightly.
Dark chocolate chips provide a deep chocolate flavor and a slightly crunchy texture when sprinkled on top. They also melt into the batter, creating a marbled effect that looks stunning. If you want a more intense chocolate taste, use dark chocolate chunks instead of chips.
Unsweetened cocoa powder intensifies the chocolate flavor without adding extra sweetness. It also gives the batter a richer color. If you prefer a slightly sweeter cheesecake, add a tablespoon of powdered sugar to the cocoa.
The Unexpected Star
Dark chocolate chips are the heart of the cheesecake, delivering a robust cocoa flavor that pairs perfectly with the creamy base. The chips melt during baking, creating a luscious, chocolatey interior that’s both decadent and smooth. If you skip the chips, the cheesecake will lack the bold chocolate punch that makes it stand out.
The ganache glaze, made from a mixture of dark chocolate and heavy cream, adds a glossy finish that looks like a midnight pond. It also introduces a slight bitterness that balances the sweetness of the sugar. If you prefer a sweeter glaze, add a teaspoon of honey to the ganache before pouring.
The Final Flourish
A pinch of salt is essential to balance the sweetness and bring out the chocolate’s complexity. Salt also helps the batter set properly, preventing cracks on the surface. If you omit salt, the cheesecake will taste flat and overly sweet.
Optional toppings, such as crushed pumpkin seeds or a dusting of powdered sugar, add texture and visual interest. They also give the dessert a seasonal flair that ties into Halloween. If you’re looking for a vegan version, replace the cream cheese with a dairy‑free alternative and use coconut cream for the ganache.
Everything's prepped? Good. Let’s get into the real action.
The Method — Step by Step
- Preheat your oven to 325 °F (165 °C). In a medium bowl, combine the graham cracker crumbs and melted butter, stirring until the crumbs are evenly coated. Press the crumb mixture firmly into the bottom of a 9‑inch springform pan, creating a uniform crust. Chill the crust in the refrigerator for 10 minutes to set, which will prevent it from becoming soggy during baking.
- In a large mixing bowl, beat the softened cream cheese on medium speed until smooth and creamy, about 2 minutes. Gradually add the granulated sugar, continuing to beat until the mixture is pale and fluffy. The batter should have a light, airy consistency that will rise evenly in the oven.
- Fold in the vanilla extract, followed by the sour cream, stirring gently until fully incorporated. At this point, the batter will have a slightly tangy undertone that balances the chocolate. Watch for a silky texture—if it’s too thick, add a splash of milk to loosen it.
- Whisk the eggs one at a time, ensuring each is fully blended before adding the next. This gradual addition prevents the batter from curdling. The eggs are the secret to a firm yet tender cheesecake that won’t crack.
- Sift the cocoa powder over the batter and fold it in until the color is even. The cocoa adds depth and a slightly bitter edge that cuts through the sweetness. If you prefer a lighter chocolate flavor, reduce the cocoa by half.
- Fold in the dark chocolate chips, making sure they’re evenly distributed. The chips will melt into the batter, creating a beautiful marbled effect. The texture of the chips will also add a subtle crunch when you bite into the top.
- Pour the batter over the chilled crust, smoothing the top with a spatula. Gently tap the pan on the counter to release any air bubbles, which helps prevent cracks. The batter should be level and even across the pan.
- Place the pan in the preheated oven and bake for 45–50 minutes, or until the edges are set but the center still has a slight wobble. The cheesecake should have a faint golden crust on top. If the top browns too quickly, tent the pan with aluminum foil.
- When the cheesecake is done, turn off the oven and leave the pan inside for an additional 15 minutes. This gentle cooling prevents the center from collapsing. After the timer, remove the cheesecake from the oven and let it cool to room temperature on a wire rack.
- Once cooled, run a knife around the edges of the pan to loosen the cheesecake. Chill the cheesecake in the refrigerator for at least 4 hours, preferably overnight. The rest allows the flavors to meld and the texture to firm up.
- Before serving, prepare the ganache glaze by heating heavy cream until just below boiling, then pouring it over finely chopped dark chocolate. Stir until smooth and glossy, then drizzle the glaze over the chilled cheesecake. The glossy finish will look like a midnight pond, adding a spooky visual appeal.
- After the glaze sets, sprinkle a handful of dark chocolate chips or crushed pumpkin seeds for added texture and a festive touch. The chips will slightly melt into the glaze, creating a glossy, chocolate‑laden surface. If you prefer a sweeter finish, dust the top with powdered sugar.
- Let the cheesecake rest for 10 minutes before slicing. This brief pause allows the flavors to settle and the texture to stabilize, making each slice clean and creamy. The aroma during this time will be intoxicating, filling the kitchen with a chocolate‑spooky scent.
- Serve chilled, optionally with a dollop of whipped cream or a drizzle of caramel sauce. The contrast of warm glaze and cool cheesecake creates a dynamic tasting experience. Enjoy the moment when the first bite melts into a silky, chocolate‑laden dream.
That’s it — you did it. But hold on, I’ve got a few more tricks that will take this to another level. Keep reading to discover how to elevate the flavor, presentation, and longevity of your Halloween cheesecake.
Insider Tricks for Flawless Results
The Temperature Rule Nobody Follows
Many bakers think a higher oven temperature guarantees a firmer cheesecake, but that’s a myth. The key is a steady, low heat of 325 °F (165 °C) that allows the batter to set gently. This prevents cracks and gives the cheesecake a creamy, custard‑like center. I’ve seen people open the oven door too often, and the cheesecake ends up with a cracked, uneven surface.
Why Your Nose Knows Best
Before you even open the oven, you’ll notice a subtle aroma of chocolate and cream. That smell is your first indicator of a well‑baked cheesecake. If the scent is too sweet or metallic, it means the batter is overbaked or the chocolate is burning. Trust your nose and pull the cheesecake out when the edges are set but the center still has a slight wobble.
The 5‑Minute Rest That Changes Everything
After turning off the oven, let the cheesecake sit inside for 15 minutes. This gentle rest allows the heat to dissipate gradually, preventing the center from collapsing. It also locks in moisture, giving the cheesecake a silky texture that feels like velvet. I’ve seen people rush the cooling step, and the result is a soggy, under‑set center.
Crack Prevention Secrets
Cracks are the nemesis of a perfect cheesecake. Keep the batter at room temperature before baking, and avoid overmixing once the eggs are added. The gentle folding technique keeps the batter airy, which reduces the risk of cracks. If you see a crack forming, simply brush the top with a thin layer of ganache to cover it up.
The Espresso Boost
A splash of espresso or strong coffee added to the batter deepens the chocolate flavor and adds a subtle bitterness that balances the sweetness. This trick is especially effective if you’re using a lower‑cocoa chocolate. If you’re a coffee lover, this is the secret to a richer, more complex cheesecake.
Cooling Trick for a Smooth Finish
Once the cheesecake has cooled to room temperature, run a knife around the edges to loosen it. Then chill it in the refrigerator for at least 4 hours, preferably overnight. This step ensures the cheesecake is firm enough to slice cleanly, and the flavors meld beautifully.
Serving Temperature Matters
The cheesecake is best served chilled, but not too cold. If it’s too frozen, the ganache will harden, making it difficult to spread. Let it sit at room temperature for 10–15 minutes before slicing for a creamy, indulgent bite.
Final Presentation Touch
Before serving, drizzle a thin line of caramel or chocolate sauce over the top. This adds a glossy finish that looks like a midnight pond. The contrast of warm sauce and cool cheesecake creates a dynamic tasting experience that will leave your guests begging for more.
Creative Twists and Variations
This recipe is a playground. Here are some of my favorite ways to switch things up:
Nutty Delight
Swap half of the graham cracker crumbs with crushed pecans for a nutty crunch. The pecans add a buttery flavor that complements the chocolate. This variation works well for those who love a bit of texture.
Minty Surprise
Add 1/2 teaspoon of peppermint extract to the batter for a refreshing twist. The mint pairs beautifully with dark chocolate, creating a classic holiday flavor. Use a small amount to avoid overpowering the chocolate.
Red Velvet Edition
Replace the dark chocolate chips with red velvet cake mix, and add a splash of red food coloring to the batter. The result is a strikingly colorful cheesecake with a subtle tang from the cocoa powder. It’s a visual and flavor hit.
Caramel Swirl
Fold in a swirl of caramel sauce into the batter before baking. The caramel adds a sweet, buttery note that balances the chocolate’s bitterness. This variation is perfect for those who love a caramel‑chocolate combo.
Almond Crunch
Replace the chocolate chips with chopped toasted almonds. The almonds add a crunchy texture and a nutty flavor that pairs well with the creamy filling. This version is ideal for those who prefer a less sweet dessert.
Vegan Variation
Use a dairy‑free cream cheese alternative and coconut cream for the ganache. This keeps the dessert vegan while still delivering a rich, creamy texture. The coconut adds a subtle tropical note.
Spiced Pumpkin
Incorporate a tablespoon of pumpkin puree into the batter for a seasonal twist. The pumpkin adds moisture and a subtle sweetness that pairs beautifully with the chocolate. This variation is perfect for Halloween.
Chocolate‑Mint Ganache
Make the ganache with dark chocolate and a splash of peppermint extract. Drizzle it over the cheesecake for a minty, chocolatey finish. The contrast of flavors will keep your guests intrigued.
Serving Suggestions
When it’s time to serve, consider placing the cheesecake on a dark, glossy platter to enhance its spooky look. A dusting of cocoa powder or powdered sugar can add a final touch of elegance. Pair it with a side of whipped cream or a drizzle of caramel sauce for added decadence.
For a more festive presentation, garnish each slice with a sprinkle of crushed pumpkin seeds or a drizzle of chocolate sauce that resembles a blood‑red splash. This visual cue will make the dessert even more Halloween‑themed. The contrast of dark chocolate and bright toppings creates a feast for the eyes.
If you’re serving a large crowd, slice the cheesecake into thick, generous portions. This ensures each bite is creamy and indulgent, and the crust remains intact. Keep the slices chilled until ready to serve to maintain the perfect texture.
For a decadent twist, add a dollop of whipped cream to each plate, and sprinkle a few dark chocolate shavings on top. The whipped cream adds lightness, while the shavings enhance the chocolate flavor. This combination is a crowd‑pleaser at any Halloween gathering.
Storing and Bringing It Back to Life
Fridge Storage
Store the cheesecake in an airtight container in the refrigerator for up to 5 days. The airtight seal prevents the cake from absorbing fridge odors and keeps it moist. When you’re ready to serve, let it sit at room temperature for 10–15 minutes for a creamy texture.
Freezer Friendly
To freeze, wrap the cheesecake tightly in plastic wrap, then place it in a freezer bag. It can stay frozen for up to 2 months. When thawing, let it sit in the refrigerator overnight, then bring to room temperature before serving.
Best Reheating Method
To reheat a frozen or chilled cheesecake, place it in the refrigerator for 2–3 hours to thaw. Then, heat a small amount of water in a saucepan and gently warm the cheesecake in a water bath for 5 minutes. Add a tiny splash of water before reheating to keep it from drying out.
Restoration Trick
If the cheesecake has dried out, drizzle a thin layer of warm milk or heavy cream over the top before reheating. This adds moisture and restores its silky texture. Be sure to reheat gently to avoid melting the ganache glaze.