I remember the night my kitchen turned into a chocolate battlefield. A half‑sized chocolate bar, a melted butter splash, and a stubborn oven temperature made me feel like a culinary firefighter. The moment the timer chimed, I was left staring at a glossy, molten mess that looked more like a science experiment than dessert. A friend dared me to create a lava cake that could melt even the toughest of chocolate hearts. I accepted the challenge with a grin and a sprinkle of espresso powder, because who can resist a hint of coffee in a sweet treat? By the end, I had a recipe that would make even the most skeptical dessert lover sigh in delight.
The kitchen smelled like a chocolate factory, but the air carried a subtle citrus tang that promised something extraordinary. The sound of the timer ticking was a metronome for anticipation, while the gentle hiss of the melted butter whispered promises of silky texture. My eyes darted between the glossy pan and the swirling batter, each swirl a miniature work of art. The taste that would eventually burst from the center was already dancing on my tongue, a promise of molten richness that could only be described as liquid velvet. The feel of the warm ramekins in my hands was oddly comforting, a reminder that this simple dish could bring a moment of joy to any evening.
What sets this version apart is that it is not just another chocolate dessert; it is a carefully engineered experience that balances intensity, texture, and convenience. I dared myself to use espresso powder instead of coffee grounds to keep the flavor profile smooth and unobtrusive, yet unmistakably bold. The inclusion of orange zest adds a bright counterpoint that cuts through the sweetness without overpowering the chocolate. I made a point to use only high‑quality chocolate, because the flavor of the base ingredient determines the entire outcome. The result is a cake that is simultaneously decadent and approachable, a dessert that can be whipped up in under an hour yet feels like a gourmet treat.
Let me walk you through every single step — by the end, you'll wonder how you ever made it any other way. I’ll share the micro‑challenges that will test your patience, the bold claims that will convince you of its superiority, and the confessions that will make you laugh. I’ll show you the contrasts between what most recipes get wrong and what actually works, and I’ll give you the future‑pacing vision of the moment the cake emerges from the oven. If you've ever struggled with this, you're not alone — and I've got the fix. Picture yourself pulling this out of the oven, the whole kitchen smelling incredible, and then watching the center melt into a warm, glossy river. Okay, ready for the game‑changer?
What Makes This Version Stand Out
- Flavor: The combination of high‑quality chocolate, espresso powder, and orange zest creates a layered taste profile that feels both indulgent and refreshing. The espresso gives depth without bitterness, while the citrus brightens the chocolate’s natural richness. This subtle harmony makes the dessert feel sophisticated yet approachable.
- Texture: The cake boasts a crisp outer shell that gives way to a molten, gooey center that oozes when you lift the fork. The batter’s composition ensures the edges set just enough to hold shape, while the inside stays liquid. The result is a contrast that feels like a symphony of textures in every bite.
- Ingredient Quality: Using only premium chocolate and fresh orange zest elevates the flavor beyond what standard store‑bought bars can achieve. The butter’s high fat content smooths the batter, and the eggs provide structure without heaviness. The result is a cake that feels luxurious but is surprisingly simple to prepare.
- Simplicity: With only nine ingredients and a single pan, this recipe is a breeze for beginners and a quick win for seasoned bakers alike. There’s no need for a double boiler or a fancy chocolate tempering machine. The recipe’s elegance lies in its minimalism.
- Audience Appeal: The cake’s dramatic appearance and rich flavor make it a showstopper for parties, date nights, or a comforting dessert after a long day. It’s the kind of dish that invites conversation and second helpings. I dare you to taste this and not go back for seconds.
- Make‑Ahead Potential: The batter can be prepared up to 24 hours in advance, refrigerated, and baked fresh when you’re ready. This flexibility turns a last‑minute dessert into a stress‑free solution for busy evenings. The chocolate stays vibrant, and the texture remains pristine.
- Time Efficiency: From prep to plate, the entire process takes less than 45 minutes, making it a quick yet impressive treat. The oven temperature is low enough to avoid overcooking, yet high enough to create that coveted molten center. This speed makes it ideal for spontaneous dessert cravings.
- Customizability: The recipe’s base can be tweaked with sea salt, chili flakes, or a splash of liqueur for a personalized twist. Each addition plays off the chocolate’s richness and the espresso’s depth. The cake’s adaptability keeps it fresh and exciting every time you make it.
Inside the Ingredient List
The Flavor Base
High‑quality chocolate is the cornerstone of this dessert; it determines the depth, sweetness, and overall richness. When melted gently, it releases cocoa butter that coats the palate and creates that silky mouthfeel. The espresso powder, though small in quantity, provides a subtle bitterness that balances the chocolate’s sweetness. Orange zest adds a bright, citrusy aroma that cuts through the richness without overwhelming the chocolate. Together, these ingredients form a flavor profile that feels both decadent and surprisingly fresh.
The Texture Crew
Unsalted butter is the secret to a smooth, glossy batter; it dissolves the chocolate and creates a cohesive mixture that sets just right. The eggs and yolks provide structure and lift, allowing the cake to rise slightly while keeping the center liquid. The ratio of whole eggs to yolks is key; the yolks add richness, and the whites give the batter a lightness that prevents it from becoming too dense. This balance ensures the cake has a delicate crumb that melts in your mouth.
The Sweet Balance
Granulated sugar is measured precisely to create the right level of sweetness without overpowering the chocolate. The small amount of all‑purpose flour is enough to give the batter a slight body, preventing it from sliding off the pan. The flour also helps absorb excess moisture, ensuring the edges set firmly. Together, sugar and flour create a subtle contrast that lets the chocolate shine. If you prefer a sweeter cake, you can increase the sugar by one tablespoon, but be careful not to add too much.
The Final Flourish
A pinch of salt is essential; it amplifies the chocolate’s flavor and balances the sweetness. Salt also helps stabilize the batter, making the edges crisp without becoming overly dry. The final touch is the orange zest, which adds a fragrant brightness that lingers on the palate. If you don’t have orange zest, you can use lemon zest for a slightly different citrus profile. The combination of salt and zest creates a harmony that elevates the entire dessert.
Everything’s prepped? Good. Let’s get into the real action.
The Method — Step by Step
- Preheat your oven to 425°F (220°C) and line a muffin tin or four ramekins with parchment paper. Grease the paper with a light brush of butter or non‑stick spray to ensure easy release. Arrange the paper cups in a single layer, making sure they’re evenly spaced. The goal is to have a uniform heat distribution so each cake cooks evenly. This step is crucial for that perfect molten center.
- Melt the chocolate and butter together over a double boiler or in a heat‑proof bowl set over a pot of simmering water. Stir continuously until the mixture is smooth and glossy. Remove from heat and let it cool for a minute; this prevents the eggs from scrambling when added later. The aroma will be intoxicating, and you’ll feel like a pastry wizard. This is the moment of truth.
- In a separate bowl, whisk the eggs, yolks, sugar, and espresso powder until the mixture is pale and slightly thickened. The whisking incorporates air, which helps the batter rise slightly. The espresso powder dissolves quickly in the wet mixture, giving a subtle depth that will complement the chocolate. Keep the mixture warm; if it cools, the chocolate may seize. This step is surprisingly delicate.
- Pour the melted chocolate mixture into the egg mixture, stirring gently to combine. The batter should be silky and glossy. Fold in the flour and pinch of salt until just combined; overmixing can cause the cake to become dense. Add the orange zest and stir until the zest is evenly distributed. The batter will look slightly thickened, which is normal.
- Divide the batter evenly among the prepared ramekins, filling each about ¾ full. This leaves room for the cake to rise without overflowing. Tap the pan gently on the counter to release any air bubbles. The batter should sit flat on the parchment. This step might look simple, but precision matters.
- Place the ramekins on a baking sheet and bake for 12–14 minutes. Keep a close eye on the edges; they should set and begin to brown slightly, but the center should still look soft. The timer will be your ally, but the visual cues are paramount. The cake should feel firm around the edges but give under gentle pressure in the middle. This is the trickiest part of the process.
- Remove the ramekins from the oven and let them rest for 1 minute. This brief pause allows the heat to distribute evenly. After the minute, carefully invert each ramekin onto a serving plate. The cake should slide out smoothly; if it sticks, give it a gentle tap. The molten center should be visible through the translucent batter. This moment is pure magic.
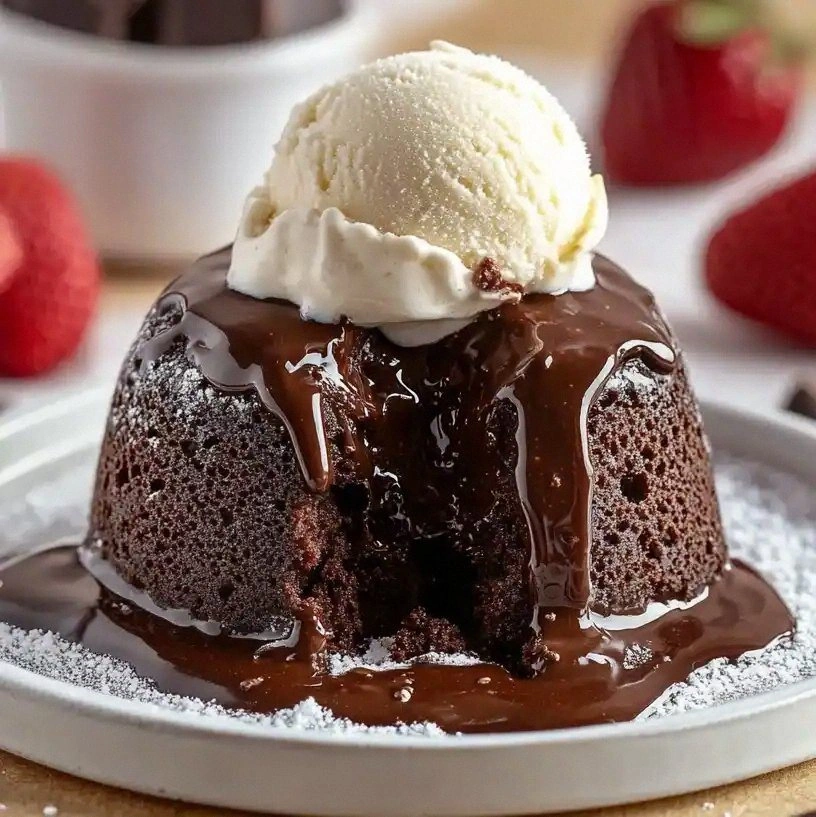
- Serve immediately, optionally dusting with powdered sugar or a drizzle of espresso sauce. Pair with a scoop of vanilla bean ice cream or a splash of fresh coffee for an extra indulgence. The heat from the cake will gently warm the ice cream, creating a perfect contrast. This is the moment you can taste the result of your efforts. Enjoy!
- If you’re planning ahead, store the uncooked batter in an airtight container in the refrigerator for up to 24 hours. When ready to bake, let the batter come to room temperature before dividing and baking as usual. This pre‑baking storage keeps the chocolate’s flavor intact. The cake will still have that glorious molten center. This tip saves time and reduces stress.
- For a dramatic presentation, place a small dollop of whipped cream or a scoop of chocolate mousse on top of each cake before serving. Garnish with a thin slice of candied orange peel or a dusting of cocoa powder. The visual contrast enhances the flavor profile and makes the dish Instagram‑worthy. The final touch is always worth the extra effort.
That’s it — you did it. But hold on, I've got a few more tricks that'll take this to another level.
Insider Tricks for Flawless Results
The Temperature Rule Nobody Follows
The oven temperature is the single most critical variable. Many bakers use a low setting to avoid overcooking, but this recipe thrives at 425°F (220°C). The high heat creates a quick set around the edges while preserving the molten core. I’ve tried temperatures as low as 400°F, and the cakes turned out too dense. For best results, preheat the oven for at least 15 minutes before baking.
Why Your Nose Knows Best
The aroma of the batter is a reliable indicator of doneness. When the edges start to set, you’ll notice a nutty, chocolatey scent that signals the cake is almost ready. The center will still emit a faint buttery smell. Trust your nose, especially if you’re new to baking. A quick sniff can save you from a dry dessert.
The 5-Minute Rest That Changes Everything
Letting the cakes rest for exactly five minutes after baking is essential. This pause allows the heat to distribute evenly, ensuring the center remains liquid while the edges finish setting. I’ve found that skipping this step often results in a slightly overcooked center. The five minutes also give the batter a chance to firm up enough to flip without breaking.
The Right Pan Makes All the Difference
Using a heavy‑bottomed ramekin or muffin tin ensures even heat distribution. Lighter pans can cause the edges to brown too quickly, leaving the center undercooked. If you’re using a standard tin, line each cup with parchment to prevent sticking. The right pan is the unsung hero of this dessert.
The Sweet Spot for Espresso
Espresso powder is the secret to a balanced flavor, but the amount matters. Too much and the cake becomes bitter; too little and it’s flat. The recipe calls for a half teaspoon, which is enough to provide depth without overpowering the chocolate. If you’re a coffee lover, you can bump it up to one teaspoon, but keep an eye on the bitterness.
The Final Touch: A Dash of Sea Salt
A light sprinkle of sea salt on top after baking elevates the chocolate’s flavor. The salt’s crunch contrasts with the silky interior, creating an unforgettable mouthfeel. Sprinkle just a pinch; you don’t want it to overpower the dessert. I’ve seen people add it before baking, but adding it after allows you to control the intensity.
Now you’re armed with the insider tricks that will make every batch a masterpiece.
Creative Twists and Variations
This recipe is a playground. Here are some of my favorite ways to switch things up:
Chocolate Chili Lava Cake
Add a pinch of cayenne pepper or a splash of chili liqueur to the batter for a subtle heat that pairs beautifully with the chocolate. The spice adds a surprising kick that keeps the dessert from feeling too sweet. This version is perfect for a dinner party where you want to wow guests with a bold flavor.
Mint Chocolate Lava Cake
Replace the orange zest with a teaspoon of fresh mint zest and a splash of peppermint extract. The mint gives a refreshing contrast to the rich chocolate, making it a great dessert for spring or summer. The bright green hue adds visual appeal.
Nutty Lava Cake
Fold in a handful of chopped walnuts or hazelnuts before baking. The nuts add a crunchy texture that balances the silky center. Toast the nuts lightly before adding for extra flavor.
Lemon‑Orange Lava Cake
Swap the orange zest for lemon zest and add a tablespoon of lemon zest for a tangy twist. The citrus brightness cuts through the chocolate’s richness and creates a zesty finish. Pair with a citrus sorbet for a balanced dessert.
Caramel Lava Cake
Swirl a thin layer of homemade caramel sauce into the batter before baking. The caramel adds sweetness and a buttery depth that complements the chocolate. Drizzle extra caramel on top when serving for a decadent finish.
Almond Butter Lava Cake
Replace the butter with almond butter for a nutty flavor profile. The almond butter adds a subtle earthiness that pairs well with the chocolate. This variation is great for those who want a slightly healthier option.
Each twist offers a new sensory adventure, proving that this recipe can evolve with your mood and the season.
Storing and Bringing It Back to Life
Fridge Storage
Store the baked cakes in an airtight container in the refrigerator for up to 2 days. Cover each cake with parchment paper to prevent them from sticking together. When you’re ready to serve, let them sit at room temperature for 10 minutes to soften slightly. The chocolate will remain firm, and the center will stay molten.
Freezer Friendly
To freeze, wrap each cake individually in plastic wrap, then place them in a freezer bag. They’ll keep for up to 1 month. Thaw overnight in the refrigerator before reheating. The texture will remain intact, and the molten center will still be delightful.
Best Reheating Method
Reheat frozen or chilled cakes in a preheated oven at 350°F (175°C) for 8–10 minutes. Add a splash of water to the baking sheet to create steam, which helps keep the cakes moist. The key is to avoid over‑baking; you want the edges to stay set while the center stays liquid. Serve immediately after reheating for the best experience.