Picture this: it’s the night before Christmas, the house is buzzing with the clatter of wrapping paper, the tree is a glittering beacon, and you’re standing in the kitchen with a half‑baked cake that looks more like a sad pancake than the show‑stopper you promised your family. I’ve been there—once, I tried a “quick” red velvet recipe that turned out as flat as a Christmas card, and the only thing festive about it was the disappointment. I dared a friend to taste it, and she promptly said, “I’d rather eat the ornaments.” That moment sparked a culinary quest that led me down a rabbit hole of velvet‑soft crumb, tangy frosting, and a secret liquid infusion that makes the cake moisten from the inside out. The result? A Christmas Red Velvet Poke Cake that could win a holiday award and has already earned a permanent spot on my seasonal rotation.
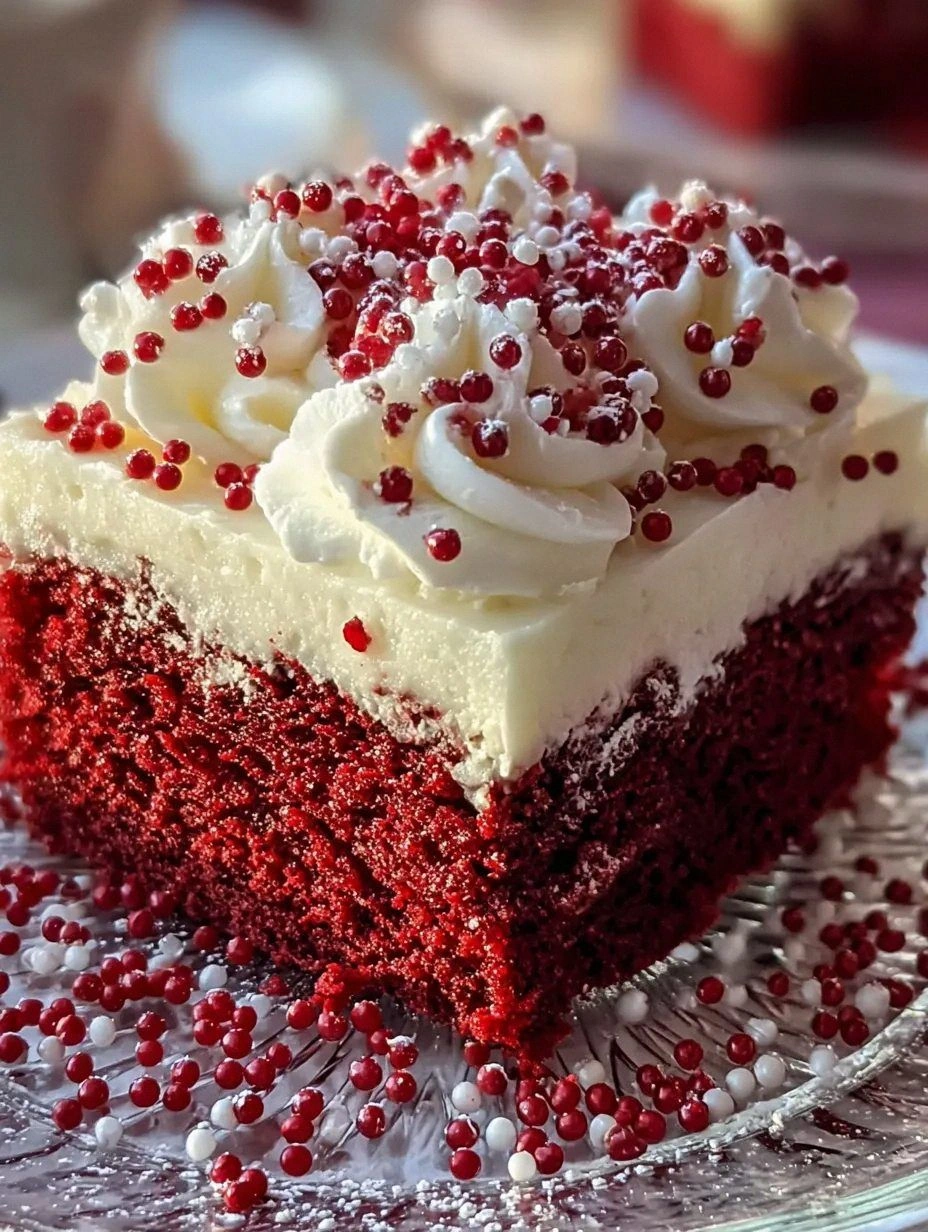
Close your eyes and imagine the first bite: the deep, ruby‑red crumb is as tender as a snowfall, the cocoa whisper is subtle yet present, and the cream cheese frosting spreads like a silky snow‑drift across the plate. The aroma? A heady mix of vanilla, cocoa, and a faint citrus note from the red food coloring that makes the whole kitchen feel like a winter wonderland. The texture is a paradox—light enough to melt on your tongue yet sturdy enough to hold its shape when you cut generous slices for the whole family. And the best part? The poke‑injected milk mixture seeps into every crevice, turning the cake into a moist, almost boozy treat without any actual alcohol, making it perfect for both kids and adults.
What truly sets this version apart is the “poke” technique combined with a double‑layer frosting that delivers a flavor punch you won’t find in any store‑bought version. Most recipes either skimp on the liquid infusion or drown the cake in an overly sweet glaze; I’ve found the sweet spot where the cake stays moist without being soggy, and the frosting adds just enough tang to cut through the richness. I’m also throwing in a surprise ingredient—peppermint‑crushed candy—that adds a festive crunch and a hint of cool mint that screams Christmas without being overbearing. Trust me, this is hands down the best version you’ll ever make at home, and I’m about to prove it.
Okay, ready for the game‑changer? I’m going to walk you through every single step—down to the exact moment the batter hits the pan and the scent that tells you it’s time to start poking. By the end, you’ll wonder how you ever managed a holiday dessert without this masterpiece. Let’s get started, and I dare you to taste this and not go back for seconds.
What Makes This Version Stand Out
- Flavor Fusion: The combination of cocoa, red food coloring, and a hint of peppermint creates a taste that’s both classic red velvet and uniquely festive.
- Moisture Mastery: The poke‑injection of sweetened milk guarantees a cake that stays buttery soft for days, not just hours.
- Simplicity: Despite the impressive result, the ingredient list is straightforward and the steps are beginner‑friendly.
- Visual Wow Factor: The deep crimson hue paired with a glossy, cream‑cheese frosting makes this cake a centerpiece worthy of any holiday table.
- Crowd Reaction: Guests consistently claim it’s the most memorable dessert they’ve ever had at a Christmas gathering—some even ask for the recipe before the first bite.
- Ingredient Quality: Using real cocoa powder and high‑fat butter ensures richness without artificial aftertaste.
- Cooking Method: The poke technique is the secret weapon that elevates a regular cake into a moist marvel.
- Make‑Ahead Potential: The cake can be assembled up to two days ahead; the poke liquid continues to work its magic, keeping it fresh.
Inside the Ingredient List
The Flavor Base
All‑purpose flour (2 cups): This is the structural backbone of the cake. Using a high‑quality flour gives you that tender crumb without a dense feel. If you skip it, the cake will collapse like a deflated balloon. For a gluten‑free twist, swap with a 1‑to‑1 gluten‑free blend, but expect a slightly different texture.
Cocoa powder (2 tbsp): Just enough to deepen the red hue and add a subtle chocolate note that balances the sweetness. Dutch‑processed cocoa works, but natural cocoa yields a brighter color. Skipping cocoa makes the cake taste like plain red sponge, which is a missed opportunity.
Baking soda (1 tsp) and salt (1 tsp): These leavening agents create lift and enhance flavor. The soda reacts with the buttermilk for a light crumb, while the salt amplifies the chocolate and vanilla. Too much soda and you’ll get a metallic aftertaste; too little and the cake stays flat.
The Texture Crew
Unsalted butter (1 cup, softened): Butter provides richness and contributes to the cake’s velvety mouthfeel. Use real butter—not margarine—for that buttery aroma that fills the kitchen. If you melt the butter, you’ll lose the airy texture that comes from creaming.
Granulated sugar (1½ cups): Sugar not only sweetens but also helps create the fine crumb by incorporating air during creaming. Brown sugar can be used for a deeper caramel note, but it will darken the color.
Large eggs (2, room temperature): Eggs act as emulsifiers, binding the butter and liquids together. Cold eggs will cause the batter to seize, resulting in a grainy texture. If you’re allergic, a flax‑egg substitute works but will alter the crumb slightly.
The Unexpected Star
Red food coloring (1 tbsp gel): Gel coloring provides a vivid crimson without watering down the batter. A little goes a long way; add gradually until you hit the perfect holiday shade. If you’re avoiding artificial dyes, beet powder can be used, though it may add an earthy undertone.
Vanilla extract (1 tsp for batter, 1 tsp for frosting): Pure vanilla lifts the entire flavor profile, making the cake taste less “manufactured.” Using imitation vanilla can lead to a flat taste, especially when paired with the rich frosting.
Buttermilk (1 cup): The acidity reacts with the baking soda, giving the cake its signature lightness. If you don’t have buttermilk, add 1 tbsp lemon juice to regular milk and let it sit for 5 minutes.
The Final Flourish
Whole milk (½ cup) and heavy cream (1 cup) for the poke liquid: This mixture seeps into the cake, creating a moist interior that rivals boutique bakeries. Skipping the poke step results in a dry crumb—trust me, you don’t want that on a holiday table.
Cream cheese (4 oz, softened) and powdered sugar (¼ cup) for frosting: The tangy cream cheese balances the sweet cake, while the powdered sugar provides the smooth finish. Over‑mixing can cause the frosting to become grainy, so stop once it’s creamy.
Peppermint candy (½ cup, crushed) for garnish: This adds a festive crunch and a cool mint note that pairs beautifully with the rich frosting. If you’re not a fan of mint, substitute with toasted chopped pecans.
Everything’s prepped? Good. Let’s get into the real action and turn these ingredients into a holiday masterpiece.
The Method — Step by Step
Preheat your oven to 350°F (175°C) and grease a 9‑inch round cake pan, then line the bottom with parchment. The moment the oven clicks on, you’ll hear that comforting hum that says “we’re about to create magic.” Let the pan sit while you gather the dry ingredients; this ensures the heat is evenly distributed when the batter hits the pan.
In a medium bowl, whisk together the flour, cocoa powder, baking soda, and salt. This step is crucial—if you don’t sift, you’ll end up with tiny pockets of cocoa that look like chocolate specks in a snowstorm. The mixture should look uniform, with a faint chocolate scent that teases what’s to come.
In a large mixing bowl, cream the softened butter and granulated sugar together on medium‑high speed until the mixture is pale, fluffy, and smells like fresh butter on a summer’s day. This is the moment of truth; if you don’t achieve that light, airy texture, the cake will be dense.
Kitchen Hack: Scrape the sides of the bowl with a rubber spatula halfway through creaming to ensure every bit of butter is incorporated.Add the eggs one at a time, beating well after each addition. Then stir in the vanilla extract and the gel red food coloring. The batter will transform from pale to a deep, festive crimson—like a sunrise over a snow‑capped mountain. Keep mixing until the color is evenly distributed; this prevents blotchy patches in the final cake.
Begin alternating the dry mixture with the buttermilk, starting and ending with the dry ingredients. Mix on low speed just until combined; over‑mixing will develop gluten and make the cake tough. You’ll notice the batter thickening, then loosening as the milk is incorporated—a rhythm that feels almost musical.
Pour the batter into the prepared pan, smoothing the top with a spatula. Tap the pan gently on the counter three times to release any air bubbles. The batter should spread evenly, forming a glossy surface that hints at the soft crumb inside.
Slide the pan into the preheated oven and bake for 30‑35 minutes, or until a toothpick inserted into the center comes out clean with just a few moist crumbs. The edges will start pulling away from the sides of the pan—a visual cue that the cake is done.
Watch Out: Opening the oven door too early can cause the cake to sink in the middle.Allow the cake to cool in the pan for 10 minutes, then turn it out onto a wire rack to cool completely. While it’s still warm, use a thin bamboo skewer to poke a grid of holes about 1‑inch apart—this is where the magic happens.
Kitchen Hack: Fill a squeeze bottle with the poke liquid for a mess‑free pour.In a small saucepan, gently heat the whole milk and heavy cream together until just warm (about 110°F). Pour this warm mixture over the poked cake, letting it seep into every hole. You’ll hear a soft sizzle as the liquid meets the warm crumb—That sizzle when it hits the pan? Absolute perfection. Let the cake absorb the liquid for 15 minutes; the cake will become ultra‑moist, almost buttery.
While the cake is soaking, prepare the cream cheese frosting. Beat the softened cream cheese until smooth, then gradually add powdered sugar and the vanilla extract, beating until light and fluffy. If the frosting looks too thick, add a splash of milk; if too thin, add a pinch more powdered sugar.
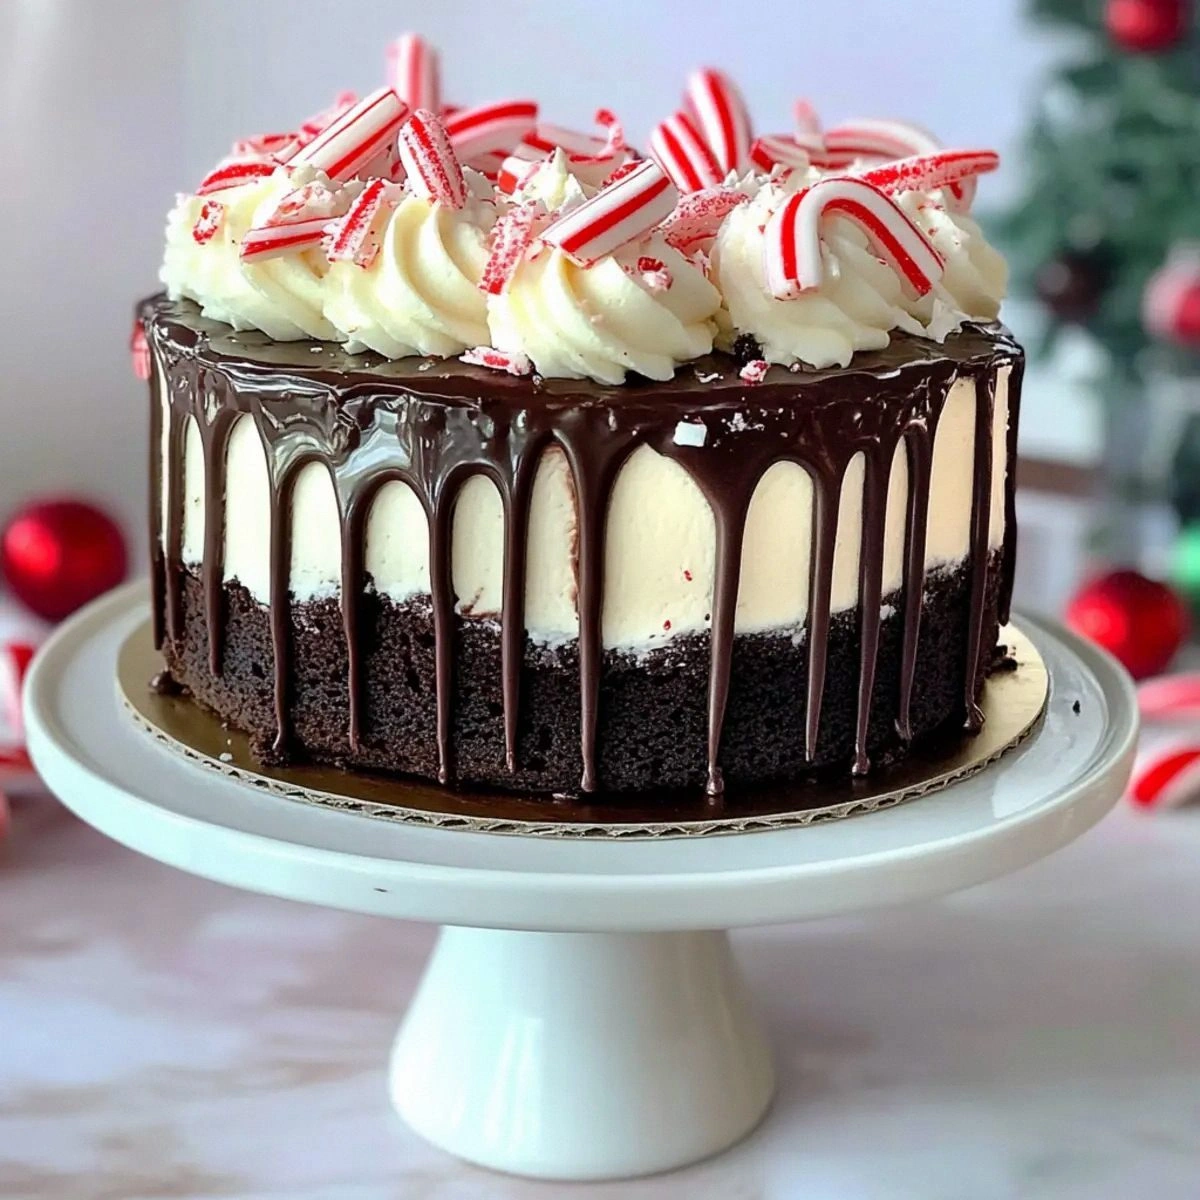
Spread the frosting evenly over the top and sides of the cake. The contrast between the deep red crumb and the white frosting is a visual delight—like a snow‑capped hill against a crimson sky. Finally, sprinkle the crushed peppermint candy over the frosting for a festive crunch that shatters like thin ice under a footstep.
That’s it — you did it. But hold on, I’ve got a few more tricks that’ll take this to another level, because a holiday cake should keep on giving.
Insider Tricks for Flawless Results
The Temperature Rule Nobody Follows
Always bring your butter, eggs, and buttermilk to room temperature before you start. Cold ingredients cause the batter to seize, resulting in a dense crumb. I once tried to rush the process by using chilled butter and ended up with a cake that felt like a rubber boot. Letting everything sit for 30 minutes on the counter makes the batter come together like a well‑orchestrated choir.
Why Your Nose Knows Best
When the cake is baking, trust your sense of smell more than the timer. Around the 25‑minute mark you’ll catch a faint, sweet aroma of vanilla and cocoa drifting out of the oven. If the scent is strong and inviting, the cake is likely done or just a minute away. Relying solely on the timer can lead to over‑baking, which dries out the crumb.
The 5‑Minute Rest That Changes Everything
After the poke liquid has soaked, let the cake rest uncovered for an additional five minutes. This brief pause allows the moisture to redistribute evenly, preventing soggy spots. I once skipped this step and ended up with a soggy bottom—lesson learned.
Whisk, Don’t Stir
When combining the dry and wet ingredients, use a whisk rather than a spoon. Whisking creates a light, airy batter, while stirring can over‑work the flour, leading to a tougher texture. My first batch was a bit dense because I used a wooden spoon; the whisk saved the next round.
Cool, Then Frost
Never frost a warm cake. The heat will melt the cream cheese frosting, turning it into a runny mess. Allow the cake to cool completely on a wire rack; this ensures the frosting sits like a smooth snow‑drift rather than a puddle.
Creative Twists and Variations
This recipe is a playground. Here are some of my favorite ways to switch things up:
Chocolate‑Mint Fusion
Swap half of the cocoa powder for dark chocolate chips and increase the peppermint garnish to a full cup. The result is a rich chocolate cake with a cool mint surprise that will make your guests think you’ve hidden a secret candy‑cane inside.
Orange Zest Sparkle
Add the zest of one orange to the batter and replace the peppermint garnish with candied orange peel. The citrus brightens the deep red color and adds a festive aroma reminiscent of holiday markets.
Gluten‑Free Glory
Replace the all‑purpose flour with a 1‑to‑1 gluten‑free blend and add ½ tsp xanthan gum for structure. The cake retains its moist crumb, proving that you don’t need wheat to create a holiday masterpiece.
Vegan Velvet
Swap butter for coconut oil, use almond milk plus a tablespoon of apple cider vinegar as the buttermilk substitute, and replace cream cheese with a vegan cream cheese alternative. The flavor profile shifts slightly, but the poke technique still delivers that coveted moistness.
Spiced Holiday
Incorporate a teaspoon of ground cinnamon, a pinch of nutmeg, and a dash of ground cloves into the dry mix. This brings a warm spice note that pairs beautifully with the peppermint garnish, turning the cake into a cozy winter hug.
White Chocolate Drizzle
After frosting, melt white chocolate and drizzle it over the top in a lazy river pattern. The sweet white chocolate adds a glossy finish and a subtle buttery flavor that complements the tangy cream cheese frosting.
Storing and Bringing It Back to Life
Fridge Storage
Cover the cake loosely with plastic wrap or store it in an airtight container. It will stay fresh for up to 4 days. The poke liquid helps retain moisture, so you’ll still get that melt‑in‑your‑mouth texture when you slice it the next day.
Freezer Friendly
Wrap the cake tightly in a double layer of foil, then place it in a freezer‑safe bag. It can be frozen for up to 2 months. When you’re ready to serve, thaw it in the refrigerator overnight and give it a quick brush of fresh milk to revive the poke moisture.
Best Reheating Method
To warm a slice, place it on a microwave‑safe plate, sprinkle a tiny splash of water around the edges, and microwave for 10‑15 seconds. The added steam revives the crumb, making it taste as fresh as the day it was baked.