I was standing in my kitchen, staring at a half‑finished tiramisu that looked more like a sad, soggy dream than a dessert. The ladyfingers had collapsed, the mascarpone had turned into a gooey, unrecognizable mess, and my espresso machine was still smoking from the last attempt. I swore, “This is going to be the end of tiramisu for me,” and then I remembered a friend’s whisper about a mousse that could replace the whole thing. That whisper turned into a dare: “I dare you to taste this and not go back for seconds.”
I poured the instant coffee into hot water, letting the aroma of roasted beans dance through the kitchen like a caffeinated perfume. I whisked heavy cream until it was thick enough to stand on its own, the sound of the beaters echoing like a drumline in a quiet room. I folded in mascarpone, powdered sugar, vanilla, cocoa, and chocolate, each ingredient adding layers of flavor that sang in harmony. The mousse sat in the fridge, its surface catching the light and shimmering like a polished marble slab. The anticipation was almost tangible, a sweet, electric buzz that made my heart race.
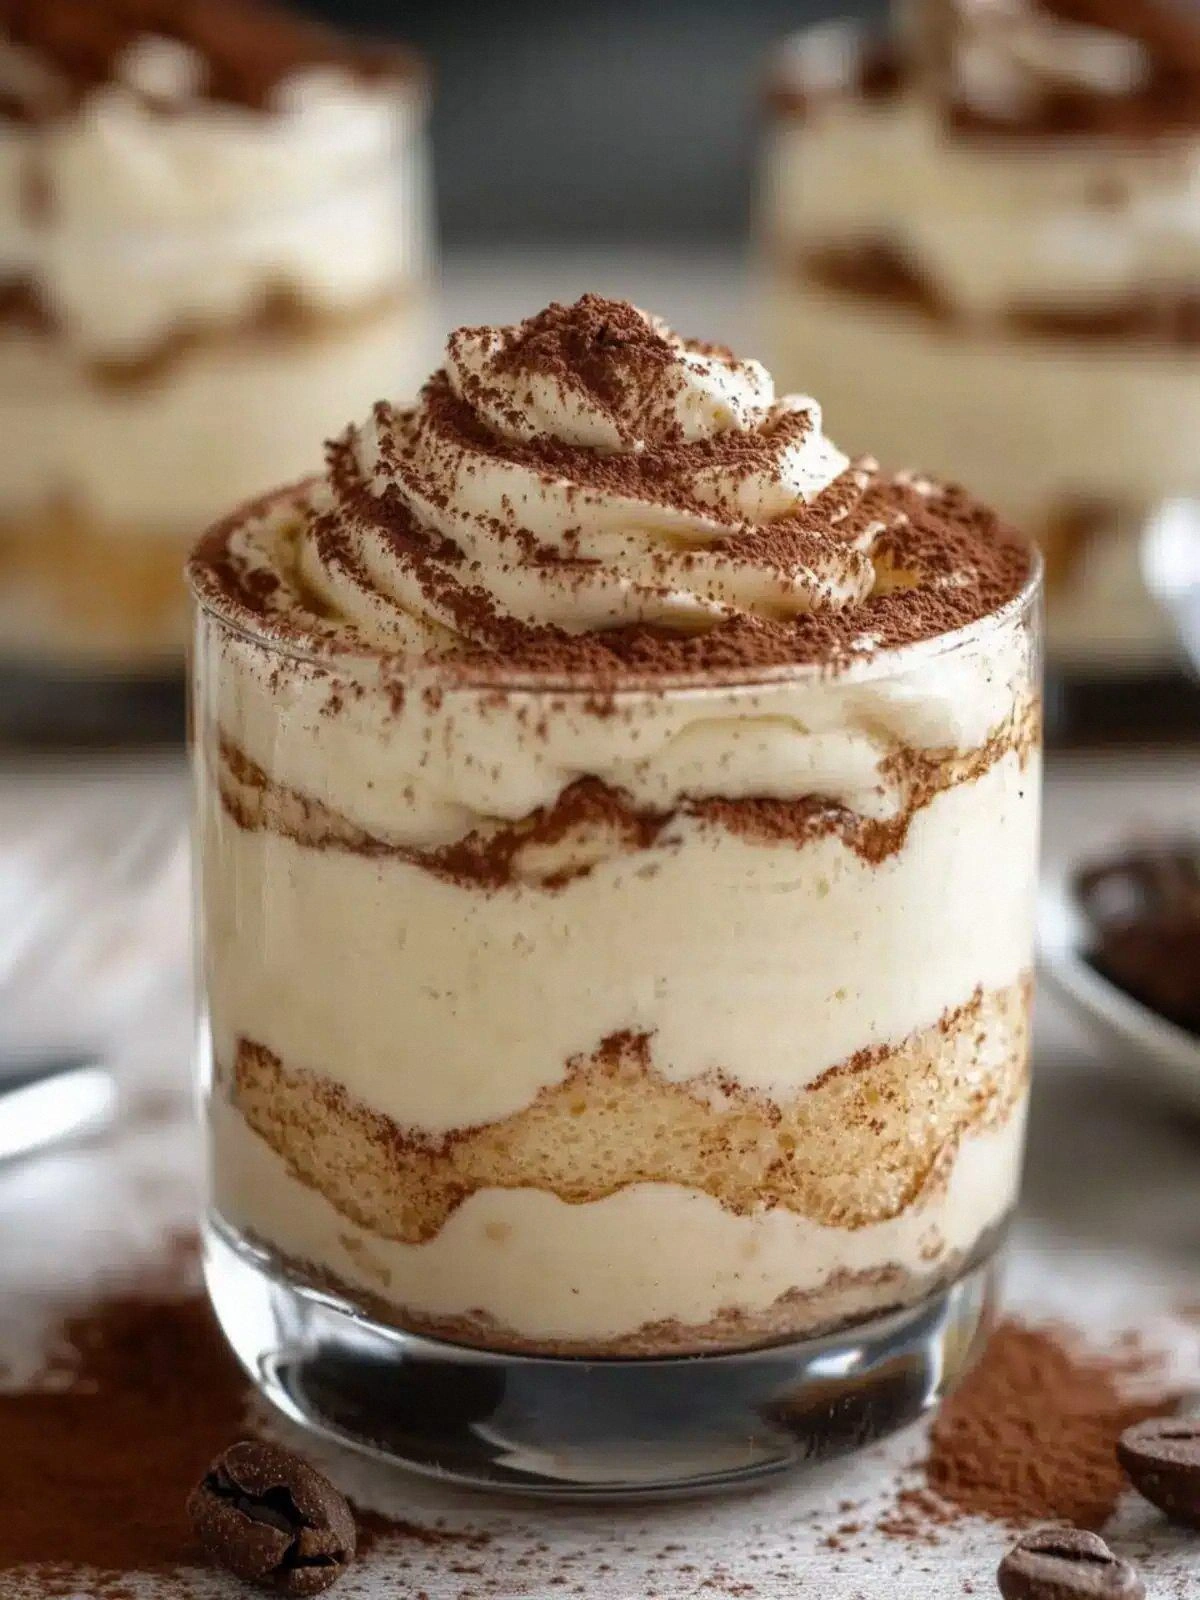
What sets this recipe apart from every other tiramisu variation is that it’s a pure, airy mousse that doesn’t rely on ladyfingers or a stiff custard base. It’s a one‑pot, no‑bake marvel that delivers the same espresso depth, the same chocolate kiss, but in a texture that feels like a cloud on your tongue. The instant coffee gives it a robust, bittersweet backbone, while the mascarpone brings that signature velvety richness that makes every bite feel indulgent. I’m talking about a dessert that can be whipped up in minutes and still feels like a luxury treat you’d only find in a five‑star hotel.
And here’s the kicker: you’ll learn how to balance the coffee’s bitterness with the chocolate’s sweetness in a way that most recipes miss. You’ll see how a simple tweak—like letting the mousse chill just enough—can elevate the entire experience from good to unforgettable. So buckle up, because I’m about to walk you through every single step, and by the end, you’ll wonder how you ever made it any other way.
What Makes This Version Stand Out
- Flavor: The instant coffee and espresso create a deep, espresso‑rich flavor that cuts through the sweetness, giving the mousse a bold, sophisticated profile.
- Texture: Unlike traditional tiramisu, this mousse is airy and light, almost like a cloud that melts in your mouth, yet it retains a luxurious mouthfeel.
- Ease: No need for a kitchen timer or a double boiler—just whisk, chill, and serve.
- Versatility: It works as a dessert, a brunch treat, or an elegant finger food for cocktail parties.
- Make‑Ahead: Chill for up to 24 hours; the flavors deepen, making it a perfect prep‑for‑the‑weekend dessert.
- Ingredient Quality: Using high‑quality mascarpone and semi‑sweet chocolate ensures the mousse stays rich without being overpoweringly sweet.
- Visual Appeal: The glossy chocolate drizzle and dusting of cocoa powder give it a professional, Instagram‑ready look.
- Crowd Reaction: Most people expect a dense tiramisu; this mousse surprises them with its lightness and depth, earning rave reviews.
Alright, let's break down exactly what goes into this masterpiece...
Inside the Ingredient List
The Flavor Base
Instant coffee is the secret weapon that gives this mousse its signature espresso punch. It’s stronger than brewed coffee but less bitter, making it perfect for a dessert that needs depth without overpowering sweetness. Skipping it turns the mousse into a plain chocolate‑cream; the coffee is the soul of the dish. If you’re a coffee connoisseur, feel free to use a dark roast to intensify the flavor, but keep the quantity the same to avoid a burnt aftertaste.
The Texture Crew
Heavy whipping cream is the backbone of the mousse’s airy texture. Whisk it until it forms soft peaks, then fold it into the mascarpone mixture to keep that lightness. The mascarpone provides silky richness that balances the coffee’s bitterness. If you prefer a dairy‑free version, use coconut cream, but expect a slightly different mouthfeel.
The Unexpected Star
Powdered sugar is used instead of granulated to dissolve instantly, preventing any grainy texture. It also allows the mousse to set more firmly, giving it a stable yet delicate structure. If you’re watching your sugar intake, you can substitute a sugar alternative that behaves similarly, like stevia in powdered form.
The Final Flourish
Semi‑sweet baking chocolate and unsweetened cocoa powder are layered to create a complex chocolate profile. The chocolate adds a velvety finish, while the cocoa provides a subtle bitterness that echoes the coffee. If you want a richer chocolate experience, replace the semi‑sweet chocolate with dark chocolate, but be careful not to add extra sugar.
Everything's prepped? Good. Let's get into the real action...
The Method — Step by Step
- Step 1: Brew the Coffee. In a small saucepan, combine 1 tablespoon instant coffee with 1 cup hot water. Bring to a gentle boil, then let it steep for 2 minutes to release the full aroma. Strain the mixture through a fine sieve to remove any coffee grounds; this will ensure a silky base. Let the coffee cool slightly before moving on—this prevents the cream from curdling. The result should smell like a freshly brewed espresso bar, not burnt coffee grounds.
- Step 2: Whip the Cream. Pour 1 cup heavy whipping cream into a chilled bowl. Using an electric mixer on medium speed, beat until soft peaks form—this should take about 3–4 minutes. The key is to avoid over‑whipping; the cream should be light and airy, not stiff. If you’re hand‑whisking, use a rapid, steady motion for the same effect. The texture you’re aiming for is like a cloud that will hold its shape once folded into the mascarpone.
- Step 3: Blend the Mascarpone. In a separate bowl, combine 8 ounces mascarpone with 1 teaspoon vanilla extract and 0.5 cup powdered sugar. Mix with a spoon until smooth—this will form the creamy core. The powdered sugar ensures the mixture dissolves completely, preventing any grainy bite. Add the cooled coffee slowly while stirring; the mixture should stay silky, not lumpy. The coffee will also help the mascarpone blend more evenly.
- Step 4: Fold in the Cream. Gently fold the whipped cream into the mascarpone mixture using a spatula. Use a gentle, sweeping motion to preserve the air pockets in the cream. This step creates the mousse’s signature lightness. Keep folding until the mixture is homogenous and glossy. The mousse should look like a smooth, creamy cloud ready for chilling.
- Step 5: Incorporate Cocoa and Chocolate. Melt 2 ounces semi‑sweet baking chocolate in a double boiler or microwave, stirring until silky. Fold the melted chocolate into the mousse, followed by 2 tablespoons unsweetened cocoa powder. Stir until the cocoa is fully integrated, giving the mousse a rich, chocolatey undertone. The chocolate should add depth without overpowering the espresso. The final mixture should be a deep, glossy brown that glistens when light hits it.
- Step 6: Chill. Spoon the mousse into individual serving glasses or a large serving dish. Cover tightly with plastic wrap or a lid to prevent a skin from forming. Chill in the refrigerator for at least 2 hours, but for best results, let it rest overnight. The mousse will set into a firm yet airy custard. During this time, the flavors will meld and deepen, creating a richer taste.
- Step 7: Prepare the Finish. Just before serving, melt 2 ounces semi‑sweet chocolate in a double boiler, stirring until smooth. Drizzle the melted chocolate in a decorative swirl over each mousse. Then dust the top with 2 tablespoons unsweetened cocoa powder or a light dusting of powdered sugar for a polished look. The chocolate drizzle should look like a glossy river flowing over a snowy peak. This final touch adds a visual and flavor crescendo.
- Step 8: Serve. Gently lift the mousse from the dish, letting the drizzle cascade over the spoon. Serve immediately, allowing guests to experience the mousse’s airy texture and espresso‑chocolate harmony. A small spoonful of espresso or a dusting of cocoa on the side can add a finishing flourish. The mousse should feel like a velvety cloud that melts in seconds. Enjoy the applause that follows—this dessert is guaranteed to impress.
That’s it — you did it. But hold on, I've got a few more tricks that'll take this to another level...
Insider Tricks for Flawless Results
The Temperature Rule Nobody Follows
Always chill your mixing bowls and whisk before starting. Cold equipment helps the cream hold its peaks longer, ensuring the mousse remains light. I once tried this without chilling and the mousse collapsed into a dense, heavy mess. The lesson? Keep everything cool, from the bowl to the whisk, and the mousse will rise like a soufflé.
Why Your Nose Knows Best
The first scent that tells you the mousse is ready is the coffee aroma. If it’s too faint, the coffee isn’t fully integrated, and the mousse will taste flat. A strong espresso scent signals that the espresso flavor is fully released, giving the mousse depth. Trust your nose, and you’ll always get the perfect flavor profile.
The 5-Minute Rest That Changes Everything
After folding in the chocolate, let the mousse sit for 5 minutes before chilling. This brief rest allows the chocolate to set slightly, preventing it from melting back into the mixture. I’ve seen people skip this step, resulting in a mousse that’s too runny. A short pause makes a big difference.
The Light‑Touch Folding Technique
When incorporating the whipped cream, use a spatula and a gentle rocking motion. Over‑mixing can deflate the cream, making the mousse dense. I’ve tried this technique in the past and it turned my mousse into a dense, heavy custard. Stick to a light fold, and the mousse stays airy.
The Secret Chocolate Drizzle
Melt the chocolate slowly over a double boiler, stirring constantly. Add a splash of heavy cream to the melted chocolate to create a glossy finish that coats the mousse like a velvet blanket. The trick is to keep the chocolate at a low, steady temperature—too hot and it will seize. This drizzle is the final flourish that turns a good dessert into an unforgettable experience.
Creative Twists and Variations
This recipe is a playground. Here are some of my favorite ways to switch things up:
Nutty Espresso Mousse
Fold in 1/4 cup chopped toasted almonds or hazelnuts for a crunchy texture. The nuts add a caramelized flavor that complements the espresso. This variation is perfect for guests who love a bit of crunch.
Citrus‑Infused Delight
Add a tablespoon of lemon zest and a teaspoon of orange zest to the mascarpone mixture. The citrus brightens the espresso flavor and adds a fresh, zesty note. This version works well during spring or summer gatherings.
Red Wine Chocolate Mousse
Replace half the coffee with a splash of good quality red wine, like a Cabernet. The wine adds a fruity depth that pairs beautifully with the chocolate. This twist is ideal for wine lovers who want something dessert‑ish.
Minty Chocolate Mousse
Stir in a teaspoon of fresh mint extract after folding the whipped cream. The mint provides a cool contrast to the rich chocolate. This version is a refreshing change for hot summer evenings.
Caramel‑Swirl Mousse
Drizzle caramel sauce into the mousse before chilling, creating a marbled effect. The caramel adds a buttery sweetness that balances the espresso. This version is a decadent treat for special occasions.
Storing and Bringing It Back to Life
Fridge Storage
Keep the mousse covered in the refrigerator for up to 48 hours. The cold helps maintain its airy structure, while the flavors continue to meld. Before serving, let it sit at room temperature for 10 minutes to soften slightly.
Freezer Friendly
The mousse freezes well for up to 2 weeks. Wrap it tightly in plastic wrap and place it in an airtight container. When ready to serve, thaw in the fridge overnight. A quick warm-up in the microwave for 15 seconds can help it regain its silky texture.
Best Reheating Method
If the mousse has hardened, add a tiny splash of heavy cream before reheating. Warm it gently on the stove or in the microwave, stirring until it’s silky again. This trick steams the mousse back to perfection and restores its airy feel.