I was in the middle of a rainy Thursday night, the kind where the only thing louder than the thunder is the growl of an empty stomach. I had a bag of chicken breasts that had been languishing in the fridge for days, and a jar of honey that was practically begging to be used before it crystallized. I tossed a quick Google search, but every recipe I found either left the chicken dry as a desert or drowned it in a sauce that tasted like a dessert gone rogue. That night, I dared myself to combine the sweet, sticky allure of honey with a fiery kick that would make my taste buds do a salsa—yes, hot honey, the secret weapon I’d been missing.
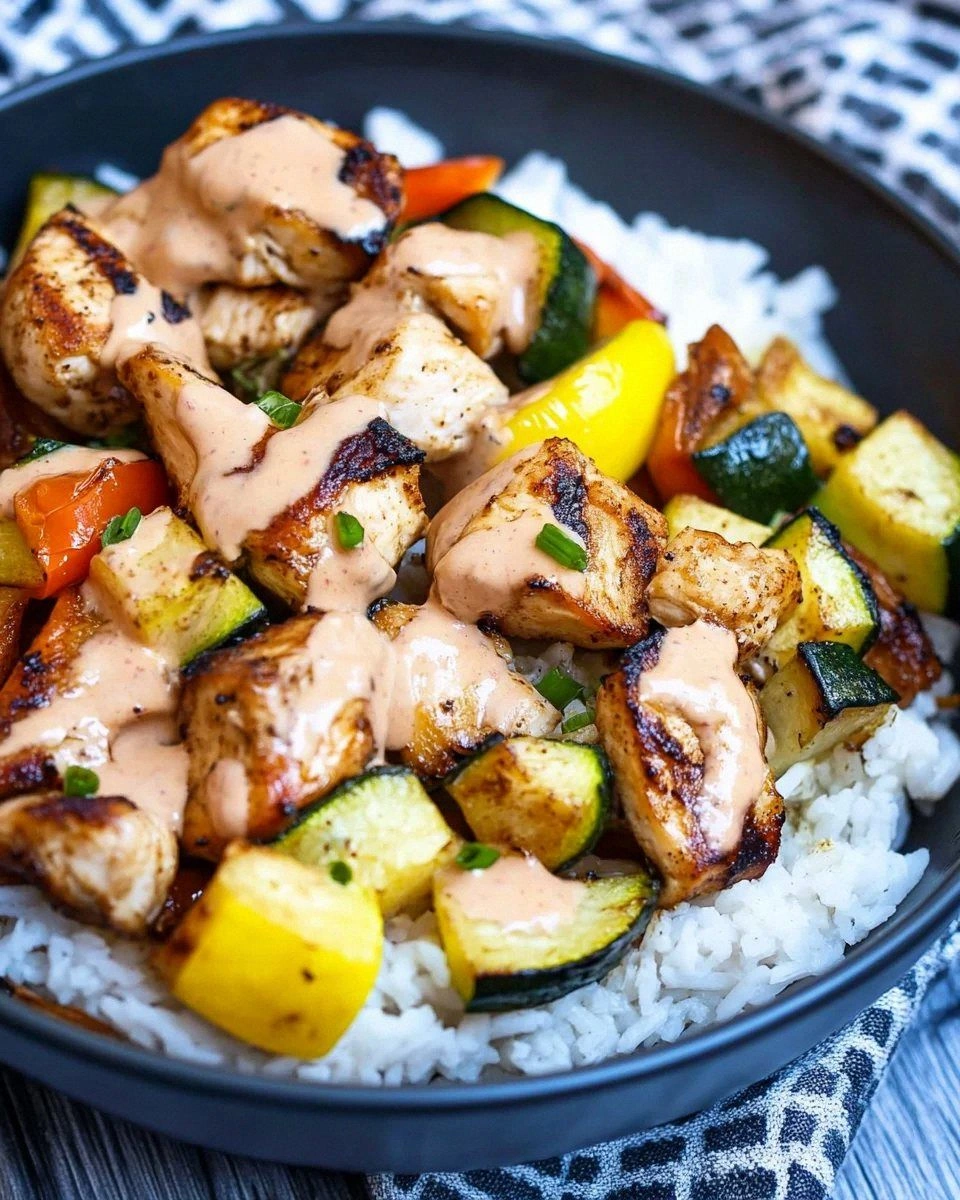
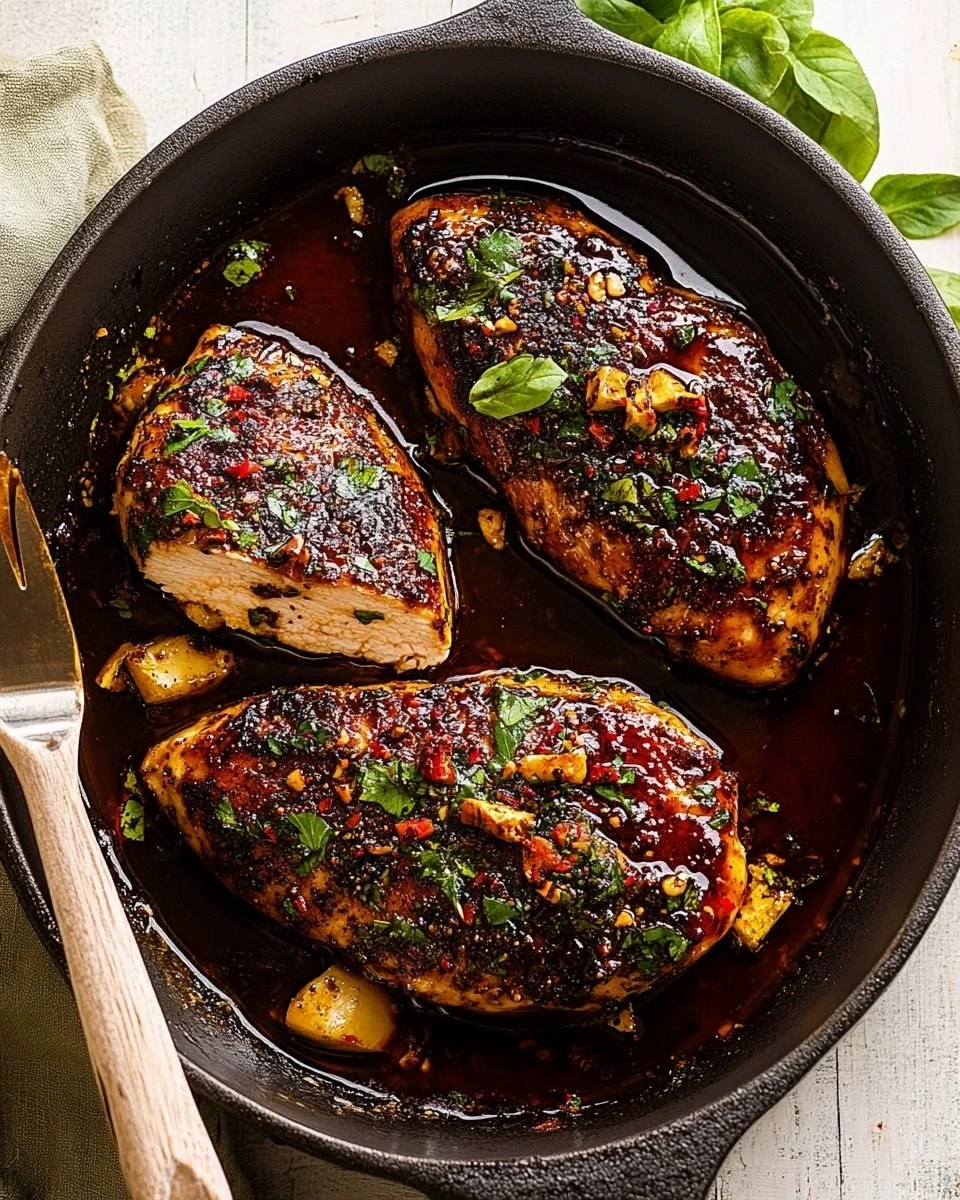
Picture this: the oven preheats to a comforting 400°F, the kitchen fills with a warm, caramelizing perfume that makes you want to hug the countertop, and the chicken sizzles as it meets the pan, a sound that could be mistaken for applause. The sauce, a glossy amber river, slides over the meat like a silk scarf, clinging to every crevice, promising a crunch that shatters like thin ice when you bite. As the timer dings, the chicken emerges with a caramelized crust that crackles, a juicy interior that’s pink and tender, and a lingering heat that whispers, “I’m still here.” I swear, that first bite made me forget about the rain entirely—my mouth was a fireworks display of sweet, spicy, and savory.
Most hot honey chicken recipes either skimp on the honey, leaving the flavor flat, or drown the bird in sauce, turning it into a soggy mess. This version, however, balances the glaze just right, using a quick sear to lock in juices before the oven does its magic. The secret? A two‑step seasoning that builds layers of flavor, plus a finishing drizzle that adds that glossy shine and a final punch of heat. I’ll be honest — I ate half the batch before anyone else got to try it, and that’s a confession you’ll hear a lot from anyone who’s tasted this masterpiece.
I’m about to hand you the exact method that turned a simple weekday dinner into a show‑stopping centerpiece. I dare you to taste this and not go back for seconds. Let me walk you through every single step — by the end, you’ll wonder how you ever made it any other way.
What Makes This Version Stand Out
- Flavor Explosion: The marriage of honey’s natural sweetness with the bold heat of hot sauce creates a balanced profile that dances on the palate without overwhelming it.
- Texture Triumph: A quick sear creates a crust that’s crisp enough to satisfy, yet the interior stays juicy, proving that you can have both crunch and tenderness.
- Simplicity: Only ten pantry staples are required, meaning you won’t need a grocery run that takes half a day.
- Unique Twist: The finishing splash of lemon juice brightens the glaze, cutting through the richness and adding a subtle zing.
- Crowd Reaction: Friends have called it “the best chicken ever” and begged for the recipe, making it perfect for dinner parties or family nights.
- Ingredient Quality: Using high‑quality honey and a good‑grade hot sauce makes all the difference; you’ll taste the depth in every bite.
- Cooking Method: Baking after searing ensures even cooking while the glaze caramelizes perfectly without burning.
- Make‑Ahead Potential: The glaze can be prepared ahead of time, and leftovers reheat beautifully, keeping the flavor intact.
Inside the Ingredient List
The Flavor Base
Honey is the heart of this dish, providing a natural sweetness that caramelizes beautifully under high heat. Choose a raw, lightly processed honey if you can—its floral notes add depth that store‑bought syrups lack. If you skip the honey, the glaze will lose its glossy sheen and the signature sweet‑heat balance will fall flat, turning the dish into just another spicy chicken.
The Texture Crew
Olive oil and butter work together to create a luscious coating that helps the glaze adhere while also contributing to that coveted crust. The oil has a higher smoke point, allowing you to sear without burning, while butter adds a buttery richness that rounds out the flavor. If you replace butter with margarine, you’ll miss out on that subtle nutty undertone and the sauce may separate.
The Unexpected Star
A splash of lemon juice might seem minor, but its acidity cuts through the sweetness and amplifies the heat, making the overall taste feel brighter and less cloying. Fresh lemon juice is preferable to bottled; the latter can introduce unwanted preservatives that dull the flavor. If you’re out of lemon, a teaspoon of apple cider vinegar can stand in, though it will add a slightly different tang.
The Final Flourish
Smoked paprika and garlic powder bring a smoky, aromatic backbone that elevates the dish from ordinary to unforgettable. The paprika adds a subtle earthiness, while the garlic powder gives a rounded savory note. Skipping these spices will make the chicken taste flat, and the glaze will lack the depth that makes each bite compelling.
Everything's prepped? Good. Let's get into the real action...
The Method — Step by Step
Preheat your oven to 400°F (200°C). While the oven warms, line a baking sheet with parchment paper and set a wire rack on top; this ensures the heat circulates evenly around the chicken, giving you that perfect golden crust. The moment the oven clicks, you’ll hear a faint hum that signals the start of something delicious.
Kitchen Hack: Place a shallow pan of water on the lower rack; the steam will keep the chicken moist while the top crisps.Pat the chicken breasts dry with paper towels, then drizzle them with olive oil, ensuring each piece is lightly coated. Sprinkle kosher salt, black pepper, garlic powder, and smoked paprika evenly; the spices should cling to the oil, forming a thin, fragrant layer. This seasoning step is where flavor builds, so don’t rush—feel the powder dust your fingertips as a sign you’ve got the right amount.
Heat a large skillet over medium‑high heat and add a splash of olive oil. When the oil shimmers, lay the chicken breasts in the pan, hearing that immediate sizzle that tells you you’ve got the perfect temperature. Sear each side for about 2‑3 minutes, just until the surface turns a deep golden brown; the edges will start pulling away from the pan, a visual cue that the crust is forming.
Watch Out: If the heat is too high, the spices will burn before the chicken cooks through, resulting in a bitter taste.While the chicken sears, whisk together honey, hot sauce, melted butter, and lemon juice in a small bowl until the mixture is smooth and glossy. The sauce should have a thick, pourable consistency—if it’s too runny, add a touch more honey; if too thick, a splash of water will loosen it. This is the moment of truth: the aroma of hot sauce mingling with honey should make your kitchen smell like a summer fair.
Transfer the seared chicken to the prepared wire rack, then brush each breast generously with the hot honey glaze, making sure to coat the sides as well. Reserve a half cup of the glaze for later; this will become the finishing drizzle that adds that final burst of flavor right before serving.
Slide the baking sheet into the preheated oven and bake for 20‑25 minutes, or until the internal temperature reaches 165°F (74°C). Halfway through, baste the chicken with any remaining glaze in the pan, letting the heat caramelize the sugars further. You’ll notice the edges turning a deeper amber, and a faint crackling sound as the glaze sets.
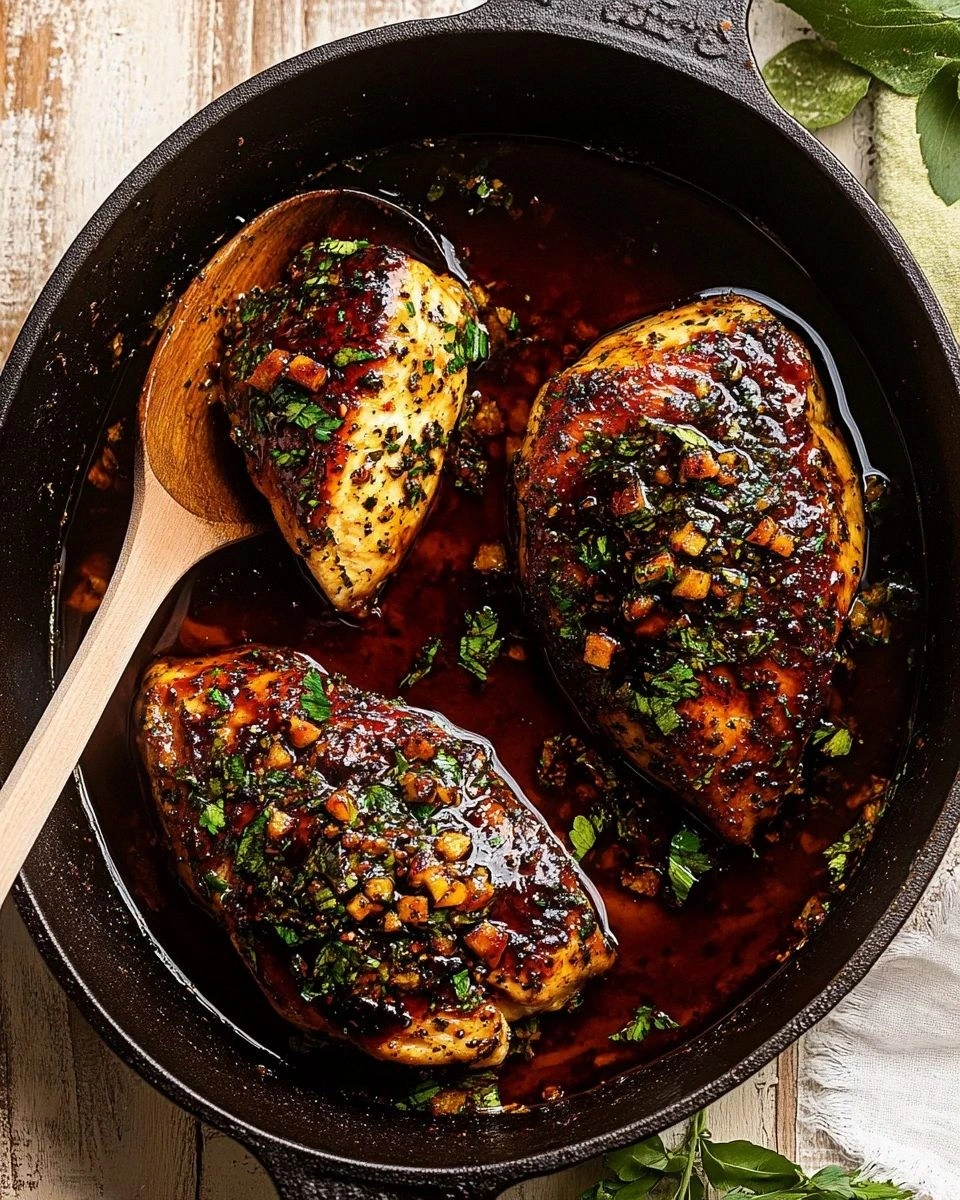
Once cooked, remove the chicken from the oven and let it rest on a cutting board for 5 minutes. Resting allows the juices to redistribute, ensuring each bite is moist rather than watery. While it rests, give the reserved glaze a quick stir and drizzle it over the top, letting it cascade like liquid gold.
Kitchen Hack: Slice the chicken against the grain for extra tenderness; this tiny adjustment makes a world of difference.Serve the chicken breasts whole or slice them into strips, pairing them with a side of roasted veggies or a crisp green salad. The aroma will still be wafting from the plate, inviting everyone to dig in. And now the fun part—watch your guests’ faces light up as they experience that sweet‑spicy crunch.
That's it — you did it. But hold on, I've got a few more tricks that'll take this to another level...
Insider Tricks for Flawless Results
The Temperature Rule Nobody Follows
Never let the pan get hotter than a gentle shimmer; a scorching pan will scorch the spices before the chicken seals. I once turned the heat up too high, and the paprika turned black, giving the dish a burnt, bitter edge. Keep the heat steady, and you’ll get a uniform crust that’s golden, not charred.
Why Your Nose Knows Best
Your sense of smell is a better indicator than a timer when the glaze is ready. When the honey‑hot sauce mixture starts to bubble and emit a caramel scent, you know it’s reaching the perfect viscosity. Trust that nose cue; it prevents over‑cooking and ensures the glaze doesn’t crystallize.
The 5‑Minute Rest That Changes Everything
Resting the chicken after baking is non‑negotiable. Those five minutes let the fibers relax, so the juices stay locked in instead of spilling out onto the plate. A friend once sliced his chicken immediately and ended up with a dry, flavor‑less bite—lesson learned.
Butter‑Boosted Glaze
Adding a tablespoon of butter to the glaze not only enriches the flavor but also creates a glossy finish that looks restaurant‑ready. The butter emulsifies with the honey, preventing the sauce from separating during baking. If you prefer a dairy‑free version, coconut oil works as a substitute without sacrificing shine.
The Secret of the Wire Rack
Cooking the chicken on a wire rack allows hot air to circulate, giving an even bake and preventing a soggy bottom. The rack also lets excess glaze drip away, so you don’t end up with a pool of sauce that makes the crust soggy. If you don’t have a rack, elevate the chicken on a bed of sliced onions; they’ll add flavor while keeping the meat lifted.
Creative Twists and Variations
This recipe is a playground. Here are some of my favorite ways to switch things up:
Maple‑Chipotle Fusion
Swap half the honey for pure maple syrup and replace the hot sauce with chipotle in adobo. The result is a smoky, sweet‑heat combo that pairs beautifully with roasted sweet potatoes. Perfect for a fall dinner when you crave comforting flavors.
Garlic‑Infused Chili
Add two minced garlic cloves to the glaze and use a Thai sweet chili sauce instead of regular hot sauce. This gives the dish an Asian twist, with a subtle garlicky depth that complements the honey’s sweetness. Serve over jasmine rice for a complete meal.
Citrus‑Pepper Kick
Replace lemon juice with orange zest and add a pinch of cracked pink peppercorns to the seasoning mix. The citrus brightens the glaze while the peppercorns add a floral heat that’s less aggressive than chili. This variation shines when paired with a fresh arugula salad.
Spicy BBQ Remix
Mix in a quarter cup of your favorite BBQ sauce into the glaze and increase the hot sauce by half a tablespoon. The smoky BBQ notes meld with the honey, creating a finger‑licking glaze that’s perfect for a backyard cookout. Serve with corn on the cob for a true summer vibe.
Herb‑Lemon Finale
Stir fresh chopped rosemary and a drizzle of extra lemon juice into the glaze just before serving. The herbaceous aroma lifts the dish, making it feel light enough for a spring brunch yet still satisfying. Pair with a side of quinoa tossed with peas and mint.
Storing and Bringing It Back to Life
Fridge Storage
Place leftover chicken in an airtight container and store it in the refrigerator for up to 3 days. Before reheating, drizzle a teaspoon of water over the pieces and cover them loosely with foil; this creates steam that revives the glaze’s shine. Reheat in a preheated 350°F oven for 10‑12 minutes, or until the internal temperature reaches 165°F.
Freezer Friendly
If you want to keep the chicken longer, wrap each breast tightly in plastic wrap, then place them in a freezer‑safe zip‑lock bag. They’ll stay good for up to 2 months. To thaw, move them to the fridge overnight, then follow the same reheating method as for fresh leftovers.
Best Reheating Method
The oven is your best friend when it comes to reheating; a skillet will steam the chicken and lose the crispness. Add a splash of water or chicken broth to the pan, cover, and heat on medium‑low for 5 minutes, then uncover for an additional 2 minutes to restore the crust. This technique keeps the meat juicy while reviving that caramelized edge.