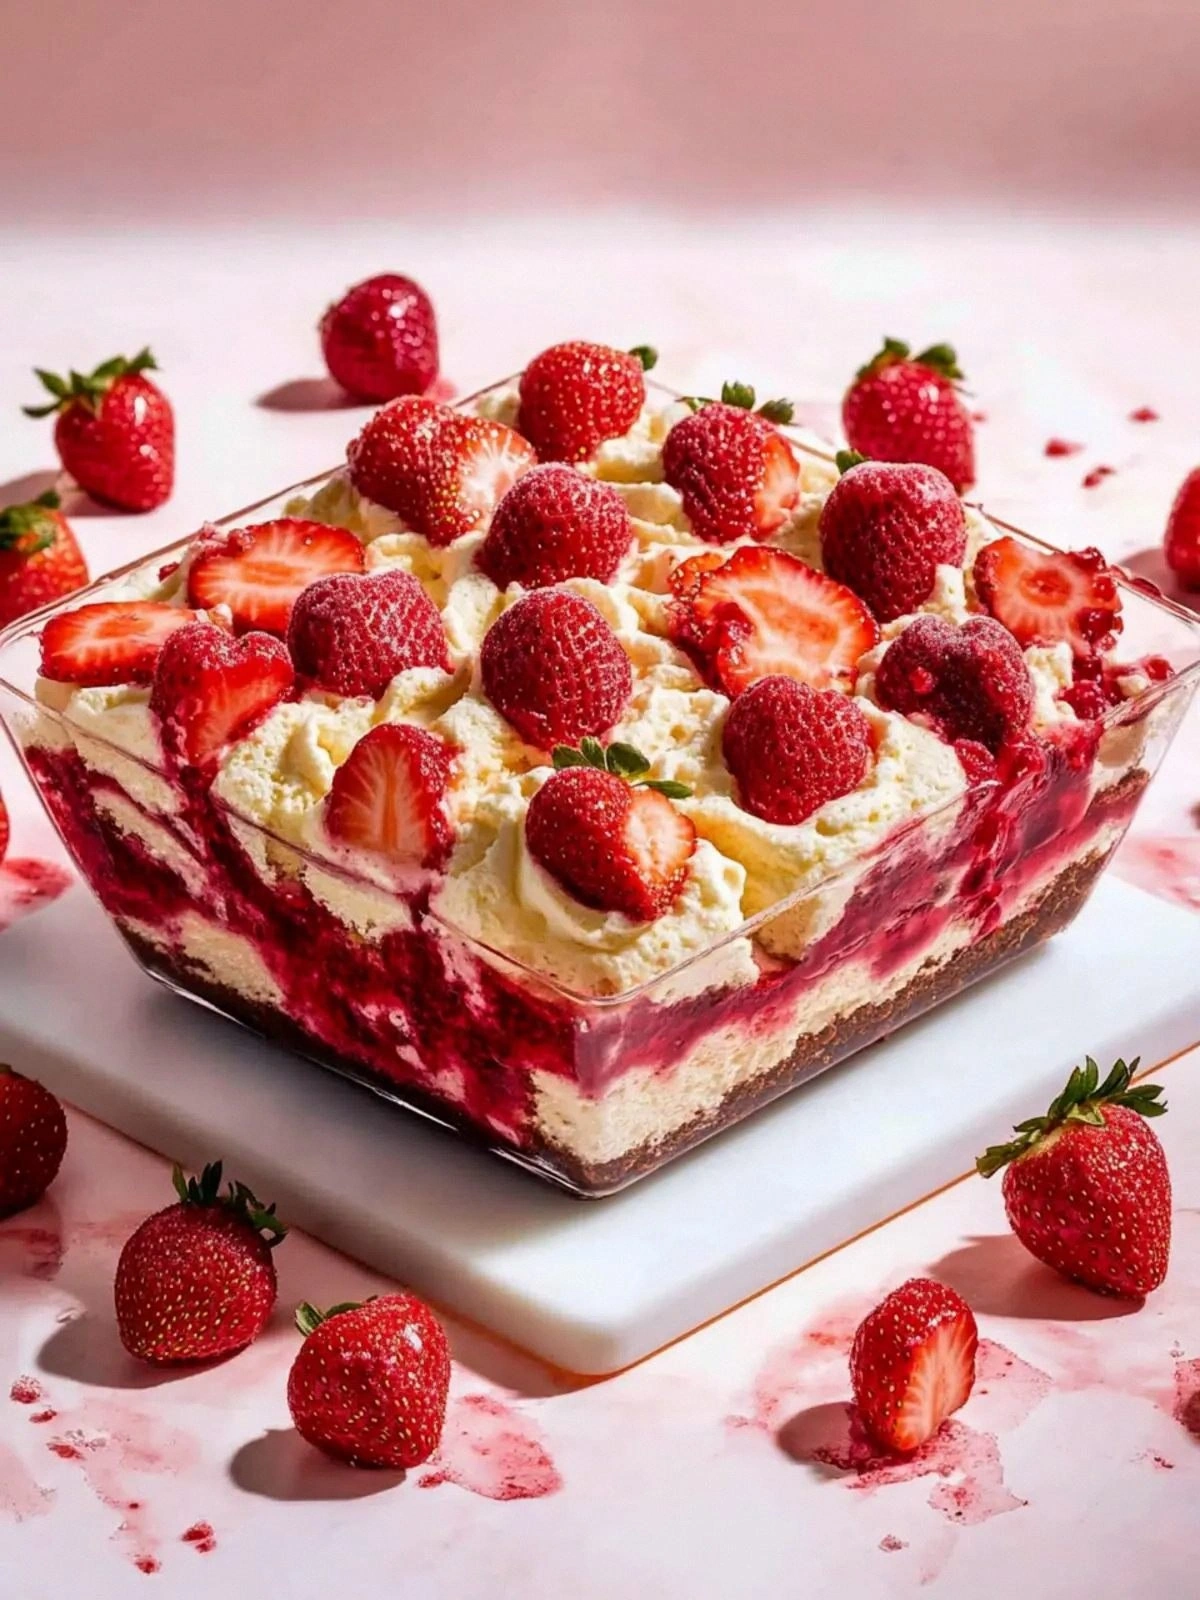
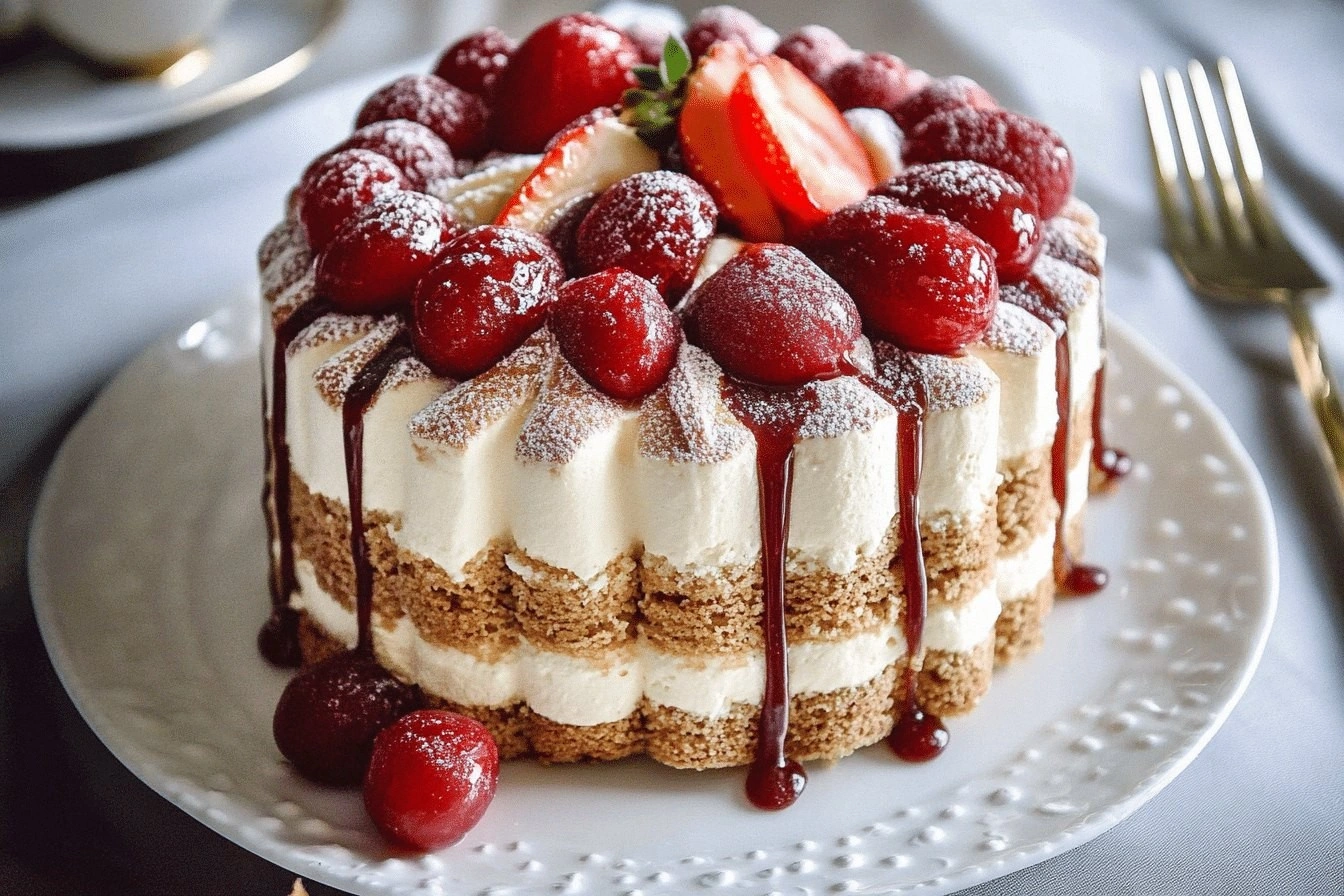
Picture this: you’re in a dimly lit kitchen, a storm rattles the windows, and your friend dares you to whip up a dessert that feels like a secret club. You’ve spent the last decade chasing the perfect Charlotte Russe, but every attempt ends with a soggy shell or a custard that’s more pudding than pastry. That night, I stumbled onto a recipe that flipped the script, turning a classic into a showstopper that whispers “I dare you to taste this and not go back for seconds.” The result? A silky, airy custard wrapped in a crisp ladyfinger shell that tastes like a gentle summer breeze and a decadent finale that makes you wonder why you ever settled for ordinary.
The first thing that hits you is the aroma—vanilla and citrus mingle in a syrup that coats each ladyfinger like velvet. The texture is a triumph: the ladyfingers soak just enough to stay firm, while the custard swirls like cloud‑filled whipped cream. The contrast between the crunchy shell and the melt‑away filling is a symphony of mouthfeel that keeps you reaching for more. I’ve tried countless variations, but this version stands out because every component is meticulously balanced, from the precise gelatin ratio to the fresh fruit topping that adds a pop of color and flavor.
What makes this recipe a game‑changer isn’t just the ingredients; it’s the subtle techniques that elevate each bite. The syrup isn’t simply sweetened; it’s infused with a hint of lemon zest that cuts through the richness of the custard, while the gelatin is activated in cold water to preserve the custard’s lightness. The custard itself is folded with heavy cream, giving it a luxurious mouthfeel that’s not too heavy, and the final touch of fresh berries or candied fruit brings a bright, natural sweetness that feels like a celebration. I’ll be honest—after tasting the first slice, I ate half the batch before anyone else even had a chance to try it.
If you’ve ever struggled with a Charlotte Russe that falls apart or tastes bland, you’re not alone. Most recipes get this completely wrong by over‑soaking the ladyfingers or under‑cooking the custard. Here’s what actually works: a precise syrup ratio, a gelatin activation step that keeps the custard airy, and a finishing garnish that adds texture and flavor. Picture yourself pulling this out of the fridge, the whole kitchen smelling incredible, and watching friends gasp as the first slice melts in their mouths. Let me walk you through every single step—by the end, you’ll wonder how you ever made it any other way.
What Makes This Version Stand Out
- Taste: The delicate balance of sweet and citrus in the syrup lifts the custard, preventing it from feeling heavy. The vanilla infuses the entire dessert, creating a warm, aromatic backdrop that makes each bite feel comforting. This subtle flavor profile keeps the dessert sophisticated yet approachable.
- Texture: The ladyfingers retain a light, sponge‑like bite even after soaking, while the custard remains cloud‑like and silky. Gelatin is activated in cold water, giving the custard a firm yet tender structure that slices cleanly. The result is a multi‑textured experience that satisfies every palate.
- Simplicity: With only a handful of ingredients, the recipe is straightforward yet elegant. Each step builds on the previous one, so you never feel overwhelmed. The method is designed for both beginners and seasoned bakers.
- Uniqueness: The inclusion of a citrus‑infused syrup and a choice between candied or fresh fruit gives the dessert a modern twist. The recipe also allows for seasonal fruit substitutions, making it versatile year‑round.
- Crowd Reaction: Friends and family consistently remark that this Charlotte Russe is “hands down the best version you'll ever make at home.” The dessert’s visual appeal and flavor complexity leave a lasting impression.
- Ingredient Quality: Using fresh eggs, heavy cream, and high‑quality gelatin ensures a luxurious finish. The ladyfingers should be fresh or lightly toasted to maintain structure.
- Cooking Method: The method incorporates a careful activation of gelatin and a gentle folding technique that preserves air in the custard.
- Make‑Ahead Potential: The dessert can be assembled a day in advance, allowing flavors to meld. The custard sets firmly, making it ideal for special occasions.
Alright, let's break down exactly what goes into this masterpiece...
Inside the Ingredient List
The Flavor Base
Ladyfingers form the foundation of this dessert, providing a delicate, sponge‑like structure that holds the syrup and custard. They should be fresh or lightly toasted to ensure they absorb the syrup without becoming soggy. If you’re short on time, use a pre‑baked ladyfinger mix, but be sure to adjust the soaking time.
¾ cup granulated sugar is used in the syrup to sweeten the soak, ensuring each bite is perfectly balanced. A little sugar also helps the ladyfingers stay crisp while they hydrate. If you prefer a lower‑sugar version, substitute with a 25% reduction and add a splash of honey for natural sweetness.
¾ cup water provides the liquid base for the syrup, allowing the ladyfingers to soften without becoming mushy. Water also dilutes the sugar, preventing the syrup from becoming overly thick. Using sparkling water can add a subtle effervescence that enhances the overall texture.
1 teaspoon vanilla extract infuses the syrup with warmth and depth, complementing the citrus notes. Vanilla is a classic pairing with custard and enhances the overall flavor profile. If you’re using a vanilla bean, scrape the seeds and add the pod for an intensified aroma.
The Texture Crew
2¼ cups heavy cream is whipped into the custard, giving it a cloud‑like lightness and rich flavor. Heavy cream’s high fat content ensures a silky mouthfeel that’s indulgent yet not too heavy. For a lighter version, replace half the cream with whole milk.
2½ envelopes Knox gelatin or 28 g gold sheet gelatin is the secret to setting the custard. Gelatin gives the custard a firm yet tender structure that holds its shape when sliced. If you’re vegan, use agar‑agar as a plant‑based alternative, but note it requires a higher temperature to set.
4 tablespoons cold water is used to bloom the gelatin, ensuring it dissolves evenly and sets properly. Blooming gelatin prevents lumps and guarantees a smooth custard. If you’re in a hurry, use a small saucepan to dissolve the gelatin at a low temperature.
1 cup granulated sugar for the custard balances the cream’s richness and sweetens the eggs. The sugar also helps stabilize the custard’s texture. To reduce sugar, substitute ¼ cup of the sugar with a natural sweetener like stevia or monk fruit.
5 large eggs provide structure and richness to the custard. The yolks enrich the custard, while the whites help stabilize the mixture. If you’re concerned about raw eggs, use pasteurized eggs or cook the custard gently at a low temperature to ensure safety.
1 teaspoon vanilla extract for the custard rounds out the flavor, adding a warm, aromatic note that complements the lemon in the syrup. Vanilla also balances the richness of the eggs and cream. A dash of almond extract can be added for an extra layer of flavor.
1 cup whole milk adds moisture and smoothness, preventing the custard from becoming too dense. Milk also helps the custard set at a gentle temperature. If you prefer a richer custard, use whole milk instead of skim.
The Unexpected Star
½ cup candied fruit or 1 cup fresh fruit (strawberries, blueberries, raspberries, cherries, peaches, chopped small) adds a burst of color and natural sweetness. Candied fruit gives a chewy texture and deep flavor, while fresh fruit offers a bright, juicy contrast. Choose seasonal fruit for the freshest taste.
If you’re using fresh fruit, wash and dry it thoroughly to avoid excess moisture that can affect the custard’s texture. Slice berries into small pieces to ensure they’re evenly distributed throughout the dessert. For a dramatic presentation, arrange the fruit on top of the custard before chilling.
The Final Flourish
Optional fresh fruit for decoration adds a dazzling, vibrant finish that invites everyone to dig in. A few slices of kiwi or a sprinkle of mint can elevate the visual appeal. This garnish also adds a fresh, aromatic note that brightens each bite.
When decorating, consider arranging fruit in a symmetrical pattern or creating a small fruit tower that adds height and elegance. The garnish should be placed just before serving to keep the fruit crisp and colorful. If you’re serving a crowd, have a few extra fruit pieces ready for last‑minute garnishes.
Everything’s prepped? Good. Let’s get into the real action...
The Method — Step by Step
- Prep the Syrup: Combine ¾ cup sugar, ¾ cup water, and 1 teaspoon vanilla extract in a small saucepan. Heat over medium heat until the sugar dissolves, then add a few drops of lemon zest. Let the mixture cool slightly; it should still be warm enough to coat the ladyfingers without cooking them. This step is crucial for the delicate balance of sweet and citrus.
- Soak the Ladyfingers: Place the ladyfingers in a shallow dish and pour the warm syrup over them, ensuring each finger is fully saturated. Gently press them together to create a solid base. Let them soak for 5 minutes, then lift them out, allowing excess syrup to drip off. The ladyfingers should be moist but not soggy.
- Activate Gelatin: In a small bowl, sprinkle 2½ envelopes Knox gelatin over 4 tablespoons cold water. Let it bloom for 5 minutes, then gently heat until fully dissolved. This step ensures the gelatin will set the custard properly. Avoid boiling, as high heat can degrade gelatin’s setting power.
- Make the Custard: In a mixing bowl, whisk 5 large eggs with 1 cup sugar until pale and slightly thick. Add 1 cup whole milk and 2¼ cups heavy cream, whisking to combine. Gently fold in the dissolved gelatin, making sure it’s evenly distributed. This mixture should feel silky and smooth.
- Cook the Custard: Transfer the custard to a saucepan and cook over low heat, stirring constantly, until it thickens enough to coat the back of a spoon. This usually takes about 8-10 minutes. Do not let it boil; a gentle simmer preserves the custard’s delicate texture.
- Add Vanilla: Remove the custard from heat and stir in 1 teaspoon vanilla extract. Let it cool to room temperature; the custard will thicken further as it cools. This cooling phase is essential for achieving the right consistency.
- Assemble the Charlotte: Line a 9‑inch springform pan with the soaked ladyfingers, pressing them into the bottom and up the sides. Pour the custard over the ladyfingers, smoothing the top with a spatula. If you’re using fresh fruit, layer it on top now, leaving a small margin for the final garnish.
- Chill: Cover the pan with plastic wrap and refrigerate for at least 4 hours, preferably overnight, until the custard is firm and sliceable. The longer chill allows the flavors to meld and the texture to set perfectly.
- Serve: Release the springform pan, slice the Charlotte into wedges, and arrange on a platter. Garnish with fresh fruit and a drizzle of any remaining syrup if desired. Present it immediately to enjoy the contrast of crisp, sweet, and creamy layers.
That’s it — you did it. But hold on, I’ve got a few more tricks that'll take this to another level...
Insider Tricks for Flawless Results
The Temperature Rule Nobody Follows
Cooking the custard at exactly 170°F (77°C) ensures it thickens without curdling. Use a candy thermometer to monitor the temperature; this precision guarantees a smooth, velvety custard. If the custard reaches 180°F, it will become rubbery and lose its airy quality.
Why Your Nose Knows Best
During the cooling phase, the custard will emit a faint vanilla aroma that signals it’s ready. Trust your nose; if the scent is too strong, the custard may be overcooked. A subtle, sweet scent means the custard is perfectly set.
The 5‑Minute Rest That Changes Everything
After folding in the gelatin, let the custard rest for 5 minutes before cooking. This brief pause allows the gelatin to hydrate fully, resulting in a smoother final texture. Skipping this step can lead to uneven gelatin distribution.
Avoiding the Soggy Ladyfinger Dilemma
If you notice the ladyfingers absorbing too much syrup, reduce the soaking time or use a lighter syrup. Alternatively, toast the ladyfingers briefly before soaking to create a barrier that resists excess moisture. A crisp base is essential for a satisfying bite.
Choosing the Right Gelatin
Knox gelatin envelopes are convenient, but gold sheet gelatin provides a cleaner texture. If you’re using gold sheet gelatin, dissolve it in cold water for 5 minutes, then gently heat until fully dissolved. The choice of gelatin affects the firmness of the custard.
Finishing Touches for a Showstopper
Just before serving, dust the top with powdered sugar or drizzle a thin layer of caramel sauce. These finishing touches add visual appeal and a burst of flavor. A simple garnish of mint leaves can also elevate the presentation.
Creative Twists and Variations
This recipe is a playground. Here are some of my favorite ways to switch things up:
Tropical Twist
Swap fresh berries for diced mango and pineapple, and add a splash of coconut milk to the custard. The tropical fruits bring a bright, exotic flavor that pairs wonderfully with the vanilla custard. Garnish with toasted coconut flakes for added crunch.
Chocolate Lover’s Dream
Add 2 tablespoons of cocoa powder to the custard for a rich chocolate base. Sprinkle melted dark chocolate on top before chilling for an extra indulgent touch. Pair with a drizzle of chocolate ganache for a decadent finish.
Berry Burst Variation
Use a mix of strawberries, blueberries, and raspberries in the custard instead of fresh fruit. This creates a vibrant, colorful dessert that’s perfect for summer gatherings. The natural sugars in the berries enhance the custard’s sweetness.
Herbal Infusion
Add a sprig of fresh rosemary or thyme to the syrup for a subtle herbal note. The herb’s aroma complements the vanilla, adding depth to the flavor profile. Remove the sprig before serving to keep the dessert visually appealing.
Nutty Variation
Fold toasted almond slivers into the custard for a crunchy texture and nutty flavor. The almonds also add a subtle caramelized note that pairs well with the creamy custard. Sprinkle chopped pistachios on top for a pop of color.
Spiced Delight
Add a pinch of ground cinnamon and nutmeg to the custard for a warm, comforting flavor. The spices enhance the vanilla and lemon notes, creating a cozy dessert perfect for fall. Garnish with a dusting of cinnamon for a finished look.
Storing and Bringing It Back to Life
Fridge Storage
Store the Charlotte in an airtight container in the refrigerator for up to 3 days. The custard stays firm, and the flavors continue to meld. When ready to serve, let it sit at room temperature for 10 minutes to soften slightly.
Freezer Friendly
Wrap the assembled Charlotte tightly in plastic wrap, then place it in a freezer‑safe container. Freeze for up to 2 weeks. When you’re ready to eat, thaw overnight in the refrigerator. The custard may become slightly softer, but the texture remains delightful.
Best Reheating Method
Reheat the Charlotte gently in a warm oven at 300°F (150°C) for 5 minutes to revive the custard’s softness. Avoid microwaving, as uneven heating can cause the custard to split. A quick warm-up restores the dessert’s original mouthfeel.