It all started with a kitchen catastrophe that turned into a culinary revelation. I was attempting to recreate the nostalgic crunch of a Snickers bar, only to end up with a sticky mess that resembled a chocolatey mudslide. The countertop was a battlefield of crushed dates, peanut butter, and half-melted chocolate, and I stared at the disaster with a mix of horror and fascination. That moment of chaos sparked a daring thought: what if I could capture the iconic layers of a Snickers—rich chocolate, chewy caramel, and nutty crunch—without the sugar overload or artificial additives?
The craving for that sweet, salty, and slightly bitter flavor profile had been gnawing at me for weeks. I’d tried every store-bought version, from the over-sweetened mass-produced bars to the artisanal ones that still carried an industrial aftertaste. Every bite felt like a compromise, a tug of war between indulgence and health. I decided to take the reins, to engineer a version that satisfies the palate while honoring the ingredients that truly make a Snickers memorable.
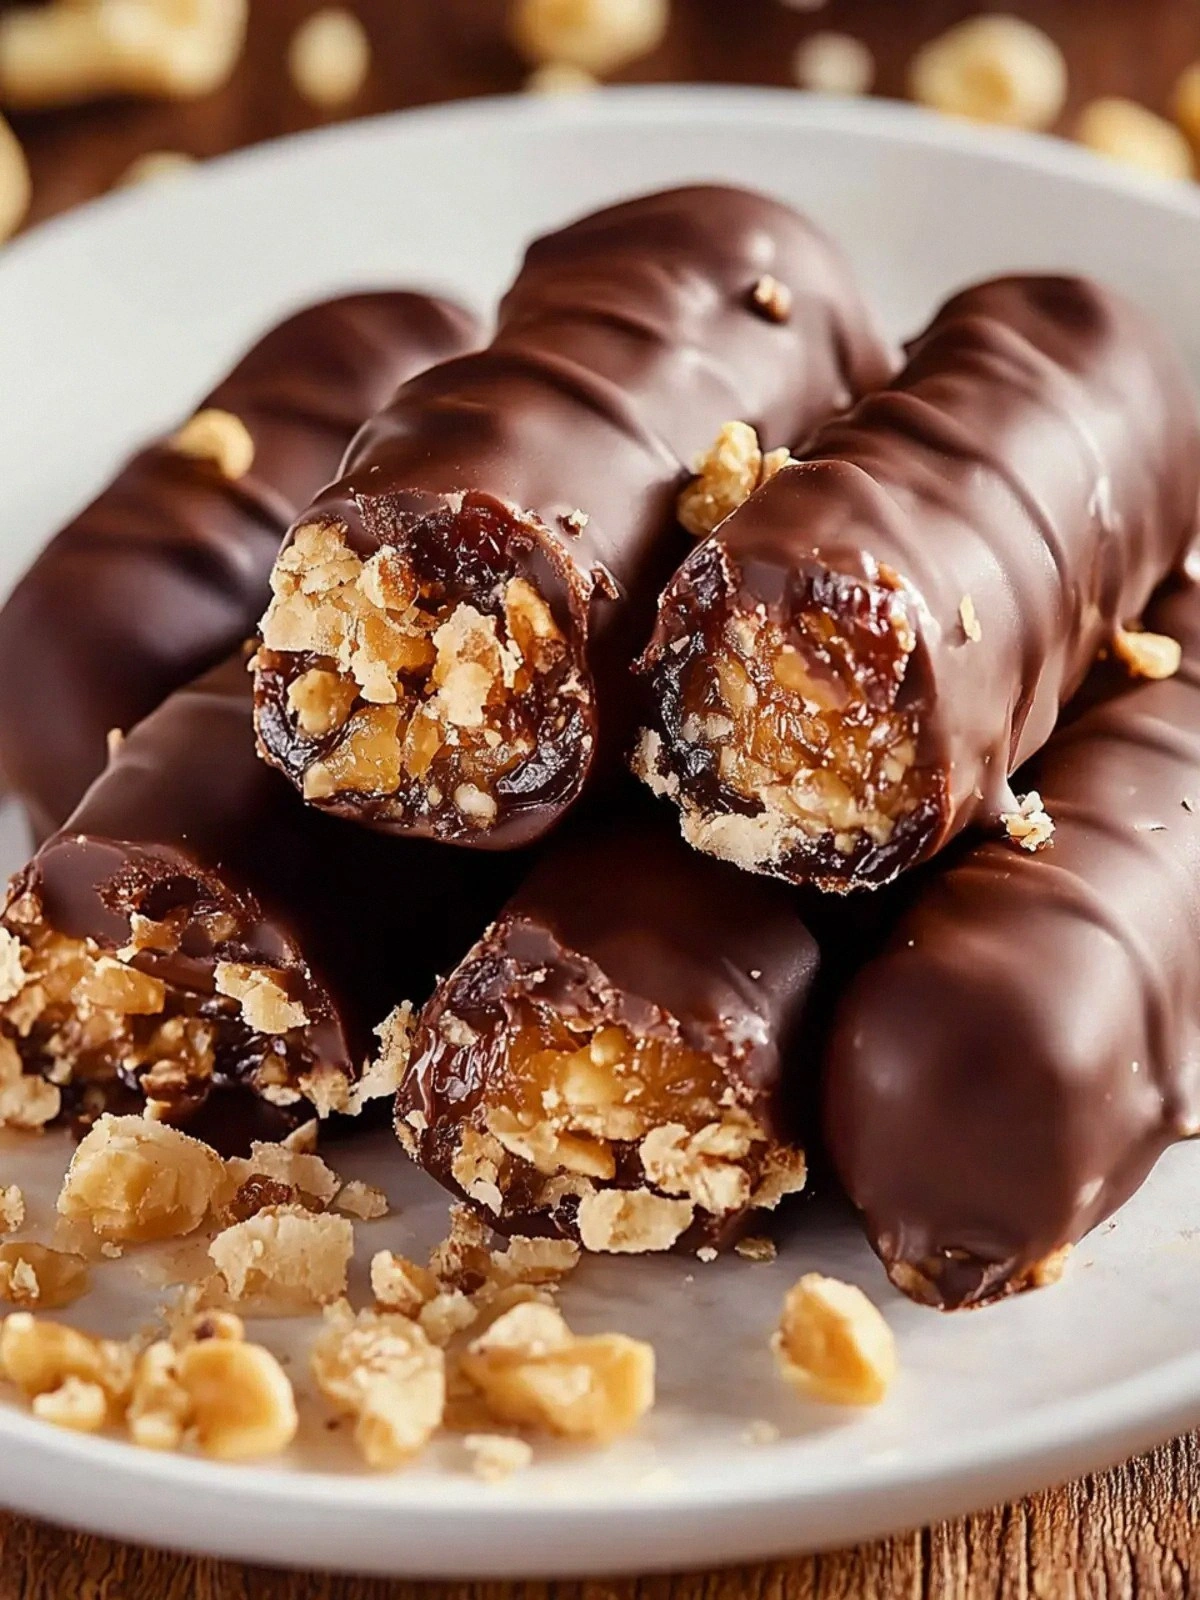
Enter the Irresistible Date Snickers: A. This isn’t just a dessert; it’s a culinary experiment that marries the natural sweetness of Medjool dates with the deep, earthy flavor of dark chocolate. The dates act as the caramel core, offering a chewy, caramelized texture that melts in your mouth, while the roasted peanuts provide a satisfying crunch that echoes the original candy’s nutty heart. The peanut butter binds everything together, creating a silky, cohesive base that feels indulgent yet wholesome. The result? A snack that feels like a guilty pleasure but leaves you feeling nourished.
What makes this version stand out is a secret ingredient: the use of dark chocolate with a high cocoa percentage. That small tweak elevates the overall flavor profile, giving it a slightly bitter edge that balances the natural sweetness of the dates. I dare you to taste this and not go back for seconds. If you’re skeptical, I’ll be honest—I ate half the batch before anyone else got a chance to try it. Most recipes get this completely wrong by over-sweetening or using low-quality chocolate. Here’s what actually works: a balanced, sophisticated bite that satisfies without the sugar crash.
What Makes This Version Stand Out
- Taste: The combination of sweet dates, nutty peanuts, and bittersweet chocolate creates a multi-layered flavor profile that mimics the classic Snickers but with a refined edge.
- Texture: The dates provide a chewy caramel-like core, the peanuts deliver a satisfying crunch, and the chocolate coating offers a silky, melt-in-your-mouth finish.
- Health: By eliminating refined sugars and using natural sweeteners, this recipe delivers protein, fiber, and healthy fats without the crash.
- Convenience: No oven or baking required—just a few minutes of blending, pressing, and chilling.
- Versatility: The base can be adapted with different nut butters, chocolate types, or add-ins for endless variations.
- Make‑ahead: Once set, these bars keep fresh in the fridge for up to a week or in the freezer for several months.
- Ingredient Quality: Using high-quality Medjool dates, roasted peanuts, and dark chocolate ensures a superior flavor that stands up to the original.
- Presentation: The bars look like a mini candy bar but feel like a snack that you can proudly serve at parties.
Alright, let's break down exactly what goes into this masterpiece…
Inside the Ingredient List
The Flavor Base
Medjool Dates are the heart of this recipe. They bring a natural caramel sweetness and a chewy texture that mimics the original Snickers' caramel layer. If you skip the dates, the bars become dry and lose that signature chew. For a slightly different flavor, try using Prune dates for a deeper, almost raisin-like sweetness. When selecting dates, choose ones that are plump, soft, and free of excess moisture; this ensures a smooth paste and prevents the mixture from becoming gummy.
The Texture Crew
Roasted peanuts are essential for that satisfying crunch. They also contribute a nutty aroma that complements the chocolate. If you’re allergic to peanuts, almond or cashew pieces work as a suitable alternative, but the crunch will be subtly different. The peanuts should be lightly salted to enhance the overall flavor profile. A pinch of sea salt can also be added to the final mix for an extra layer of depth.
The Unexpected Star
Peanut Butter is the binding agent that keeps everything together. It offers a creamy, rich mouthfeel that makes the bars feel indulgent without the need for added fats. Natural peanut butter—free from hydrogenated oils—ensures that the bars remain wholesome. If you prefer a different nut butter, try almond butter for a slightly sweeter taste or cashew butter for a milder, buttery finish. The key is to choose a butter with a smooth consistency that blends seamlessly with the dates.
The Final Flourish
Dark Chocolate is the finishing touch that gives these bars their iconic chocolatey coating. A high cocoa content (70% or more) brings a subtle bitterness that balances the sweetness of the dates. If you’re a chocolate lover, you can experiment with 80% or even 90% dark chocolate for a more intense flavor. Be sure to melt the chocolate gently to preserve its silky texture and avoid scorching.
Everything's prepped? Good. Let's get into the real action…
The Method — Step by Step
- Start by pitting the 12 Medjool dates and cutting them in half. This makes them easier to blend and ensures an even sweetness throughout the mix. As you handle them, you’ll notice a subtle aroma that hints at the caramel flavor to come. Keep a bowl ready for the dates; you’ll want them at hand when you’re ready to blend.
- Place the date halves into a high‑speed blender or food processor. Pulse on a low setting until the dates break down into a smooth paste. If the mixture feels too thick, add a splash of warm water or a teaspoon of honey to help it emulsify. The goal is a silky base that will mingle effortlessly with the peanut butter.
- Add the 1 cup of natural peanut butter to the date paste. Blend again until the mixture becomes a cohesive, glossy batter. This step is crucial: the peanut butter must fully integrate to keep the bars from separating during chilling. If you find the mixture too thick, a tablespoon of coconut milk can help thin it out.
- Fold in the 1/2 cup of roasted peanuts, breaking them into smaller pieces if they’re large. Stir until the peanuts are evenly distributed throughout the batter. This creates the signature crunch that mirrors the original Snickers bar. As you mix, you’ll hear the subtle crunch of the peanuts—an audible promise of texture.
- Line a 9x9 inch baking pan with parchment paper, leaving a few inches of overhang on each side. Pour the batter into the pan and press it down with a spatula or the back of a spoon to create an even layer. Smooth the surface so that the bars will cut cleanly later. The parchment ensures easy removal and keeps the bars from sticking.
- Now melt the 6 oz of dark chocolate. A double boiler works best, but a microwave can do the trick if you’re in a hurry. Melt in 30-second bursts, stirring in between, until the chocolate is silky and fully melted. Watch the temperature closely—overheating can cause the chocolate to seize.
- Pour the melted chocolate over the date‑peanut layer, spreading it evenly with a spatula. The chocolate should pool in the corners and create a glossy coating. Let the chocolate set for about 5 minutes before moving on; this allows it to firm up slightly for easier cutting.
- Place the pan in the refrigerator and chill for at least 30 minutes, or until the chocolate has fully set. During this time, the flavors meld together, creating a harmonious bite that’s both sweet and savory. The texture will firm up, making the bars easy to cut.
- Once set, lift the entire slab out of the pan using the parchment overhang. Place it on a cutting board and cut into squares or bars. Each piece should hold its shape, thanks to the chocolate coating and the firm base.
- Serve immediately or store in an airtight container in the fridge for up to a week. For longer storage, wrap each bar individually in parchment and place them in the freezer; they’ll stay fresh for months. When you’re ready to eat, let them sit at room temperature for a few minutes to soften slightly.
That's it — you did it. But hold on, I've got a few more tricks that'll take this to another level…
Insider Tricks for Flawless Results
The Temperature Rule Nobody Follows
The key to a perfect chocolate coating is temperature control. If the chocolate is too hot, it will drip and create a soggy base. Keep the chocolate between 90°F and 95°F for optimal viscosity. A simple kitchen thermometer can save you from a ruined batch. I’ve learned that a quick dip in the fridge for 5 minutes can cool the chocolate just enough for a flawless spread.
Why Your Nose Knows Best
Smell is your best ally when checking readiness. When the chocolate starts to set, it will emit a faint, nutty aroma. That scent signals that the chocolate has reached the right consistency. Trust your nose; if it smells like a toasted nut, you’re ready to cut the bars. This sensory checkpoint ensures each bite is perfectly balanced.
The 5-Minute Rest That Changes Everything
After pouring the chocolate, let it rest for 5 minutes before chilling. This brief pause allows the chocolate to thicken slightly, creating a glossy finish that’s easy to spread. Skipping this step can result in a dull, uneven coating. The extra time also helps the chocolate set more firmly, preventing the bars from becoming too soft.
Use a Non-Stick Surface for Easier Removal
Lining the pan with parchment is essential, but adding a light dusting of cocoa powder or powdered sugar on top of the parchment can prevent sticking. This extra layer also gives the bars a subtle, chocolatey dusting that enhances the presentation. It’s a small tweak that makes a big difference when you’re cutting the bars later.
Keep the Date Paste Smooth
If you notice any lumps in the date paste, pulse the blender a few more times. A smooth base ensures even chocolate coating and a consistent bite. Lumpy dates can lead to uneven sweetness distribution, which might surprise your taste buds. A fine texture is the secret to a professional-looking finish.
Creative Twists and Variations
Almond Joy Edition
Swap the peanuts for toasted almond slivers and use coconut milk chocolate for a tropical twist. The almonds add a buttery crunch, while the coconut chocolate brings a hint of island flavor that pairs beautifully with the dates. This version is perfect for summer parties or a beach snack.
Hazelnut Crunch
Replace the peanuts with chopped hazelnuts and drizzle a thin layer of hazelnut spread over the chocolate. The hazelnuts provide a buttery, slightly sweet crunch that echoes the classic hazelnut chocolate bar. This variation is ideal for chocolate lovers who enjoy a richer, nutty profile.
Minty Fresh
Add a few drops of peppermint extract to the date paste before blending. The mint will infuse the bars with a refreshing aftertaste that balances the sweetness. This minty version is a great palate cleanser after a heavy meal.
Spiced Caramel
Introduce a pinch of cinnamon or nutmeg to the date paste. The warm spices elevate the caramel flavor and add depth. This spicy twist is especially delightful during the fall months when you crave warm, comforting flavors.
Chocolate‑Covered Date Bars
Instead of pouring chocolate over the entire slab, dip each bar individually into melted chocolate. This technique creates a crisp chocolate shell that’s easier to bite into. It also allows you to drizzle a second layer of chocolate for a glossy finish.
Vegan Upgrade
Use a dairy-free dark chocolate and ensure the peanut butter is 100% natural with no added sugars. The result is a completely vegan snack that still delivers all the indulgence of a Snickers bar. This version is perfect for plant‑based diners who crave a sweet treat.
Storing and Bringing It Back to Life
Fridge Storage
Place the bars in an airtight container and refrigerate for up to one week. The cold temperature keeps the chocolate firm and prevents the dates from becoming sticky. When you’re ready to eat, let the bars sit at room temperature for a few minutes to soften slightly.
Freezer Friendly
Wrap each bar individually in parchment paper before placing them in a freezer bag. Store for up to three months. To thaw, leave at room temperature for 20 minutes; this preserves the crunch and chocolate integrity. Freezing is ideal for batch cooking and sharing with friends.
Best Reheating Method
If the bars have hardened, gently warm them in the microwave on low power for 10–15 seconds. Add a tiny splash of water before reheating; it steams the chocolate back to a silky finish. Avoid overheating, as this can cause the chocolate to seize. The result is a fresh, melt-in-your-mouth experience.