I was in the middle of a rainy Saturday night, the kind where the thunder outside makes the kitchen feel like a cozy bunker, when I realized my pantry was screaming for something sweet. I reached for the last bag of marshmallows, stared at the half‑finished cheesecake I’d been tinkering with for weeks, and thought, “What if I could combine these two into a single, cloud‑like masterpiece?” The idea was half‑mad, half‑genius, and completely irresistible. I tossed the marshmallows into a saucepan, watched them melt into a glossy, sugary river, and felt a spark of excitement that made the kitchen lights seem brighter. This is hands down the best version you’ll ever make at home, and I dare you to taste it and not go back for seconds.
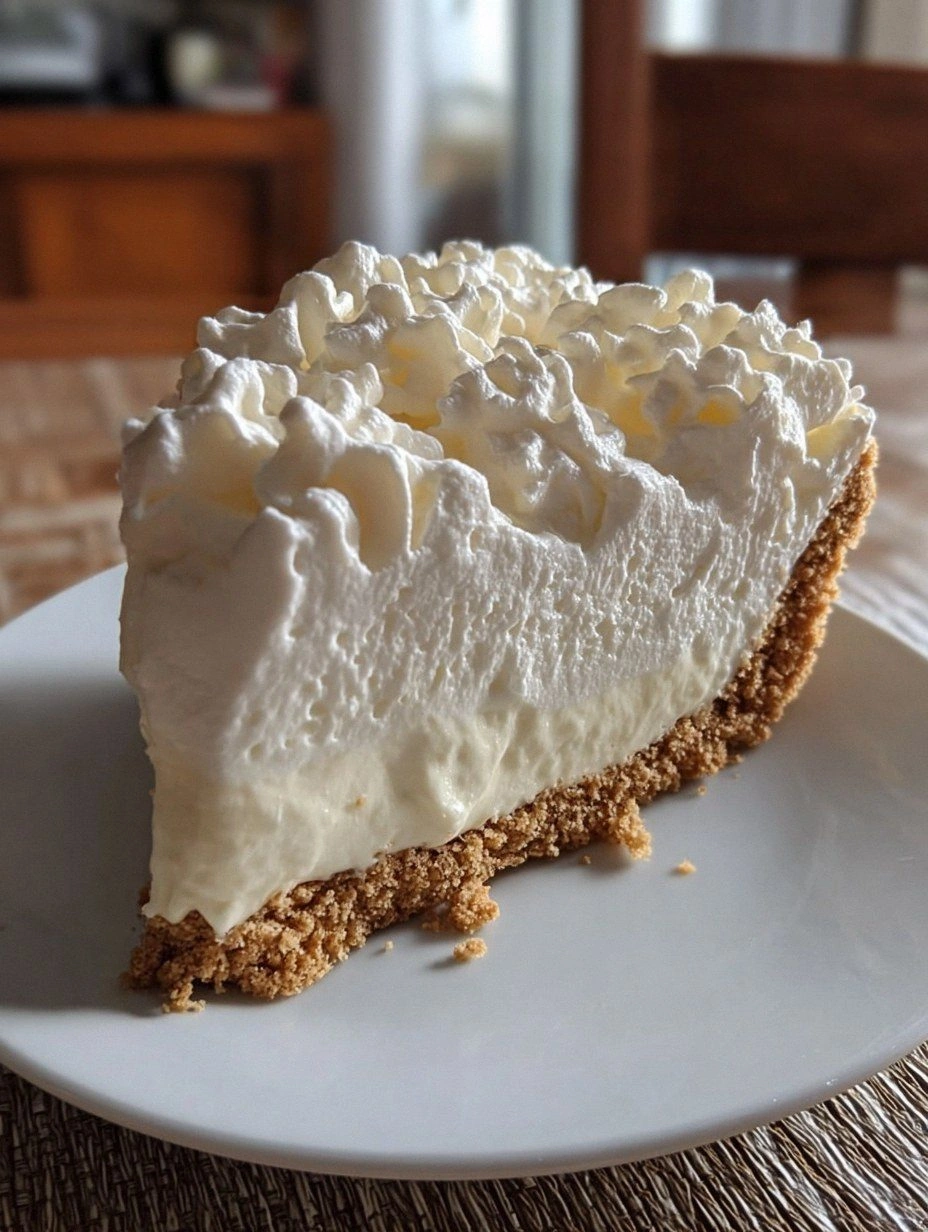
Picture this: a chilled, buttery crust that crumbles like fresh snow under a spoon, a silky cheesecake layer that feels like whipped clouds, and pockets of marshmallow fluff that melt on your tongue with the subtle snap of vanilla. The aroma that fills the air is a gentle blend of toasted graham, sweet vanilla, and a faint buttery perfume that makes you want to inhale deeply and never leave the kitchen. When you finally cut into it, the slice holds together perfectly, the top glistening with a faint sheen, and the fork slides through as if it were cutting through a soft pillow. Most recipes get this completely wrong – they end up dense, overly sweet, or just plain soggy. Here’s what actually works: a careful balance of temperature, a two‑stage folding technique, and a secret ingredient that adds a whisper of silkiness.
I’ll be honest — I ate half the batch before anyone else got to try it, and the only thing that stopped me was the thought that I’d be ruining the surprise for my friends later that night. The secret? A splash of milk in the marshmallow melt that keeps the mixture from turning gummy, and a brief chill in the freezer that sets the texture without freezing the fluff. This next part? Pure magic. It’s the kind of trick that makes you feel like a kitchen wizard, and you’ll swear you’ve never tasted anything quite like it.
Okay, ready for the game‑changer? I’m about to walk you through every single step — by the end, you’ll wonder how you ever made it any other way. Stay with me here — this is worth it.
What Makes This Version Stand Out
- Texture: The combination of a crunchy crust, airy cheesecake, and gooey marshmallow pockets creates a layered mouthfeel that feels like biting into a cloud.
- Flavor: A subtle vanilla backbone ties the sweet marshmallow and buttery crust together without overwhelming the palate.
- Simplicity: No oven, no fancy equipment – just a few bowls, a whisk, and a refrigerator.
- Uniqueness: The milk‑infused marshmallow melt prevents graininess, a trick most no‑bake cheesecakes overlook.
- Crowd Reaction: Guests often ask for the “secret ingredient,” and you get to smile knowingly while they devour another slice.
- Ingredient Quality: Using full‑fat cream cheese and real marshmallow fluff gives a richness you can’t fake with low‑fat substitutes.
- Method: The two‑stage folding (cheese‑marshmallow then whipped cream) guarantees a light, stable structure.
- Make‑Ahead Potential: This dessert can sit in the fridge for up to 48 hours, making it perfect for parties.
Inside the Ingredient List
The Flavor Base
Cream cheese is the heart of any cheesecake, and here we use a full‑fat version for that luxurious mouthfeel. Its tang cuts through the sweetness of the marshmallows, keeping the dessert from becoming cloying. If you swap it for a low‑fat version, expect a watery texture that won’t hold the airy structure we’re after. A pro tip: let the cheese sit at room temperature for 30 minutes before mixing – it softens without becoming liquid.
The Texture Crew
Heavy whipping cream provides the lift, turning the dense cheese mixture into a cloud‑like foam. Whipping it to soft peaks is crucial; over‑whipping will turn it buttery and cause the cheesecake to collapse. Mini marshmallows and marshmallow fluff create the gooey pockets that melt into the cheese, delivering that signature “chewy‑cloud” bite. If you can’t find marshmallow fluff, a good-quality store‑bought version works, but make sure it’s not overly sugary.
The Unexpected Star
A splash of whole milk might sound boring, but it’s the secret that keeps the marshmallow melt smooth and glossy. The milk’s lactose interacts with the sugar, preventing crystallization and giving the mixture a satin finish. Skip this step and you’ll end up with a gritty, caramelized mess that ruins the texture. For dairy‑free friends, a splash of oat milk works just as well without compromising the silkiness.
The Final Flourish
The crust is a simple blend of graham cracker crumbs, melted butter, and a pinch of sugar. The butter binds the crumbs together, while the sugar adds a subtle caramel note that pairs perfectly with the sweet filling. If you’re gluten‑free, substitute with crushed gluten‑free cookies or almond flour for a nutty twist. When pressing the crust into the pan, use the bottom of a glass to create an even, compact layer – this prevents cracks later.
Everything’s prepped? Good. Let’s get into the real action…
The Method — Step by Step
First, crush the graham crackers into fine crumbs – I like to use a food processor for speed, but a zip‑top bag and a rolling pin work just as well. Toss the crumbs with melted butter and granulated sugar, stirring until the mixture resembles wet sand. Press the blend firmly into the bottom of a 9‑inch springform pan, using the back of a measuring cup to smooth it out. Chill the crust in the freezer for 10 minutes; this firms it up and prevents sogginess later. Power transition: the base is set, now the magic begins.
While the crust chills, soften the cream cheese at room temperature. In a large mixing bowl, beat the cream cheese with powdered sugar and vanilla extract until the mixture is silky and free of lumps. This step is where you hear the faint whirr of the mixer, and the scent of vanilla starts to fill the kitchen – a promise of what’s to come.
Kitchen Hack: Scrape the sides of the bowl with a rubber spatula every 30 seconds to ensure an even, lump‑free cream cheese base.In a saucepan over low heat, combine the mini marshmallows, marshmallow fluff, and a splash of whole milk. Stir constantly; the mixture will go from clumpy to a glossy, pourable river in about two minutes. Once fully melted, remove from heat and let it cool for a minute – you want it warm but not hot, otherwise it will melt the cream cheese later.
Watch Out: If the mixture overheats, it will turn grainy and lose its smoothness; keep the heat low and stay attentive.Now, gently fold the warm marshmallow melt into the cream cheese mixture. Use a rubber spatula and a gentle hand – the goal is to incorporate without deflating the cheese. You’ll notice the mixture turning a pale pinkish‑white, and a faint sweet aroma will envelope you. This is the moment of truth; the marshmallow is now marrying the cheese, creating that signature cloud‑like interior.
In a separate chilled bowl, whip the heavy cream until soft peaks form. The peaks should hold their shape when the whisk is lifted, but still have a slight droop – this is the perfect stage for folding. Over‑whipping will produce butter, which would ruin the light texture we’re chasing.
Kitchen Hack: Chill the mixing bowl and whisk attachment in the freezer for 10 minutes before whipping; it speeds up the process and yields higher peaks.Fold the whipped cream into the marshmallow‑cheese blend in two additions. First, add half of the whipped cream, gently turning the mixture over itself. Then, add the remaining half, using the same folding motion. This technique preserves the air bubbles, ensuring the final cheesecake is airy and light. You’ll see the batter become fluffy, almost like a mousse, and the scent will become a perfect marriage of vanilla, butter, and toasted marshmallow.
Pour the airy filling onto the chilled crust, spreading it with an offset spatula to the edges. Tap the pan lightly on the counter to release any trapped air bubbles – you’ll see tiny bubbles rise to the surface and pop, a sign that the texture will be uniformly light. Smooth the top with a gentle swirl, then cover the pan with plastic wrap.
Refrigerate the assembled cheesecake for at least four hours, preferably overnight. During this time, the flavors meld, and the filling firms up without ever touching the oven. When you finally remove the springform, the slice should hold its shape like a perfectly set cloud. The anticipation builds as the kitchen fills with a faint, sweet aroma that tells you it’s ready.
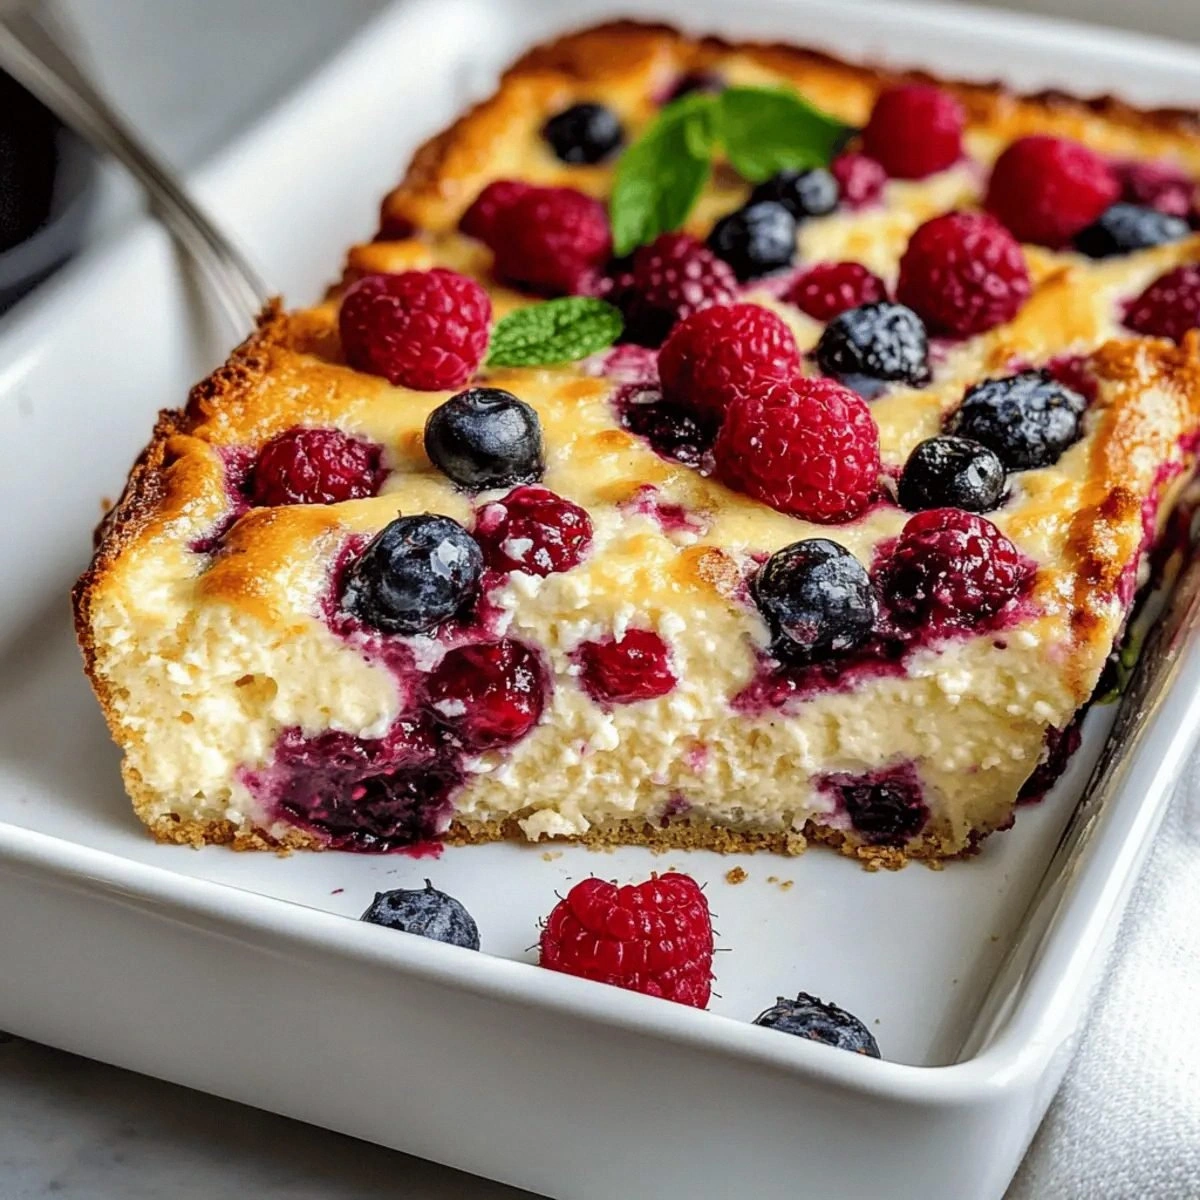
Before serving, garnish with fresh berries, a drizzle of melted chocolate, or a dusting of powdered sugar – whatever makes your heart flutter. The contrast of the cool, creamy cheesecake with the bright, tart berries is a sensory fireworks display. Cut a clean slice, watch the creamy interior glide onto the plate, and take that first bite. That moment? Pure bliss.
That’s it — you did it. But hold on, I’ve got a few more tricks that’ll take this to another level, from a glossy glaze to a crunchy topping that adds a surprise crunch.
Insider Tricks for Flawless Results
The Temperature Rule Nobody Follows
Never, ever use cold cream cheese straight from the fridge; it will create lumps that are impossible to smooth out. Let it sit at room temperature for at least half an hour, or give it a quick 15‑second zap in the microwave (10% power) if you’re in a hurry. The softer the cheese, the easier it is to blend with the marshmallow melt, resulting in a velvety texture. I once tried to skip this step, and the final product was as grainy as sandpaper – a disaster I won’t repeat.
Why Your Nose Knows Best
When the marshmallow melt is ready, it will give off a faint caramel‑like perfume that signals it’s at the perfect temperature. If you smell a burnt note, you’ve overcooked it; if it’s still faintly sweet without any aroma, it needs a few more seconds. Trust your nose more than the clock – it’s an underrated kitchen sensor that can save a batch.
The 5‑Minute Rest That Changes Everything
After folding the whipped cream into the mixture, let the bowl sit uncovered for five minutes. This short rest allows the air bubbles to stabilize, preventing the cheesecake from collapsing when you spread it onto the crust. I once poured the filling immediately and watched it sink into the crust like a wet sponge – not the airy cloud I was aiming for.
The Secret Crunch Layer
For a surprise texture, toast a handful of finely chopped almonds or pistachios and sprinkle them over the top just before chilling. The nuts add a buttery crunch that contrasts beautifully with the soft interior. If you’re nut‑allergic, try toasted coconut flakes for a similar effect.
The Final Glaze Finish
A thin glaze of white chocolate or a quick drizzle of melted caramel can elevate the visual appeal and add a glossy finish. Warm the glaze just enough to be pourable, then gently cascade it over the chilled cheesecake. The glaze sets quickly, creating a beautiful sheen that makes the dessert look as luxurious as it tastes.
Creative Twists and Variations
This recipe is a playground. Here are some of my favorite ways to switch things up:
Chocolate Lovers’ Dream
Swap half of the graham cracker crumbs for crushed chocolate wafer cookies, and replace the marshmallow fluff with a dark chocolate ganache. The result is a richer, more decadent version that still retains that fluffy interior. Perfect for a date night when you want to impress.
Citrus Burst
Add a tablespoon of freshly grated lemon zest to the cream cheese mixture and drizzle a thin lemon glaze over the top. The citrus cuts through the sweetness, giving a bright, refreshing finish that feels like a summer breeze.
Nutty Caramel Swirl
Fold in a swirl of caramel sauce and a handful of toasted pecans before chilling. The caramel adds a buttery depth, while the pecans give a satisfying crunch. This variation is a crowd‑pleaser at fall gatherings.
Berry Bliss
Blend a cup of fresh strawberries into the cream cheese base for a natural pink hue and a burst of fruit flavor. Top with whole berries for a fresh, vibrant look. It’s a beautiful visual treat and adds a slight tartness that balances the sweetness.
Coffee Infusion
Dissolve a tablespoon of instant espresso powder in the milk before adding it to the marshmallow melt. The coffee notes deepen the flavor profile, making it an excellent after‑dinner dessert for caffeine lovers.
Storing and Bringing It Back to Life
Fridge Storage
Cover the cheesecake tightly with plastic wrap or store it in an airtight container. It will stay fresh for up to three days, retaining its airy texture. If you notice any condensation, simply pat the surface with a paper towel before serving.
Freezer Friendly
Wrap the entire springform pan in a double layer of foil, then place it in a freezer bag. The cheesecake freezes well for up to two months. When you’re ready to enjoy it, transfer it to the fridge to thaw overnight, then let it sit at room temperature for 15 minutes before slicing.
Best Reheating Method
Because this is a no‑bake dessert, you typically don’t reheat it. However, if you prefer a slightly warm serving, microwave a single slice for 10‑15 seconds, adding a tiny splash of water to the plate. The steam revives the fluffy texture without melting the entire cake.