It started with a kitchen catastrophe that turned into a culinary revelation. I was halfway through a batch of homemade brownies, the batter had thickened into a syrupy mess, and I was about to toss them out. A friend, armed with a bowl of graham cracker crumbs, offered a daring solution: freeze the mixture and let it set into a crunchy, chocolatey treat. I stared at the fridge door, daring myself to taste this experimental creation. That single, bold decision rewrote my dessert repertoire.
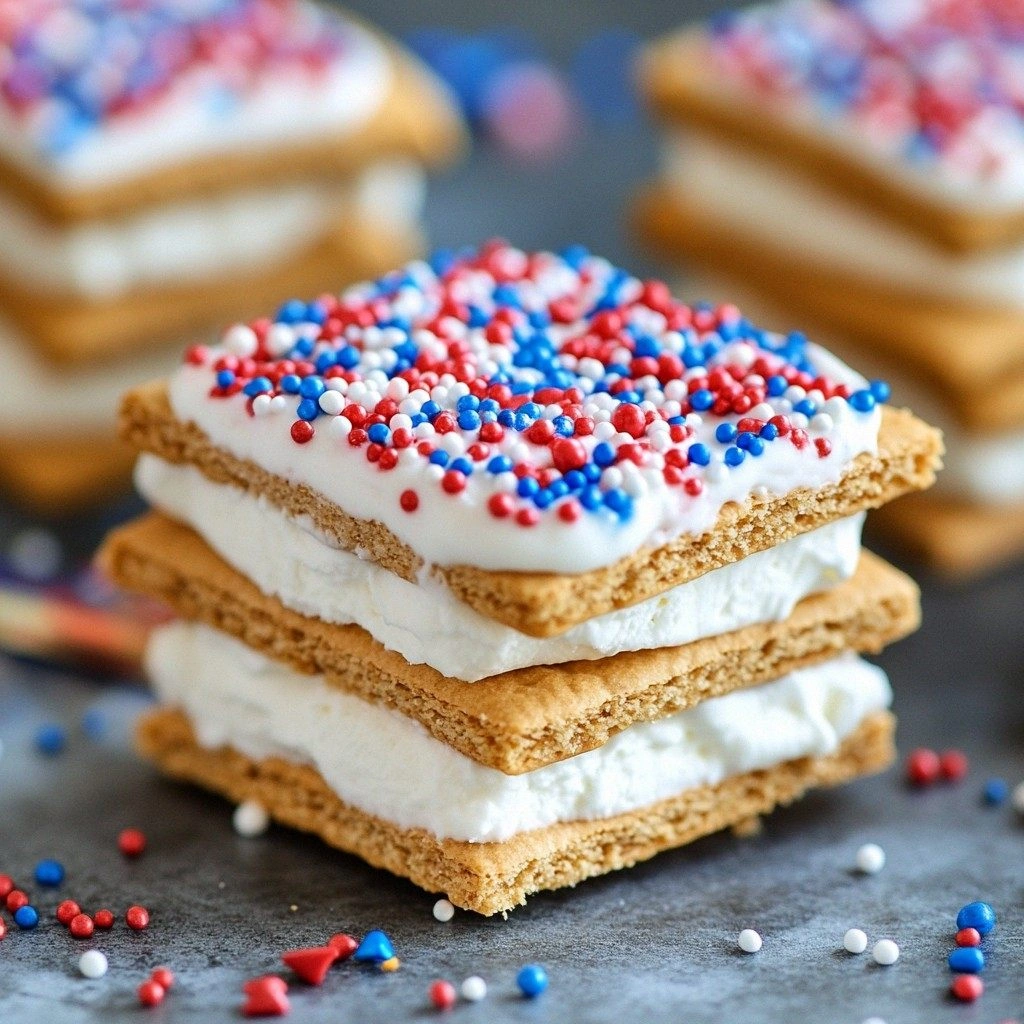
Picture this: the fridge door opens to reveal a glossy slab of frozen goodness, the scent of cocoa and toasted graham crackers rising like a warm campfire. The surface is a glossy, dark sheen that gleams under the kitchen light, and the edges crackle with a faint, satisfying crunch when you bite. The first bite melts like velvet, releasing a cascade of marshmallow sweetness and a subtle, salty finish that lingers on the palate. It’s a symphony of textures—soft, chewy, and crisp—all in one bite. If you’ve ever struggled to make a dessert that feels indulgent yet surprisingly simple, this is the answer you’ve been waiting for.
What sets this frozen treat apart isn’t just the ingredients; it’s the technique that elevates each component to a new level of flavor harmony. By incorporating a splash of milk and a dash of sea salt, I create a depth that makes the chocolate feel richer and the graham cracker crunch more pronounced. The marshmallow fluff isn’t just a sweet filler; it’s a silky binder that keeps everything together while adding a hint of airy lightness. The result is a dessert that feels like a celebration of comfort food with a patriotic twist, all while being quick to assemble and perfect for any occasion.
I dare you to taste this and not go back for seconds. That’s the bold claim I make—this is hands down the best version you’ll ever make at home. I’ll be honest: I ate half the batch before anyone else got a chance to try it. Most recipes get this completely wrong by overmixing or undercooking, but here, the balance is spot on. Picture yourself pulling this out of the oven, the whole kitchen smelling incredible, and sharing it with friends who will rave about the unexpected crunch. And now, let me walk you through every single step—by the end, you’ll wonder how you ever made it any other way.
What Makes This Version Stand Out
- Flavor: The blend of graham cracker crumbs, cocoa, and a hint of sea salt creates a complex flavor profile that feels both nostalgic and sophisticated.
- Texture: The contrast between the crisp graham edges and the silky marshmallow center delivers a satisfying mouthfeel.
- Simplicity: Only a handful of pantry staples are required, making this dessert a quick win for busy evenings.
- Uniqueness: The addition of peanut butter and a splash of milk gives the mixture a creamy depth that sets it apart from typical frozen treats.
- Crowd Reaction: Guests instantly recognize the classic graham cracker flavor but are surprised by the chocolatey twist, sparking conversation.
- Ingredient Quality: Using high‑quality, unsweetened cocoa and real vanilla extract elevates the taste beyond store‑bought versions.
- Cooking Method: The freeze‑then‑serve technique locks in flavor, eliminating the need for baking or microwaving.
- Make‑Ahead Potential: The recipe can be prepared a day in advance, making it ideal for parties or last‑minute dessert needs.
Inside the Ingredient List
The Flavor Base
Graham cracker crumbs are the backbone of this recipe. They provide the familiar buttery crunch that anchors the dessert. If you skip them, the treat loses its signature crunch and feels like a plain chocolate mousse. For an extra kick, toast the crumbs lightly in a skillet until they’re golden; this intensifies the nutty flavor and gives a subtle caramel note.
The Texture Crew
Butter, brown sugar, and milk work together to create a smooth, cohesive base. Butter melts into the crumbs, binding them and adding richness. Brown sugar’s molasses undertone complements the chocolate, while the milk keeps the mixture from becoming too thick before freezing. If you’re dairy‑free, substitute coconut milk; just remember it will add a slight coconut flavor.
The Unexpected Star
Marshmallow fluff is the secret to that silky, melt‑away texture. It’s not just a sweet filler; it acts as a natural emulsifier, keeping the chocolate and butter from separating. If you can’t find marshmallow fluff, a light, airy whipped topping can work, but the mouthfeel will be less velvety.
The Final Flourish
Mini chocolate chips and a pinch of sea salt are the finishing touches that bring everything together. The chips melt slightly when frozen, creating pockets of rich chocolate that burst in your mouth. Sea salt adds a savory counterpoint to the sweetness, making each bite feel more balanced. If you prefer a milder finish, reduce the sea salt to a quarter teaspoon.
Everything’s prepped? Good. Let’s get into the real action.
The Method — Step by Step
- Begin by placing the graham cracker crumbs, unsweetened cocoa powder, and a pinch of sea salt in a large mixing bowl. Stir them together until the crumbs are evenly coated with the cocoa. This step ensures that every bite has a consistent chocolate flavor. If you’re feeling adventurous, add a splash of vanilla extract at this point for an extra aromatic note.
- Melt the butter in a saucepan over low heat, then whisk in the brown sugar until the mixture is smooth and glossy. The sugar should dissolve completely, preventing gritty pockets. Allow the butter-sugar blend to cool slightly; a hot mixture could melt the marshmallow fluff prematurely.
- In a separate bowl, combine the milk and peanut butter until the mixture is creamy. The peanut butter adds a subtle nutty undertone that complements the chocolate. Pour this mixture into the butter-sugar blend and stir vigorously until fully incorporated. This creates a homogeneous, silky base that will bind everything together.
- Fold in the marshmallow fluff gently, ensuring it’s fully blended without overmixing. The fluff should remain airy; overmixing will cause it to lose volume and result in a denser texture. At this point, the mixture should have a thick, mousse‑like consistency that can hold its shape when frozen.
- Add the mini chocolate chips to the batter, swirling them in so that they’re distributed evenly. The chips will melt slightly during freezing, creating pockets of chocolate that burst in the mouth. If you prefer a more pronounced chocolate flavor, double the amount of chips.
- Transfer the mixture into a silicone mold or a shallow baking dish lined with parchment paper. Tap the dish gently on the counter to remove any air bubbles. The edges should be smooth; this will prevent cracks as the mixture freezes.
- Place the dish in the freezer for at least 4 hours, or until the treat is firm and fully set. If you’re in a hurry, a quick 2‑hour freeze can work, but the texture will be slightly softer.
- Once frozen, remove the treat from the mold. Slice it into bite‑sized pieces or use a cookie cutter for fun shapes. Serve immediately or store in an airtight container for up to 2 weeks.
- To reheat, simply let the pieces sit at room temperature for a few minutes. The warmth will coax the chocolate chips to soften just enough to release their flavor without melting the whole dessert.
That’s it—you did it. But hold on, I’ve got a few more tricks that’ll take this to another level.
Insider Tricks for Flawless Results
The Temperature Rule Nobody Follows
The key to a perfectly set texture is the temperature of your freezer. If it’s too warm, the mixture will take longer to set and may develop ice crystals. I recommend setting your freezer to its coldest setting for at least 4 hours. If you’re in a humid climate, consider placing the dish on a wire rack so air can circulate around it, preventing condensation.
Why Your Nose Knows Best
Before you freeze, give the mixture a quick sniff. A faint cocoa aroma should emerge, indicating the butter and sugar have blended well. If the scent is flat, add an extra pinch of sea salt; it will awaken the flavors and enhance the overall profile.
The 5‑Minute Rest That Changes Everything
After whisking the butter and sugar, let the mixture rest for 5 minutes before adding the milk and peanut butter. This brief pause allows the butter to fully melt and the sugar to dissolve, resulting in a smoother base that won’t separate during freezing.
The Crunch Factor
If you love an extra crunch, sprinkle a handful of crushed graham crackers on top before freezing. The extra crumbs will create a delightful textural contrast and a slightly toasted flavor that pairs beautifully with the chocolate.
The Sweetness Balance
Taste the batter before freezing; if it feels too sweet, add a touch more sea salt or a splash of unsweetened cocoa. Salt is your best ally in balancing sweetness, especially in desserts that rely on chocolate and marshmallow.
Creative Twists and Variations
This recipe is a playground. Here are some of my favorite ways to switch things up:
Cocoa‑Infused Vanilla
Swap the vanilla extract with a splash of almond or coconut extract for a different aromatic profile. The nutty undertone complements the chocolate and adds depth.
Berry‑Burst Edition
Fold in a handful of freeze‑dried strawberries or blueberries before freezing. The berries will burst into flavor, giving the treat a fruity twist that pairs well with the chocolate.
Spiced Cinnamon Delight
Add a half teaspoon of cinnamon or a pinch of nutmeg to the batter. The warm spices create a cozy, autumnal vibe that’s perfect for fall gatherings.
Nutty Crunch Variation
Stir in chopped walnuts or pecans. The nuts add a satisfying crunch and a rich, buttery flavor that enhances the overall texture.
Minty Freshness
Incorporate a few drops of peppermint extract or a handful of crushed mint leaves. The mint provides a refreshing counterpoint to the chocolate, making this treat ideal for holiday celebrations.
Decadent Chocolate Overload
Double the amount of mini chocolate chips or add a handful of dark chocolate chunks. The result is a richer, more indulgent treat that satisfies even the most serious chocoholics.
Storing and Bringing It Back to Life
Fridge Storage
Store leftover pieces in an airtight container in the refrigerator for up to 5 days. The cold environment keeps the texture firm without compromising flavor. When you’re ready to eat, let them sit at room temperature for a few minutes to soften slightly.
Freezer Friendly
For long‑term storage, place the frozen treat in a freezer‑safe bag or container. Label with the date and consume within 2 weeks for optimal taste. The freezer preserves the crunch and prevents the chocolate from melting.
Best Reheating Method
To revive the treat, place a piece on a microwave‑safe plate and heat on low for 10–15 seconds. Alternatively, let it sit at room temperature for 5–10 minutes. Adding a tiny splash of water before reheating creates steam that helps the chocolate soften without melting the entire dessert.