Picture this: I’m standing in a cramped apartment kitchen, the clock ticking, a frantic friend on the phone asking for a dessert that will wow a crowd, and the pantry looking like a battlefield of ingredients. I pull out my trusty rolling pin, a handful of fresh strawberries, and a stack of flour, sugar, and baking powder that I’ve been hoarding for months. The moment the aroma of butter melting in a pan hits my nose, I know I’m about to create something that will become the talk of the town. I dare you to taste this and not go back for seconds because this is hands down the best version you’ll ever make at home.
The kitchen is a stage, and I’m the director of flavor, turning ordinary ingredients into a symphony of sweet, buttery, and fruity notes. The buttery scent wafts from the skillet, the bright red of sliced strawberries glistens like ruby jewels, and the sound of whisking is a rhythmic drumbeat. The first bite is a burst of creamy whipped cream, a splash of fresh strawberries, and the soft crumb of the cake that melts in your mouth like a cloud. It’s a sensory explosion that makes you feel like you’re walking through a summer garden after a rainstorm.
What makes this recipe stand out is not just the ingredients but the technique that elevates every component to new heights. I’m not just baking a cake; I’m crafting a memory, a moment that will linger on your palate long after the last crumb. The secret lies in the balance of wet and dry, the timing of the bake, and the way I layer the flavors. The result is a cake that is airy, moist, and perfectly sweet without being cloying. Most recipes get this completely wrong, but here’s what actually works.
Picture yourself pulling this out of the oven, the whole kitchen smelling incredible, and guests gathering around the table with anticipation. I’ll be honest — I ate half the batch before anyone else got to try it. But the moment the first slice hits the plate, you’ll see the golden crust and the soft interior, and you’ll know you’re about to experience something extraordinary. And now, stay with me here — this is worth it. Let me walk you through every single step — by the end, you’ll wonder how you ever made it any other way.
What Makes This Version Stand Out
- Flavor: The combination of fresh strawberries and a hint of lemon zest creates a bright, refreshing taste that cuts through the richness of the cake.
- Texture: A light, airy crumb that practically dissolves in your mouth, balanced by the silky whipped cream.
- Simplicity: Only twelve ingredients, all of which you can find in any grocery store.
- Uniqueness: The macerated strawberries add a jam-like quality that sets this shortcake apart from the usual fluffy cakes.
- Audience: Crowd-pleaser that works for brunch, dinner parties, or a sweet finish to any meal.
- Quality: Using fresh, high‑quality butter and real strawberries guarantees a flavor that’s hard to beat.
- Method: A single pan bake that saves time and clean‑up, yet delivers professional results.
- Make‑Ahead: Assemble the cake a day ahead; the flavors deepen and the whipped cream stays fresh.
Alright, let's break down exactly what goes into this masterpiece...
Inside the Ingredient List
The Flavor Base
All‑purpose flour is the backbone of the cake, providing structure while keeping the crumb tender. It’s the canvas that allows the other flavors to shine. If you skip flour, you’ll end up with a flat, dense mess that won’t rise properly. For a lighter texture, sift the flour before mixing to eliminate clumps and aerate the mixture.
The Sweetness Crew
Granulated sugar is the sweetener that balances the tartness of the strawberries. It also caramelizes slightly during baking, giving the cake a golden hue. Powdered sugar is reserved for the whipped cream, creating a silky finish that coats the palate. If you prefer a lower sugar version, you can reduce the granulated sugar by a quarter cup and add a splash of vanilla extract for depth.
The Leavening Agents
Baking powder and baking soda work in tandem to lift the batter, ensuring a fluffy rise. Baking soda reacts with the acidic strawberries, creating tiny bubbles that lighten the crumb. If you’re using a gluten‑free flour blend, increase the baking powder by an extra teaspoon to compensate for the denser base.
The Unexpected Star
Fresh strawberries are more than just a garnish; they’re an integral flavor component. When macerated with sugar and lemon zest, they release their juices, forming a natural syrup that coats the cake layers. Choosing ripe, firm berries will give you a sweeter, more vibrant taste. If you’re in a pinch, frozen strawberries can be used, but thaw them completely and pat dry to avoid excess moisture.
The Final Flourish
Heavy cream, whisked with powdered sugar, adds a luxurious, airy topping that balances the cake’s density. A pinch of salt in the cream brings out the fruit’s natural sweetness, preventing it from becoming cloying. The vanilla extract in the batter deepens the flavor profile, giving the cake a warm, comforting undertone. If you’re lactose intolerant, you can replace heavy cream with coconut cream for a tropical twist.
Everything’s prepped? Good. Let’s get into the real action...
The Method — Step by Step
- Preheat the oven to 350°F (175°C). Grease two 8‑inch round cake pans and line the bottoms with parchment paper. The parchment prevents sticking and gives a clean release. This step is crucial for a perfect rise and easy removal. You’ll feel the anticipation building as the oven heats.
- In a large bowl, whisk together 2 cups of all‑purpose flour, 1 cup of granulated sugar, 1 tablespoon of baking powder, 1 teaspoon of baking soda, and ½ teaspoon of salt. The dry mix should look like fine sand. This is where the structure is formed. Keep the mixture dry to avoid clumping. The whisking rhythm sets the tone for the rest of the recipe.
- In a separate bowl, combine ½ cup of melted unsalted butter, 1 cup of milk, 2 large eggs, and 2 teaspoons of vanilla extract. Whisk until the mixture is smooth and the eggs are fully incorporated. The butter should be at room temperature for a silky texture. The liquid mix will later marry with the dry mix to create the batter.
- Pour the wet mixture into the dry ingredients and stir with a spatula until just combined. Do not overmix; the batter should be slightly lumpy. Overmixing can develop gluten and result in a tough crumb. This step is a dance of precision and timing. Feel the batter come together as a cohesive unit.
- Divide the batter evenly between the prepared pans, smoothing the tops with a spatula. Tap the pans gently on the counter to release any air bubbles. Place the pans in the preheated oven. Bake for 25–28 minutes, or until a toothpick inserted into the center comes out clean and the edges pull away slightly. The cake should have a golden crust and a soft, springy feel. This is the moment of truth.
- While the cake bakes, prepare the strawberries. Place 2 cups of sliced strawberries in a bowl, sprinkle with 1 tablespoon of sugar, and zest the juice of one lemon. Toss gently and let them macerate for 10 minutes. The sugar draws out juices, creating a natural syrup that will soak into the cake layers. The lemon zest adds a bright counterpoint to the berry sweetness.
- Whip 1 cup of heavy cream with ½ cup of powdered sugar until soft peaks form. Add ½ teaspoon of vanilla extract for depth. The whipped cream should be light and airy, holding its shape when piped. A pinch of salt balances the sweetness. This topping is the final flourish that turns the cake into a dessert masterpiece.
- Once baked, remove the cakes from the oven and let them cool on a wire rack for 10 minutes. Then invert each layer onto parchment paper and let cool completely. The parchment keeps the cake from sticking and makes slicing easier. Cooling also sets the crumb structure, preventing a soggy interior.
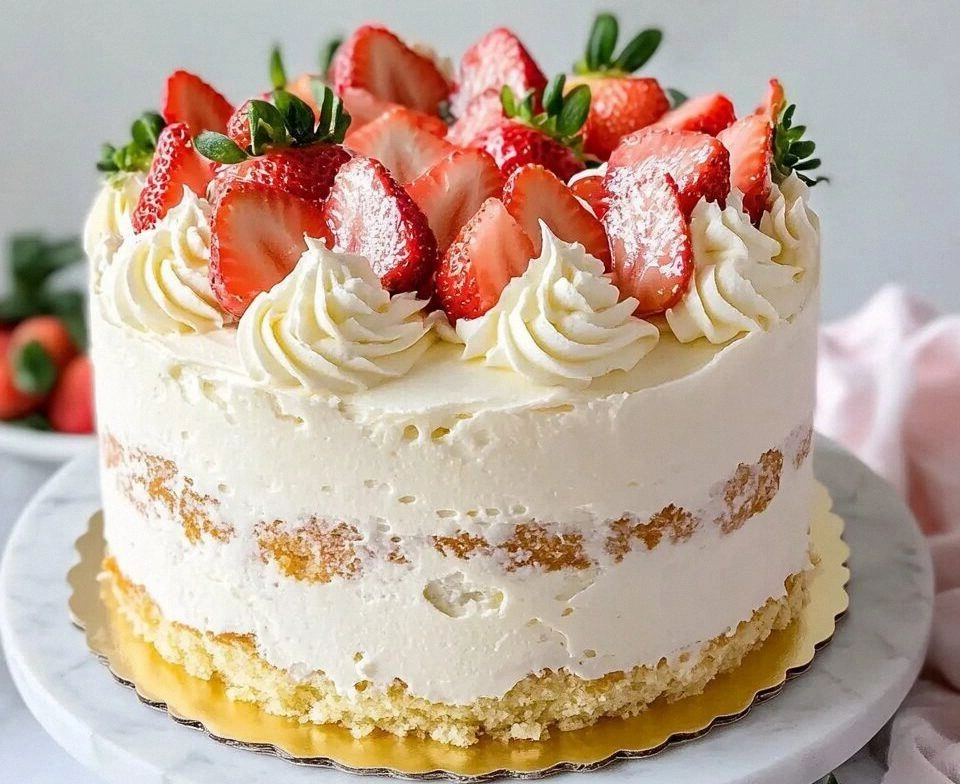
- To assemble, place one cake layer on a serving plate. Spread a generous amount of whipped cream over the top, then layer sliced strawberries. Place the second cake layer on top and finish with a final spread of whipped cream. If desired, garnish with whole strawberries or a dusting of powdered sugar. The assembly should look elegant and inviting.
- Refrigerate the assembled cake for at least 30 minutes before serving. The chill allows the flavors to meld and the whipped cream to set. When you cut into it, the layers should hold together, and the strawberries should release their juices onto the cake. Serve with a chilled glass of sparkling water or a light dessert wine. Enjoy the moment of pure bliss.
That’s it — you did it. But hold on, I’ve got a few more tricks that’ll take this to another level.
Insider Tricks for Flawless Results
The Temperature Rule Nobody Follows
Many bakers believe 375°F is the sweet spot for cakes, but 350°F gives a gentler rise that keeps the crumb moist. The lower temperature allows the batter to set evenly, preventing a dense center. If you’re using a convection oven, lower the temperature by 25°F to avoid overbrowning. This trick ensures your cake stays tender and flavorful.
Why Your Nose Knows Best
Before pulling the cake out of the oven, give it a quick sniff. A pleasant, caramelized scent indicates the batter is ready. If the smell is too sweet or raw, give it a few more minutes. Your nose is a reliable judge of doneness, especially when you’re aiming for the perfect balance between moistness and structure.
The 5‑Minute Rest That Changes Everything
Letting the cake rest on parchment for 10 minutes after baking allows the steam to escape and the structure to set. This short rest prevents the cake from becoming soggy when you slice it. It also helps the whipped cream to cling better to the crumb, creating a seamless layer.
Use a Water Bath
If you’re feeling adventurous, bake the cake pans in a water bath to keep the batter from drying out. Place the pans in a larger pan filled with hot water that comes up to the side of the cake pans. This method is especially useful in dry kitchens or during hot weather.
Keep Strawberries Cool
Macerate strawberries in a cold bowl to prevent them from releasing too much liquid before assembly. This keeps the cake from becoming soggy and maintains the bright, fresh flavor of the berries. Chill the strawberries for a few minutes before adding sugar and lemon zest.
Whipped Cream Tip
Add a pinch of salt to the whipped cream to balance the sweetness and enhance the berry flavor. The salt also helps the cream hold its shape longer, especially when served at room temperature. This small addition can transform a simple topping into a gourmet finish.
Creative Twists and Variations
This recipe is a playground. Here are some of my favorite ways to switch things up:
Lemon Strawberry Shortcake
Swap the lemon zest for a tablespoon of lemon curd and add a splash of fresh lemon juice to the batter. The citrus pairs beautifully with the strawberries, creating a zesty, bright dessert that’s perfect for summer.
Chocolate Swirl Shortcake
Fold in 1/4 cup of cocoa powder into the batter and swirl in melted dark chocolate before baking. The chocolate adds depth and richness, turning the cake into a decadent treat for chocolate lovers.
Berry Compote Shortcake
Replace sliced strawberries with a mix of blueberries, raspberries, and blackberries. Cook the berries with a splash of balsamic vinegar to create a sweet‑savory compote that coats the cake layers.
Coconut Cream Shortcake
Use coconut cream instead of heavy cream for a tropical twist. Add shredded coconut to the batter for extra texture. The coconut flavor complements the strawberries, creating a beach‑inspired dessert.
Peanut Butter Swirl Shortcake
Swirl in a tablespoon of creamy peanut butter into the batter before baking. The nutty flavor adds a surprising depth that pairs well with the sweetness of the strawberries.
Vegan Strawberry Shortcake
Replace dairy milk with oat milk, use a flaxseed egg, and substitute heavy cream with coconut cream. The vegan version retains the same light texture and fruity flavor, making it suitable for all dietary preferences.
Storing and Bringing It Back to Life
Fridge Storage
Store the assembled cake in an airtight container in the refrigerator for up to 3 days. The whipped cream will firm up slightly, so let it sit at room temperature for 15 minutes before serving to restore its airy texture.
Freezer Friendly
Wrap the cake tightly in plastic wrap and place it in a freezer‑safe container. Freeze for up to 2 weeks. When ready to serve, thaw overnight in the refrigerator and let it come to room temperature before slicing.
Best Reheating Method
Reheat the cake in a preheated oven at 300°F (150°C) for 10 minutes, then let it cool for a few minutes before serving. Add a tiny splash of water before reheating to steam back to perfection, preserving the cake’s moistness.