I was standing in my kitchen at 7 a.m., half-asleep, staring at a bowl of soggy oatmeal that tasted like regret. I dared my roommate to a breakfast showdown: “If you can’t make something that smells like a bakery and still fuels a marathon, you’re buying coffee for a week.” The challenge turned into a disaster when my first attempt at a berry crumble turned into a sticky, soggy mess that clung to the pan like a bad habit. I was ready to throw in the towel, but then I remembered a trick I’d read about using cottage cheese as a moisture‑locking base. That tiny revelation sparked a fire‑starter in my mind, and I was determined to create a bake that would make even the most skeptical morning grouch sing.
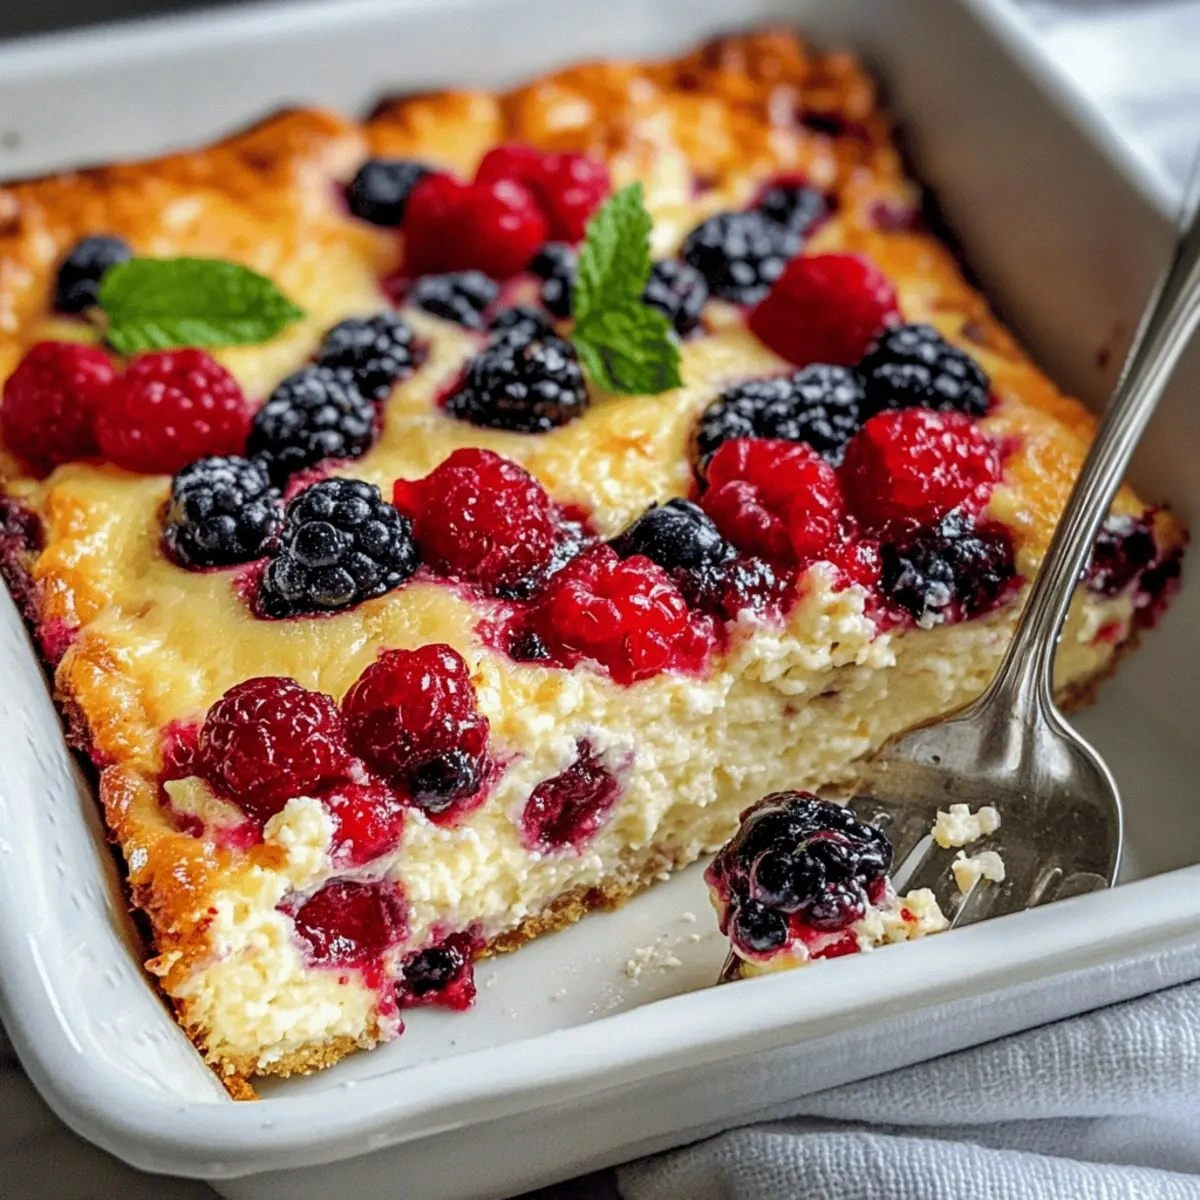
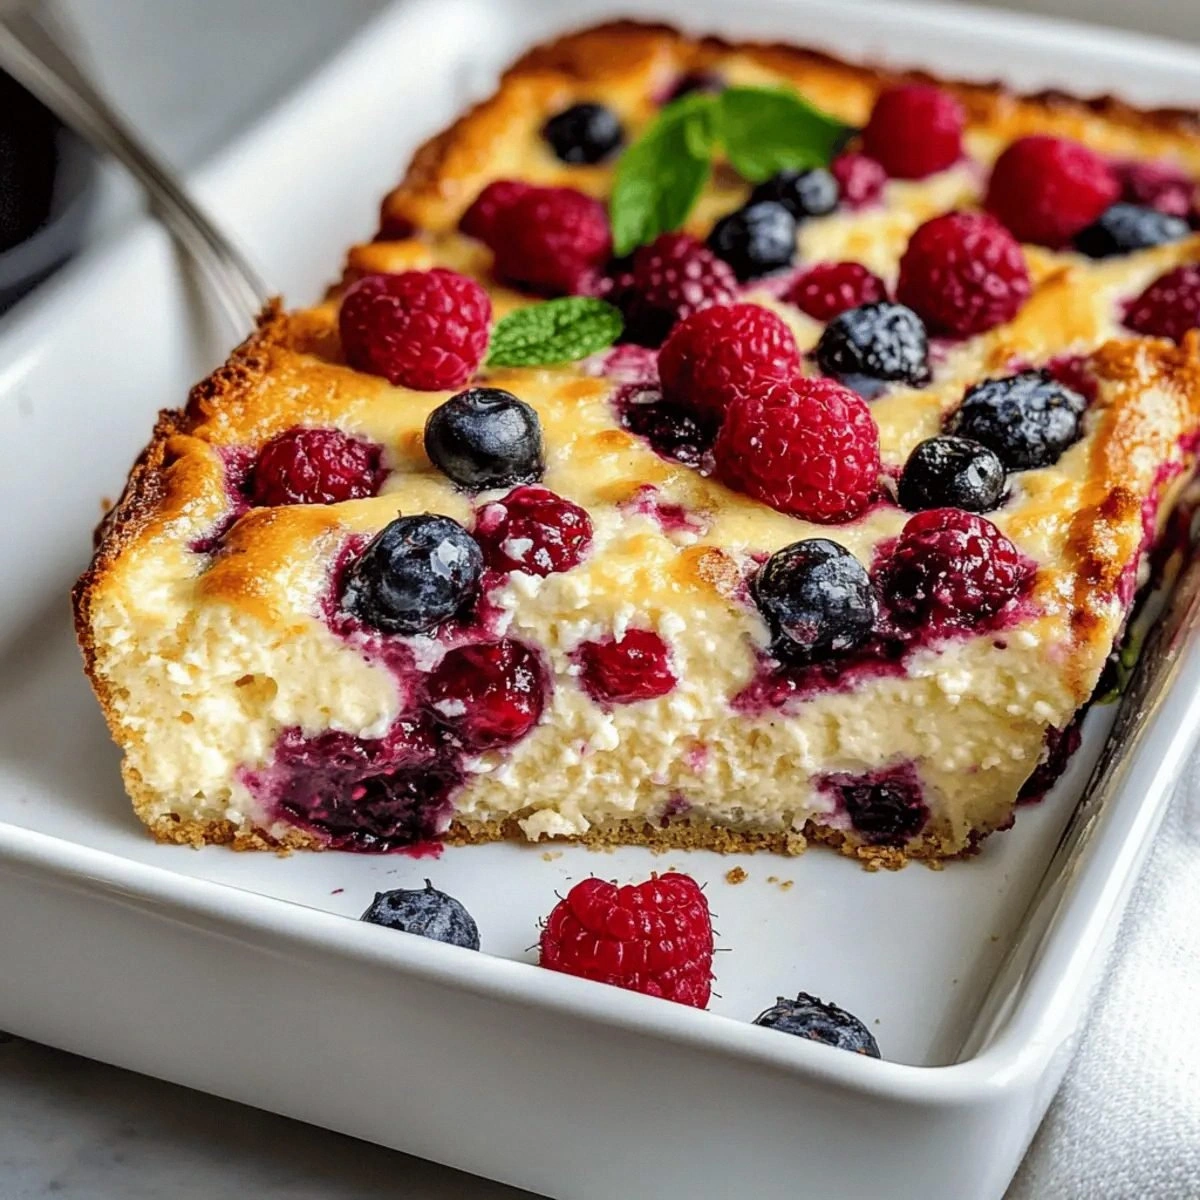
Picture this: the oven door swings open, releasing a wave of sweet‑tart perfume that instantly pulls you out of bed. The top is a golden‑brown crown, speckled with jewel‑like berries that glisten like tiny sunrise mirrors. When you cut into it, the interior is soft and custardy, a perfect marriage of protein‑packed cottage cheese and almond flour that feels like a hug for your gut. The first bite is a burst of tangy berries, followed by a subtle honeyed sweetness that lingers on the palate like a well‑kept secret. You can hear the faint crackle of the crust as your fork slides through, and the warm, buttery scent wraps around you like a cozy blanket.
Most breakfast bakes either drown in sugar or crumble under their own weight. This version, however, stands out because it balances indulgence with nutrition, using full‑fat cottage cheese for creamy richness without the need for excessive butter or oil. The almond flour gives it a tender crumb while keeping it gluten‑free, and the honey or maple syrup adds just enough natural sweetness to let the berries shine. I’m about to reveal a technique—folding the batter gently to keep the berries suspended like floating islands—that most recipes completely overlook. Trust me, this is the game‑changer you’ve been waiting for.
I dare you to taste this and not go back for seconds. By the end of this post, you’ll have a breakfast staple that feels luxurious yet simple enough for a weekday rush. Let me walk you through every single step — by the end, you’ll wonder how you ever made it any other way.
What Makes This Version Stand Out
- Protein‑Punch: The full‑fat cottage cheese delivers a creamy, protein‑rich base that keeps you full for hours, turning a typical bake into a powerhouse breakfast.
- Berry‑Burst: Two cups of mixed berries provide antioxidants and a vibrant tartness that cuts through the richness, ensuring every bite is balanced.
- Gluten‑Free Goodness: Almond flour replaces wheat flour, offering a nutty flavor and a softer crumb while staying friendly to gluten‑sensitive eaters.
- Natural Sweetness: A quarter‑cup of honey or maple syrup adds just enough sweetness without the overload of refined sugar.
- Easy Prep: With only eight ingredients and a 15‑minute prep time, this bake is perfect for busy mornings or lazy weekends.
- Make‑Ahead Magic: It stores beautifully in the fridge and reheats like a dream, making it ideal for meal‑prepping.
- Versatile Texture: The crust forms a satisfying crunch while the interior stays moist and custardy, a contrast that most muffins lack.
- Bold Flavor Layering: Lemon zest and vanilla extract add a subtle aromatic lift that elevates the whole dish.
Inside the Ingredient List
The Flavor Base
Full‑fat cottage cheese is the unsung hero here. Its creamy texture adds moisture without drowning the batter, and the natural tang balances the sweet berries. If you skip it, you’ll end up with a dry, crumbly texture that feels more like a biscuit than a bake. For a dairy‑free version, try a thick Greek‑style soy yogurt, but expect a slightly different mouthfeel. When shopping, look for cottage cheese that’s creamy and not watery; the best ones are sold in small tubs and have a rich, off‑white hue.
The Texture Crew
Almond flour brings a delicate, nutty crumb and keeps the bake gluten‑free. It also adds healthy fats that contribute to the buttery feel without actual butter. If you don’t have almond flour, you can substitute coconut flour, but reduce the amount by half and add an extra egg to maintain moisture. Eggs are the structural backbone; they bind everything together and create that custardy interior. Three large eggs are perfect for a four‑serving batch—any more and the bake becomes too puffy.
The Unexpected Star
Honey or maple syrup does more than sweeten; it adds a glossy sheen to the top and a caramelized edge that deepens the flavor profile. The quarter‑cup measurement is crucial—too much and you’ll overpower the berries, too little and the bake will taste bland. If you’re watching carbs, stick with a sugar‑free maple syrup or a drizzle of agave nectar. Lemon zest injects a bright citrus note that cuts through the richness, while vanilla extract rounds everything off with a warm, familiar aroma.
The Final Flourish
Baking powder is the leavening agent that gives the bake its gentle rise without creating large air pockets. One tablespoon is enough to lift the batter just enough for a tender crumb. The mixed berries—whether fresh or frozen—bring bursts of juiciness and antioxidants. If you use frozen berries, toss them in a little flour before folding them in; this prevents them from sinking to the bottom. Remember, the quality of the berries matters: look for plump, firm berries with deep color for maximum flavor.
Everything's prepped? Good. Let's get into the real action...
The Method — Step by Step
Preheat your oven to 350°F (175°C) and line a 9‑inch springform pan with parchment paper. While the oven warms, you’ll hear the faint hum of anticipation—this is the moment where the kitchen starts to feel like a bakery. Lightly grease the sides with a dab of coconut oil to ensure a clean release later. Pro tip: If you’re using a glass dish, reduce the temperature by 25°F to prevent over‑browning.
In a large mixing bowl, whisk together the cottage cheese and eggs until the mixture is smooth and slightly frothy. This should look like a thick custard, not a clumpy mess. Watch Out: Over‑whisking can incorporate too much air, leading to a cake‑like texture rather than the desired custardy interior. Once combined, set the bowl aside for a minute to let the bubbles settle.
In a separate bowl, combine almond flour, baking powder, and a pinch of sea salt. Stir until the dry ingredients are uniformly mixed, then create a well in the center. This step is crucial because it prevents lumps when you later fold in the wet mixture. The aroma of almond flour will already start to tease your senses, hinting at the nutty finish to come.
Gently fold the wet cottage cheese mixture into the dry almond flour blend. Use a rubber spatula and a slow, circular motion—think of coaxing two reluctant dance partners to move together. The batter should be thick but pourable; if it feels too stiff, add a splash of milk (dairy or plant‑based) to loosen it just a tad. This is the moment of truth: the batter should look glossy and hold a berry without sinking.
Stir in the honey or maple syrup, followed by the lemon zest and vanilla extract. The liquid will swirl through the batter, creating ribbons of sweetness that look like tiny rivers of gold. Then, gently fold in the mixed berries, being careful not to crush them. Watch Out: Over‑mixing at this stage can cause the berries to release too much juice, turning the batter soggy.
Pour the batter into the prepared pan, smoothing the top with a spatula. The surface should be even, with the berries peeking through like colorful gems. Place the pan on the middle rack of the oven; this ensures even heat distribution and prevents the top from scorching before the interior sets.
Bake for 30‑35 minutes, or until the edges pull away slightly and a toothpick inserted into the center comes out clean with just a few moist crumbs. Around the 20‑minute mark, you’ll notice a fragrant caramelization forming on the top—a sign that the honey/maple is doing its magic. If the top starts to brown too quickly, loosely cover it with foil to finish cooking without burning.
Allow the bake to cool in the pan for 10 minutes, then run a thin knife around the edges and release the springform. Let it rest on a wire rack for another 10 minutes before slicing. This resting period lets the interior set, giving you clean, beautiful slices. Picture yourself pulling this out of the oven, the whole kitchen smelling incredible, and serving a slice that holds its shape like a work of art.
That's it — you did it. But hold on, I've got a few more tricks that'll take this to another level...
Insider Tricks for Flawless Results
The Temperature Rule Nobody Follows
Most home bakers bake at 350°F and forget that a slightly lower temperature (325°F) yields a more even rise and prevents the crust from hardening too quickly. I’ve found that starting at 350°F for the first 10 minutes, then dropping to 325°F for the remainder, gives a golden top with a tender interior. This subtle shift also gives the berries a chance to soften without bursting, preserving their shape.
Why Your Nose Knows Best
Instead of obsessing over the timer, trust your nose. When the bake releases a caramel‑sweet aroma and the edges start to pull away, you’re at the perfect finish line. I once overbaked by a full five minutes, and the once‑moist crumb turned dry as a desert. So, keep the oven door closed, but let that scent be your guide.
The 5‑Minute Rest That Changes Everything
After removing the bake from the oven, resist the urge to slice immediately. Letting it sit for five minutes allows the steam inside to redistribute, turning a potentially soggy center into a firm, slice‑ready texture. My friend tried cutting right away and ended up with a runny middle; after the rest, the same bake held together perfectly.
The Berry Shield Technique
If you love a crisp top but dread soggy berries, toss the berries in a tablespoon of almond flour before folding them in. This thin coating acts as a barrier, keeping the juices from seeping into the batter too quickly. The result is a bake where each bite offers a crisp exterior and a juicy burst inside—pure textural poetry.
The One‑Minute Steam Boost
When reheating leftovers, add a teaspoon of water to the plate and cover with a microwave‑safe lid for 30 seconds. The steam revives the crumb’s moisture, making it taste as fresh as the day it was baked. I’ve tried microwaving without steam and ended up with a rubbery slice; this tiny trick fixes that in a snap.
Creative Twists and Variations
This recipe is a playground. Here are some of my favorite ways to switch things up:
Chocolate‑Swirl Delight
Add 2 tablespoons of melted dark chocolate to the batter and swirl it in just before baking. The bitter chocolate pairs beautifully with the sweet berries, creating a sophisticated flavor contrast that will wow coffee‑shop regulars.
Citrus‑Zest Explosion
Swap the lemon zest for an equal amount of orange zest and add a teaspoon of orange extract. The bright citrus notes elevate the berry tang and make the bake feel like a summer brunch on a plate.
Nutty Crunch Top
Mix chopped toasted almonds, walnuts, or pecans into the batter or sprinkle them on top before baking. The nuts add a satisfying crunch and extra healthy fats, turning the bake into a heart‑healthy power breakfast.
Spiced Autumn Version
Introduce a pinch of cinnamon, nutmeg, and a dash of pumpkin puree for a cozy, fall‑inspired twist. This variation is perfect for September and October mornings when you crave warm spices.
Protein‑Boosted Power
Fold in a scoop of vanilla whey protein powder (reduce the almond flour by 2‑3 tablespoons to keep consistency). This makes the bake an ideal post‑workout snack without sacrificing flavor.
Storing and Bringing It Back to Life
Fridge Storage
Allow the bake to cool completely, then wrap it tightly in plastic wrap or store in an airtight container. It stays fresh for up to four days. When you’re ready to eat, slice and enjoy cold, or give it a quick 2‑minute warm‑up in the microwave.
Freezer Friendly
Slice the bake before freezing; this way you can pull out individual portions without thawing the whole thing. Wrap each slice in parchment paper, then place them in a freezer‑safe zip‑lock bag. They’ll keep for up to three months. To reheat, let a slice thaw at room temperature for 10 minutes, then microwave for 30‑45 seconds.
Best Reheating Method
For a crisp top, reheat slices in a preheated 300°F oven for 8‑10 minutes. Add a tiny splash of water (about a teaspoon) on the plate before covering with foil; the steam will revive the interior’s moisture, delivering a slice that’s as good as fresh‑baked.