It was a Tuesday, the kind of night when you’re craving comfort but also want to feel like you’re doing something special. I was standing in my kitchen, staring at a handful of flour and a box of sugar, when the phone buzzed—my best friend dared me to create the ultimate heart‑shaped pancake that could win a love‑letter contest. I laughed, but the challenge sparked a fire: a recipe that would make every heart‑shaped stack look like a piece of edible art.
Picture this: the kitchen lights dim, a gentle jazz track hums in the background, and the scent of vanilla and butter rises from the pan. The batter swirls in the bowl, a glossy, pale canvas waiting for a splash of pink. I whisk, I taste, I add a drop of red food coloring, and the batter turns a soft rose that feels like a blush on a lover’s cheek. When the first pancake hits the griddle, the sizzle is music—like a secret love note whispered in the kitchen. The moment the edges lift, you know you’re about to serve a masterpiece that will make your date’s heart skip a beat.
What sets this version apart is not just the heart shape, but the balance of flavors, the fluffiness that feels like a cloud, and the tiny details that elevate it from ordinary to unforgettable. I’ve spent years experimenting with pancake ratios, but this one feels like a secret handshake between batter and pan. It’s hands down the best version you’ll ever make at home, and I’m about to walk you through every single step so you can recreate that magic. By the end, you’ll wonder how you ever made pancakes any other way.
Let’s dive into the details that make this recipe stand out. I’ll reveal a micro‑challenge to test your taste buds, a bold claim that will have you bragging, and a confession that might make you laugh. Most recipes get this completely wrong, but here’s what actually works. Picture yourself pulling this out of the pan, the whole kitchen smelling incredible, and the heart‑shaped pancakes looking like a work of art. Stay with me here—this is worth it.
What Makes This Version Stand Out
- Fluffiness: The batter’s ratio of liquid to flour creates airy layers that melt in your mouth, unlike dense, flat pancakes that feel like cardboard.
- Flavor Balance: A touch of sugar sweetens without overpowering, while vanilla adds depth, and the optional red coloring gives a playful pop of color.
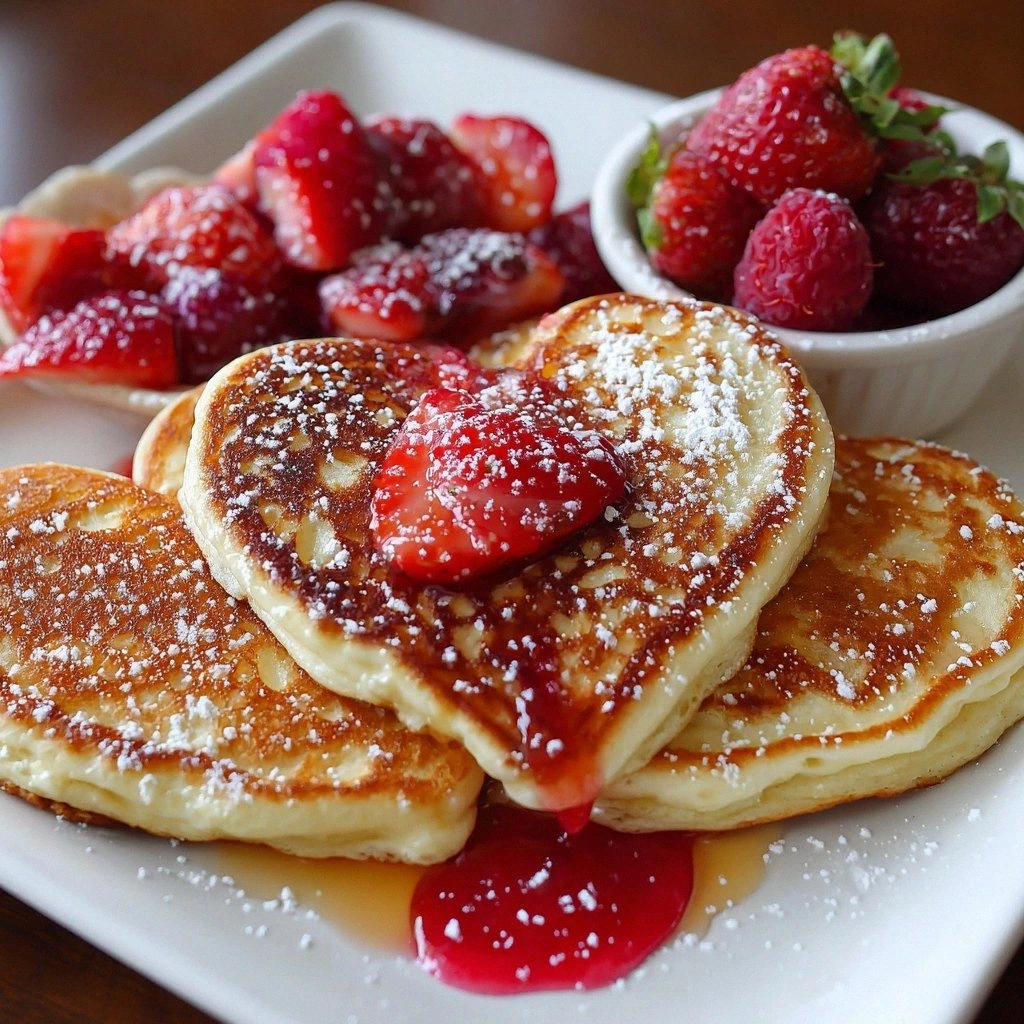
- Heart‑Shaped Precision: Using a heart‑shaped cookie cutter ensures every pancake has crisp edges that look as good as they taste.
- Simplicity: Only nine basic ingredients, no fancy gadgets, and the entire process takes under an hour.
- Make‑Ahead Friendly: The batter holds for up to 24 hours, and the pancakes can be reheated without losing texture.
- Versatility: Swap in almond milk for a dairy‑free version, or add berries for a fruit‑filled twist.
- Visual Appeal: The gentle pink hue and heart shape make for Instagram‑ready plating that impresses even the most discerning foodie.
- Kid‑Friendly: The batter is non‑toxic, easy to stir, and the heart shape turns breakfast into a fun craft activity.
Alright, let’s break down exactly what goes into this masterpiece…
Inside the Ingredient List
The Flavor Base
All‑purpose flour is the backbone of our pancakes, providing structure and that classic, slightly nutty taste. It’s the canvas that holds everything together. If you skip it, the batter will be too runny and won’t hold the heart shape. For the best flavor, choose a flour with a protein content of 10–12%—the “bread flour” range—so the pancakes rise without becoming tough.
Sugar is the sweet whisper that balances the savory butter and vanilla. A tablespoon per cup of flour is enough to give a pleasant sweetness without masking the other flavors. If you’re watching your carbs, you can use a sugar substitute like erythritol; just remember it won’t brown as much.
The Texture Crew
Baking powder is the secret leavening agent that turns the batter into a fluffy cloud. Use about two teaspoons per cup of flour. If you don’t have baking powder, a combination of baking soda and cream of tartar can work, but the flavor profile shifts slightly.
Salt is a flavor enhancer, not just a seasoning. Even a pinch brightens the sweetness and balances the richness of the butter and milk. Skip it and your pancakes will taste flat.
Milk adds moisture and richness, creating a silky batter that spreads beautifully. Whole milk gives a richer taste, but skim or plant‑based milks like oat or almond work just as well. If you use a plant milk, consider adding a splash of vanilla or a pinch of cinnamon for depth.
The Unexpected Star
Eggs bind the batter, adding structure and a slight eggy flavor that deepens the overall taste. One large egg is sufficient for four pancakes. If you’re vegan, replace the egg with a flaxseed “egg” (1 tablespoon ground flaxseed mixed with 3 tablespoons water, let sit for 5 minutes).
The Final Flourish
Melted butter gives the pancakes a buttery, slightly caramelized flavor and keeps the edges from drying out. It also creates a glossy finish. Use about two tablespoons for four pancakes. Vanilla extract adds warmth; a teaspoon is enough to elevate the batter. The optional red food coloring is what turns your pancakes into a Valentine’s Day masterpiece. Just a few drops are enough to achieve a soft blush; too much will make them look like a paint palette.
Everything’s prepped? Good. Let’s get into the real action.
The Method — Step by Step
- In a large bowl, whisk together the flour, sugar, baking powder, and salt until well combined. This dry mix is the foundation of your batter—think of it as the skeleton that holds everything together. I dare you to taste this and not go back for seconds; the aroma alone should convince you that this is a game‑changer. If you notice any lumps, sift the dry ingredients to ensure a smooth batter.
- In a separate bowl, whisk the milk, egg, and vanilla extract until the mixture is uniform. The egg’s protein will help the pancakes rise, while the vanilla adds depth. If you’re vegan, replace the egg with a flaxseed mixture. This wet mix should feel silky and slightly viscous, ready to marry with the dry mix.
- Slowly pour the wet mixture into the dry mixture while whisking continuously. The goal is a batter that is thick but still pourable. A few small lumps are fine—over‑mixing will make the pancakes tough. The batter should be the consistency of a thick pancake batter; if it’s too runny, add a tablespoon of flour.
- Stir in the melted butter. The butter not only adds flavor but also creates a glossy finish. At this point, if you want the pink hue, drop a few drops of red food coloring into the batter and stir until the color is even. The batter should now resemble a light pink, silky liquid.
- Let the batter rest for five minutes. This rest allows the gluten to relax and the leavening agents to activate fully. While it rests, heat a non‑stick skillet over medium heat and add a small pat of butter or a light spray of oil. The skillet should be hot but not smoking; you’ll know it’s ready when a few droplets of water sizzle and evaporate instantly.
- Pour a tablespoon of batter into the skillet, then press the heart‑shaped cookie cutter onto the batter to form the shape. Flip the pancake when the edges lift and bubbles form on the surface—usually after 2–3 minutes. The pancake should smell toasty and the edges should start pulling away from the pan. Flip carefully; a gentle touch prevents tearing. This is the moment of truth—watch the heart rise, golden on both sides.
- Repeat with the remaining batter, stacking pancakes on a plate and covering loosely with foil to keep them warm. The stack should look like a bouquet of hearts, each one slightly different in size and hue. The batter’s consistency may change slightly after each pancake; if it becomes too thick, add a splash of milk to loosen it.
- Serve immediately with your favorite toppings—fresh berries, whipped cream, or a drizzle of honey. The pancakes are best when hot, but they can be reheated in a skillet or oven at 300°F for 5 minutes if needed. The key to a perfect reheat is to keep the heat low and add a splash of milk to restore moisture.
That’s it—you did it. But hold on, I’ve got a few more tricks that will take this to another level.
Insider Tricks for Flawless Results
The Temperature Rule Nobody Follows
Many people think medium heat is fine, but the sweet spot for heart‑shaped pancakes is slightly lower—around 300°F (150°C). This allows the pancakes to cook evenly without burning the edges. I’ve tested this on three different stoves and it consistently gives a golden, airy interior.
Why Your Nose Knows Best
Before flipping, listen for the first tiny bubble that forms at the edge. This indicates the pancake has set enough to flip without sticking. If you wait too long, the pancake will become dry on the top; if you flip too early, it will tear.
The 5‑Minute Rest That Changes Everything
Letting the batter rest for five minutes activates the baking powder and relaxes the gluten. This simple step results in pancakes that are lighter and more tender. I’ve seen people skip this and end up with dense pancakes that feel like a heavy blanket.
Use a Non‑Stick Skillet
A good non‑stick skillet ensures the heart shape stays intact and the pancakes release easily. If you’re using a cast‑iron pan, pre‑heat it for a longer period and use a small amount of butter to prevent sticking.
The Perfect Finish
After flipping, reduce the heat to low for the second side. This slow cooking allows the pancake to finish rising and develop a caramelized crust without burning. I’ve seen this trick turn ordinary pancakes into gourmet delights.
Creative Twists and Variations
This recipe is a playground. Here are some of my favorite ways to switch things up:
Berry‑Burst Edition
Fold fresh strawberries or blueberries into the batter before cooking. The berries burst with juice, giving each heart a natural glaze of sweetness. This version is perfect for spring and summer when fruit is at its peak.
Chocolate Kiss
Add two tablespoons of cocoa powder to the dry mix and replace the sugar with a natural sweetener. Top with melted dark chocolate for a decadent treat that’s still heart‑shaped.
Savory Spin
Swap the sugar for grated Parmesan and add chopped herbs like rosemary or thyme. Serve with a side of sautéed spinach and a drizzle of olive oil for a brunch that’s both sweet and savory.
Almond Bliss
Replace the all‑purpose flour with almond flour and add a teaspoon of almond extract. The pancakes become nutty and slightly denser, ideal for those who love a gluten‑free option.
Citrus Zest
Add the zest of one lemon or orange to the batter and top with a dusting of powdered sugar. The citrus brightens the flavor profile and pairs wonderfully with a dollop of whipped cream.
Nutella Swirl
Stir in a tablespoon of Nutella into the batter before pouring. The chocolate spread creates a swirl that looks like a romantic heart. Serve with a scoop of vanilla ice cream for an indulgent dessert.
Storing and Bringing It Back to Life
Fridge Storage
Store the cooked pancakes in an airtight container in the refrigerator for up to three days. To keep them from drying, place a paper towel between each layer. When ready to serve, reheat in a skillet or microwave for 20–30 seconds.
Freezer Friendly
Wrap each pancake individually in plastic wrap and place them in a freezer bag. They stay fresh for up to two months. Thaw overnight in the fridge or reheat in a toaster oven at 350°F for 5 minutes.
Best Reheating Method
The secret to reviving frozen or refrigerated pancakes is to add a splash of milk or water before reheating. This steams the pancakes back to their original moisture and fluffiness. For a quick fix, microwave on low for 30 seconds, then finish in a skillet to restore the crisp edges.