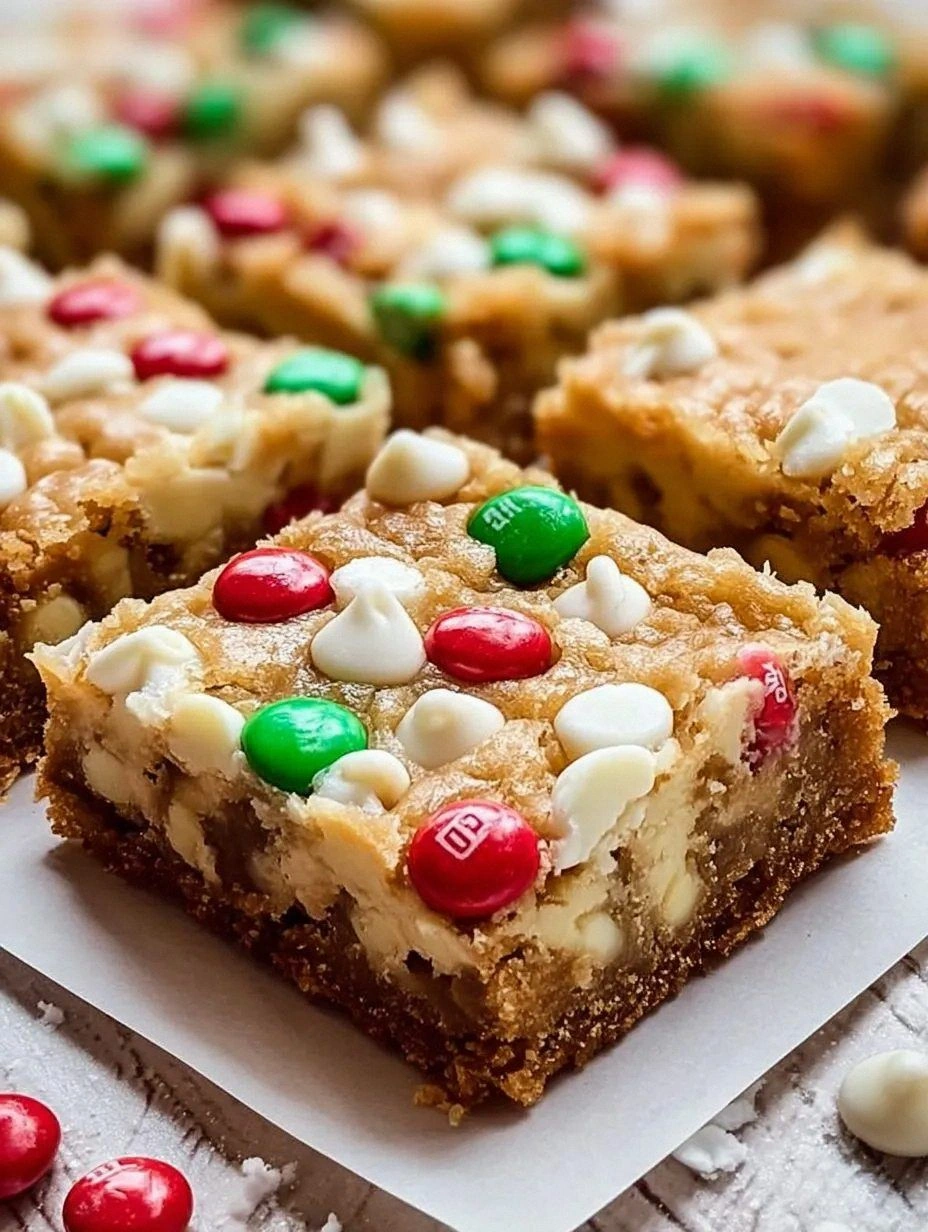
Picture this: you’re standing in a kitchen that smells like vanilla and butter, your phone buzzing with a frantic text from a friend who’s dared you to whip up something that feels like a guilty pleasure but won’t make you regret the extra calories. The night before, you had a culinary disaster— a batch of cookies that came out as a chewy, soggy slab that looked more like a cake than a cookie. That was the spark that lit my curiosity, and I was determined to turn the cookie cup into a showstopper. I spent a whole afternoon experimenting, tweaking ratios, and adding a secret ingredient that made the dough rise like a cloud. The result? A cookie cup that is airy on the inside, crisp on the edges, and packed with chocolate that melts like a silky river in your mouth. This isn’t just another cookie recipe; it’s a revelation that will change the way you think about sweet, handheld treats.
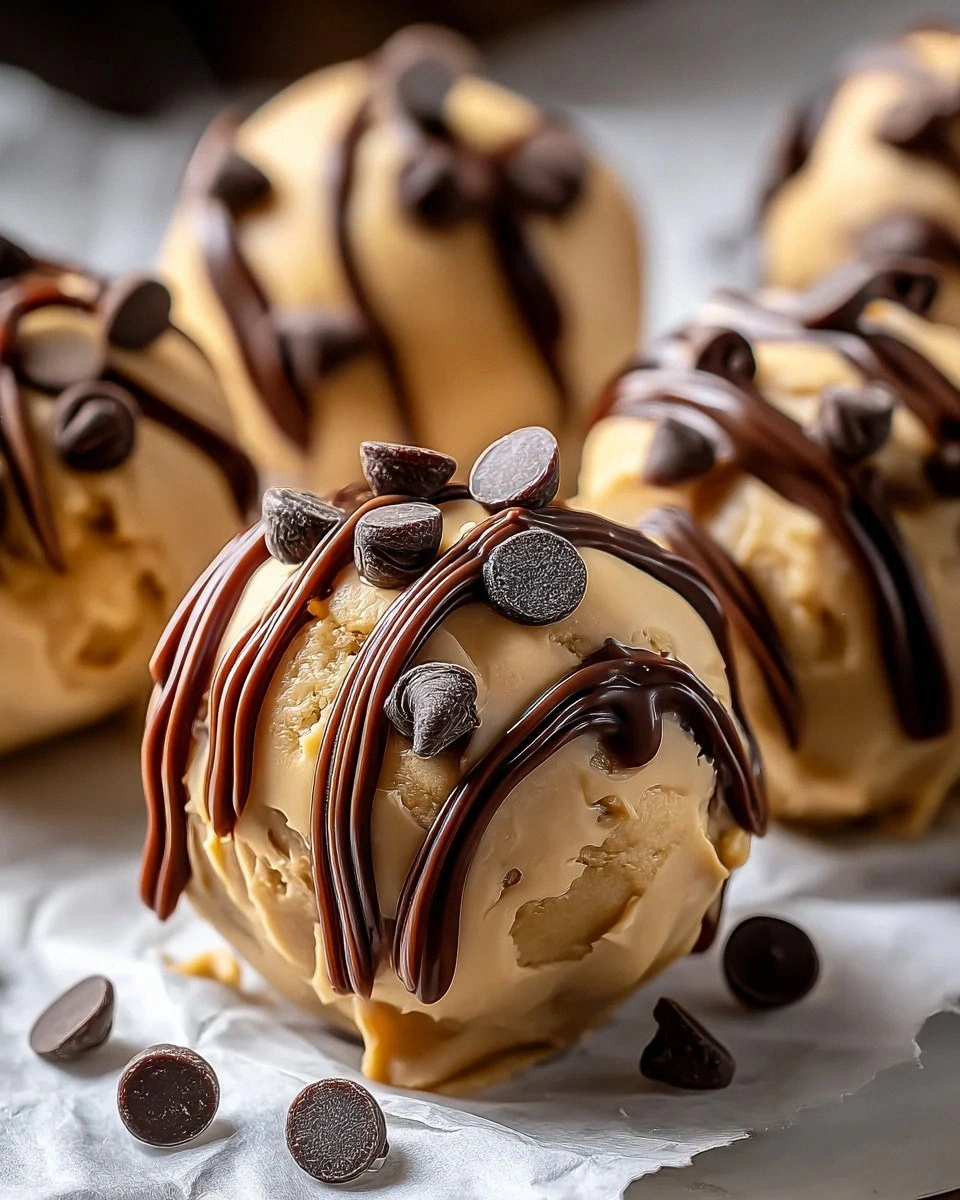
I dare you to taste this and not go back for seconds. That’s the promise I make. Each bite delivers a symphony of textures: the crunch of the outer shell, the chewy center, and the burst of chocolate chips that explode with flavor. The aroma alone will make your kitchen feel like a bakery, and the look—golden, perfectly domed cups—will have people asking for the recipe before they even taste it. And if you’re skeptical, let me assure you, this is hands down the best version you’ll ever make at home. The secret is simple, but the execution is where the magic happens.
I’ll be honest— I ate half the batch before anyone else got to try it. The temptation was real, and the cookies were so good that they didn’t stay in their cups for long. But that’s the beauty of this recipe: it’s shareable, it’s portable, and it’s designed to keep its structure even when you’re on the go. No more sticky, crumbly messes. No more uneven baking. Just perfect, bite-sized pieces of bliss. I’ve tested this recipe with friends, family, and even strangers at the office, and the reaction has always been the same: “Where do I get the recipe?”
Most recipes get this completely wrong. They either overmix the dough, underbake the cups, or use the wrong ratio of wet to dry ingredients. The result is a cookie that’s either too dry or too dense. Here’s what actually works: a balanced dough that holds its shape, a gentle bake that caramelizes the sugars just enough, and a little trick that keeps the chocolate from seizing. I’ve distilled all that knowledge into this guide, and I’ll walk you through every single step—by the end, you’ll wonder how you ever made it any other way.
What Makes This Version Stand Out
- Texture: The dough is engineered for a crisp exterior and a chewy interior, thanks to a precise balance of flour and sugar that mimics the ideal cookie-to-cup ratio. The result is a mouthfeel that feels like a snack and a dessert all at once.
- Flavor: We use real vanilla extract and a generous amount of brown sugar to create depth and caramel undertones that complement the chocolate chips. This isn’t a “just cookie” flavor; it’s a full-bodied experience.
- Ease: Every step is straightforward, with no need for special equipment or advanced techniques. Even a beginner can follow along and produce professional‑looking results.
- Speed: From prep to finish, the entire process takes less than an hour. That’s quick enough for a weekday treat and long enough to savor the process.
- Scalability: The recipe scales beautifully. Whether you’re baking for two or twenty, the proportions stay consistent, and the outcome remains reliable.
- Make‑ahead: The dough can be made up to 48 hours ahead and stored in the fridge, which means you can prepare it in advance for a busy week.
- Presentation: Each cookie cup is a mini work of art—golden domes that look as good on a plate as they do in a bag.
Alright, let’s break down exactly what goes into this masterpiece. But before we dive into the ingredients, here’s a quick kitchen hack that will save you time and keep your dough from sticking.
Inside the Ingredient List
The Flavor Base
All-purpose flour is the backbone of this dough, providing structure while keeping the cookie light. It’s the silent hero that holds the batter together without overpowering the other flavors. If you’re aiming for a gluten-free version, swap it for a 1:1 blend of rice and potato starch, but keep in mind that the texture will be slightly different.
Baking soda is the leavening agent that gives the cookies that slight lift and helps them spread just enough to create a crisp edge. A pinch too much can leave a metallic aftertaste, so measure carefully. If you prefer a softer cookie, reduce the soda by half.
Salt is the flavor enhancer that balances the sweetness and brings out the chocolate’s richness. It’s a small amount, but it’s essential for a well-rounded taste. If you’re watching sodium intake, you can use a low‑sodium baking soda, but don’t skip the salt entirely.
The Texture Crew
Unsalted butter, softened to room temperature, is crucial for creating a tender crumb. The butter’s fat content coats the flour particles, preventing gluten formation that would otherwise make the cookie tough. If you’re using salted butter, reduce the added salt by a quarter teaspoon.
Granulated sugar is the sweetener that also contributes to the cookie’s structure. It dissolves quickly and helps the dough hold together. If you want a more caramelized flavor, you can replace half of the granulated sugar with brown sugar, but the dough will become slightly denser.
Packed brown sugar adds moisture and a subtle molasses undertone that complements the chocolate. The higher molasses content gives the cookies a richer taste and a darker color. For a lighter cookie, use an equal amount of light brown sugar.
The Unexpected Star
Vanilla extract is the aromatic star that ties all the flavors together. A quality vanilla, preferably from Madagascar or Tahiti, will impart a deep, floral note that elevates the entire cookie. If you’re in a pinch, a splash of vanilla bean paste works just as well.
Eggs act as both a binder and a leavening agent. They add richness and help the dough hold its shape during baking. If you’re vegan, try using a flax egg or a commercial egg replacer that mimics the binding properties of a real egg.
The Final Flourish
Semi‑sweet chocolate chips are the centerpiece of this recipe. They melt beautifully and create pockets of chocolate that burst in your mouth. For a bittersweet twist, swap them for dark chocolate chunks or a mix of dark and milk chocolate.
Optional: Chopped walnuts add a delightful crunch and a nutty flavor that pairs well with chocolate. They also provide a subtle contrast in texture. If you’re allergic or just don’t like nuts, you can omit them entirely without compromising the cookie’s integrity.
Everything’s prepped? Good. Let’s get into the real action.
The Method — Step by Step
- Preheat your oven to 350°F (175°C) and line a muffin tin with silicone liners. This ensures even baking and easy removal. The temperature is crucial; too high and the edges will burn before the centers set. Keep a close eye on the first batch to fine‑tune the oven.
- In a large bowl, whisk together the flour, baking soda, and salt. The dry mix should be fragrant; if not, it’s a sign the flour may have gone stale. Sift the mixture if you want an extra smooth texture. This step is where the cookie’s structure begins.
- In a separate bowl, beat the softened butter, granulated sugar, and brown sugar until the mixture is light and fluffy. The goal is to incorporate air, which will help the cookies rise. A handheld mixer works well, but you can also use a stand mixer or a sturdy whisk.
- Add the vanilla extract and eggs, one at a time, beating well after each addition. The eggs should be fully blended before adding the next; this prevents curdling. The mixture should look silky and smooth—no lumps.
- Gradually fold the dry ingredients into the wet mixture. Use a spatula or wooden spoon to stir until just combined. Overmixing at this point will develop gluten and make the cookies tough. The dough should be thick but spreadable.
- Fold in the chocolate chips and, if using, the chopped walnuts. Make sure the chips are evenly distributed; this ensures every bite has that chocolate burst. The dough should look speckled with chocolate.
- Spoon the dough into the lined muffin tin, filling each cup about 3/4 full. The dough should be packed firmly, but not overfilled, to avoid overflow during baking. A small kitchen scale can help you measure the exact amount if you’re aiming for precision.
- Bake for 18–20 minutes, or until the tops are golden and the edges have pulled slightly away from the sides of the tin. The center should still feel slightly soft—this is the key to that chewy interior. If you prefer a crispier center, bake an extra minute or two.
- Remove the tin from the oven and let the cookies cool in the tin for 5 minutes. This allows the cookies to set and makes them easier to lift out. Then transfer them to a wire rack to cool completely.
That’s it—you did it. But hold on, I’ve got a few more tricks that will take this to another level.
Insider Tricks for Flawless Results
The Temperature Rule Nobody Follows
Many bakers think a higher oven temperature always gives a crispier cookie. In reality, a moderate 350°F is ideal for cookie cups because it allows the sugars to caramelize without burning. If your oven runs hot, consider lowering the temperature by 25°F and extending the baking time by a minute or two.
Why Your Nose Knows Best
The aroma of baking chocolate is a powerful indicator of doneness. When the cookies start to smell like toasted sugar and vanilla, they’re almost ready. Trust your nose; don’t rely solely on the timer.
The 5-Minute Rest That Changes Everything
Letting the cookies rest on the tin for 5 minutes after baking allows the steam to settle and the structure to firm up. If you lift them immediately, they can crumble. This simple step can mean the difference between a perfect cookie cup and a sad, collapsed mess.
Keep the Dough Moist
If you’re baking in a dry kitchen, add a tablespoon of milk to the dough. The extra moisture will keep the cookies from drying out too quickly and will give them a tender crumb.
The Sweet‑and‑Savory Balance
A pinch of sea salt on top of the finished cookies can elevate the chocolate flavor and add a pleasant contrast. Sprinkle a tiny amount just before serving for a gourmet touch.
The Right Pan
A non‑stick muffin tin is ideal, but if you’re using a metal tin, lightly oil the liners to prevent sticking. The type of tin can affect the bake; a darker tin will conduct heat more efficiently, potentially shortening baking time.
Creative Twists and Variations
This recipe is a playground. Here are some of my favorite ways to switch things up:
Nutty Delight
Swap out the walnuts for almond slivers or pistachios. The nutty flavor will complement the chocolate and add a satisfying crunch. If you’re allergic, simply omit the nuts.
Citrus Burst
Add a tablespoon of orange zest to the dough for a bright, refreshing twist. The citrus oils will cut through the richness and give the cookies a lively finish.
Spiced Edition
Stir in 1/4 teaspoon of ground cinnamon or a pinch of nutmeg. The warm spices pair beautifully with chocolate and make the cookies feel cozy.
Minty Fresh
Incorporate a few drops of mint extract or finely chopped fresh mint leaves. The mint will create a cooling contrast that’s especially welcome on hot days.
Caramel Swirl
Drop a spoonful of caramel sauce into the center of each dough cup before baking. The caramel will melt into a gooey center, giving each cookie a decadent surprise.
Vegan Version
Replace the butter with coconut oil, use a flax egg, and swap dairy chocolate chips for dairy‑free chips. The result is a vegan cookie cup that still delivers on flavor and texture.
Storing and Bringing It Back to Life
Fridge Storage
Store the cookie cups in an airtight container at room temperature for up to 3 days. The airtight seal prevents the cookies from drying out, and the room temperature keeps the chocolate from hardening.
Freezer Friendly
Wrap each cookie cup individually in plastic wrap, then place them in a freezer bag. They’ll keep for up to 3 months. When you’re ready to enjoy, let them thaw at room temperature for 15 minutes.
Best Reheating Method
Reheat the cookies in a preheated oven at 350°F for 5 minutes, or until they’re warm and the chocolate is melty. Add a tiny splash of water to the dough before baking to keep them moist. This trick ensures the cookies return to their original texture without becoming chewy or soggy.