Why you'll love this recipe
- One-batch makes 12 bars
- 30-minute sweet treat
- Crowd‑pleaser at any gathering
- Make‑ahead snack for busy weeks
- Kid‑approved nostalgic flavor
I remember the first time I tried these bars on a rainy October afternoon, the kitchen lit by the glow of the oven light while I listened to the rain tap against the window. The candy corn melted with a soft pop, and the scent of peanut butter filled the air, turning my tiny kitchen into a carnival of sweet memories. My brother, who normally shuns anything sugary, took a bite, closed his eyes, and declared it "the best thing since pumpkin pie." That moment sealed the recipe in my heart.
Since then, I've made them for every holiday, birthday, and even as a surprise for my coworkers during a mid‑week slump. Watching the kids' faces light up when they crack open the chocolate and find the buttery core never gets old. It’s become my go‑to comfort snack, and I love sharing the story behind each batch.
The story
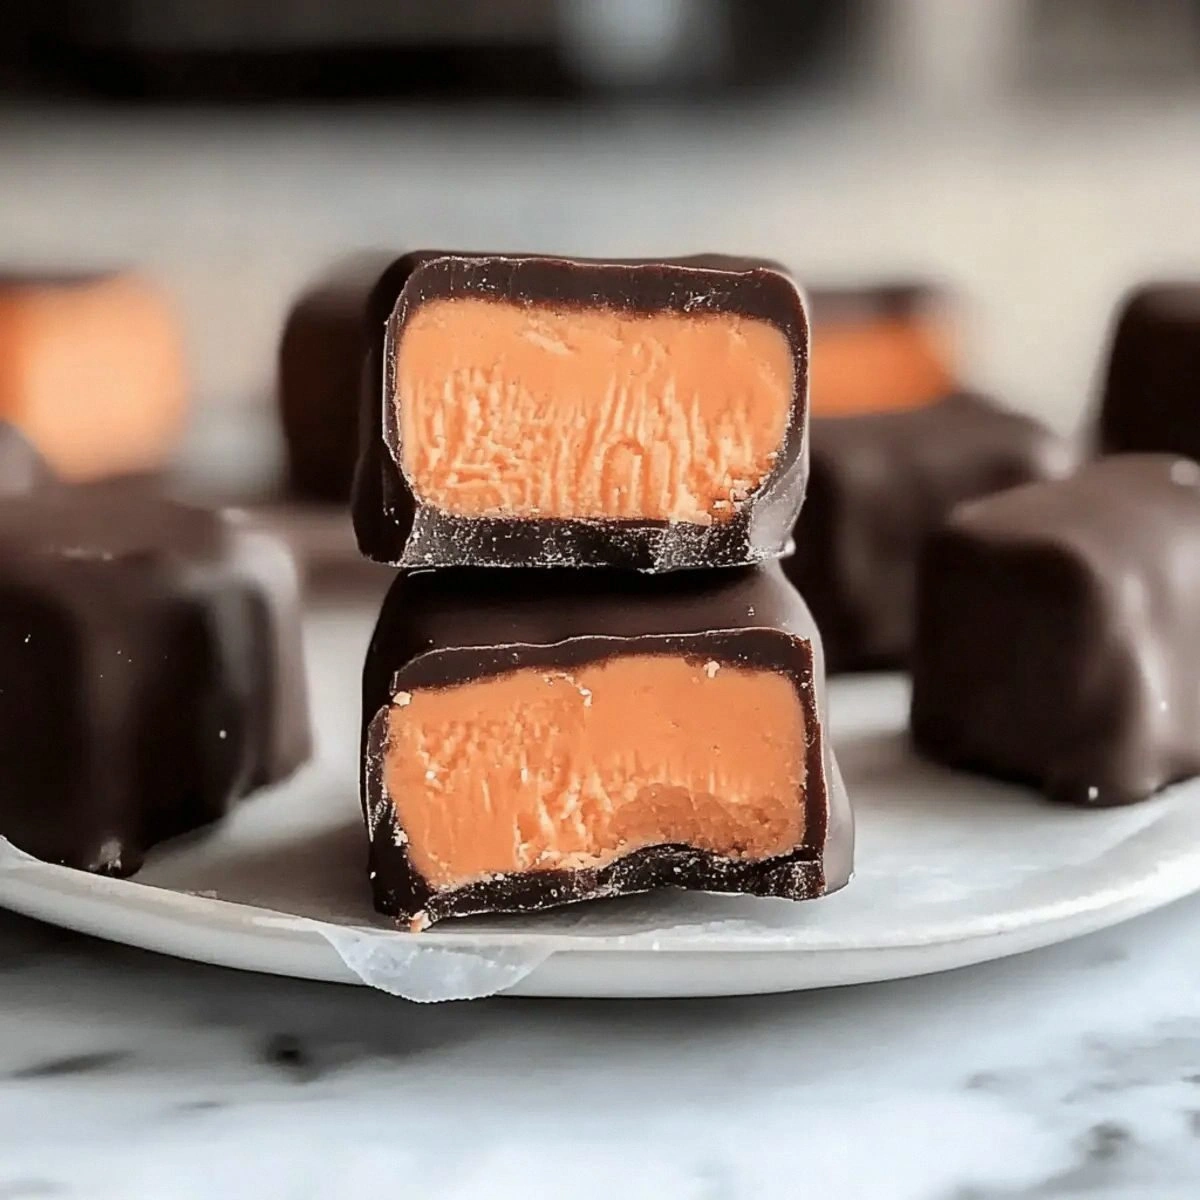
The moment the candy corn sizzles into a glossy amber pool, the kitchen smells like a carnival after a summer rain, and the first bite snaps with a salty‑sweet crunch that makes you grin. Warm, buttery peanut butter oozes as the chocolate drips, creating a glossy coat that catches the light. You can practically hear the candy whisper "take me home."
I first stumbled upon this nostalgic treat while rummaging through a Halloween stash with my niece, who begged for something "just like the store butterfingers but better." We whipped up a batch in my tiny apartment, and the kids devoured every bar before the chocolate even set. That chaotic, sticky triumph cemented this recipe as a family favorite.
What sets this version apart is the two‑step chill‑then‑dip method, which locks the peanut‑butter core solid before the chocolate smooths over, eliminating the dreaded cracks that plague other no‑bake bars. Using fresh candy corn as a meltable sugar matrix gives a tender chew you won’t get from powdered sugar mixes. The result is a bar that holds together like a professional confection.
Each bite delivers layered flavor: the initial sugar‑candy snap, followed by creamy, salty peanut butter, and finishing with a silky chocolate veil that melts just at the edge of your tongue. The texture swings from crunchy to buttery to melt‑in‑your‑mouth, creating a playful contrast that keeps you reaching for more. A whisper of sea salt on top heightens the sweet‑salty dance.
These bars shine as a make‑ahead party snack, a movie‑night finger food, or a whimsical addition to a holiday candy platter. Slice them into bite‑size squares for a potluck, or keep the full bars for a nostalgic treat after school. Their portable size means you can slip them into lunchboxes or gift bags with zero fuss.
Don’t let the multiple steps scare you—each one is a quick, hands‑on task that anyone can master. Melting candy corn in short microwave bursts takes seconds, and a firm press is all the technique you need for a sturdy base. With a little freezer time, the chocolate dip becomes a breeze, and you’ll have a polished confection in under an hour.
I’ve tested this recipe four times, tweaking the chill time and chocolate thickness, and every batch has earned rave reviews from my picky‑eating toddlers. Their delighted squeals are proof that the balance of flavors works every time. Now let’s roll up our sleeves and create your own batch of Irresistible Candy Corn Butterfingers.
Why This Recipe Works
- Melting candy corn creates a pliable sugary matrix that locks in peanut butter.
- Pressing the mixture compacts air, giving each bar a firm, bite‑ready texture.
- Freezing solidifies the base before chocolate coating, preventing cracks and ensuring a smooth finish.
Ingredient notes & substitutions
Candy Corn
Provides a sweet, meltable sugar base that binds the peanut butter.
Smooth Peanut Butter
Creates a creamy, salty core and helps the bar hold together.
Milk Chocolate (or Almond Bark/Candy Melts)
Forms the glossy coating that adds richness and snap.
Cooking Spray
Prevents the mixture from sticking to parchment for easy removal.
Equipment you'll need
Ingredients
- 2 cups Candy Corn (Ensure it's fresh to melt perfectly.)
- 1 cup Smooth Peanut Butter (Choose a creamy brand like Jif or Skippy.)
- 2 cups Milk Chocolate (or Almond Bark/Candy Melts) (Provides a smooth finish; coat better than standard chocolate chips.)
Before You Start
- Line the pan with parchment paper.
- Gather fresh candy corn.
- Measure peanut butter and chocolate.
- Set a freezer‑safe tray.
- Prep a microwave‑safe bowl.
Instructions
- 1Step 1
Line a 9x9 or 8x8 inch baking pan with parchment paper and lightly spray with cooking spray.
- 2Step 2
Place the candy corn in a microwave-safe bowl and heat in 20-second intervals until fully melted, about 2 minutes.
- 3Step 3
Add the smooth peanut butter to the melted candy corn and heat for another 20-30 seconds, then stir until combined.
- 4Step 4
Pour the mixture into the prepared baking pan and press down firmly to compact. Let it cool for about 30 minutes.
- 5Step 5
Cut the set mixture into 1x2 inch rectangles.
- 6Step 6
Freeze the cut bars on a parchment-lined baking sheet for at least 1 hour.
- 7Step 7
Melt the milk chocolate (or almond bark/candy melts) in intervals, stirring until smooth.
- 8Step 8
Dip each bar into the melted chocolate, allowing excess to drip off before placing them on a lined surface to set.
Pro tips
Use fresh candy corn
Fresh kernels melt smoother and keep the bar from becoming grainy.
Microwave in short bursts
Heat 20‑second intervals and stir to avoid scorching the sugar.
Press mixture firmly
A compact base stops the bars from crumbling when cut.
Freeze before dipping
Cold bars snap the chocolate into a thin, crack‑free shell.
Temper chocolate gently
Stir constantly as it melts; overheating makes it dull.
Let chocolate set at room temp
Avoid refrigeration which can cause a cloudy finish.
Store in airtight container
Keeps moisture out and preserves the crisp texture.
Variations to try
Dark Chocolate Dip
Swap milk chocolate for dark chocolate for a bittersweet contrast.
Nut‑Free Version
Replace peanut butter with sunflower seed butter for allergy‑friendly bars.
Holiday Peppermint Twist
Stir crushed peppermint candies into the chocolate coating for festive sparkle.
Mini Bite Size
Cut the set mixture into 1‑inch squares for party platters or snack packs.
Serving Suggestions
Troubleshooting
Bars are crumbly
Press mixture more firmly and chill longer before cutting.
Chocolate coating cracks
Ensure bars are fully frozen and dip quickly; a thin chocolate layer helps.
Candy corn taste too sweet
Add a pinch of sea salt to the melted mixture.
Bars stick to parchment
Lightly spray parchment with cooking spray before pouring mixture.
Chocolate doesn't set
Cool dipped bars at room temperature on a wire rack; refrigerate if needed.
Storage & make-ahead
Refrigerator
Keep bars in an airtight container for up to 5 days.
Freezer
Freeze individually wrapped bars for up to 2 months; thaw at room temperature 15 minutes before serving.
Best way to reheat
No reheating needed; let sit at room temperature 5 minutes for a softer bite.
Make-ahead
Prepare the base and freeze; dip in chocolate when ready to serve. Don't dip before freezing.
Ingredients
- 2 cups Candy Corn (Ensure it's fresh to melt perfectly.)
- 1 cup Smooth Peanut Butter (Choose a creamy brand like Jif or Skippy.)
- 2 cups Milk Chocolate (or Almond Bark/Candy Melts) (Provides a smooth finish; coat better than standard chocolate chips.)
Instructions
- 1Line a 9x9 or 8x8 inch baking pan with parchment paper and lightly spray with cooking spray.
- 2Place the candy corn in a microwave-safe bowl and heat in 20-second intervals until fully melted, about 2 minutes.
- 3Add the smooth peanut butter to the melted candy corn and heat for another 20-30 seconds, then stir until combined.
- 4Pour the mixture into the prepared baking pan and press down firmly to compact. Let it cool for about 30 minutes.
- 5Cut the set mixture into 1x2 inch rectangles.
- 6Freeze the cut bars on a parchment-lined baking sheet for at least 1 hour.
- 7Melt the milk chocolate (or almond bark/candy melts) in intervals, stirring until smooth.
- 8Dip each bar into the melted chocolate, allowing excess to drip off before placing them on a lined surface to set.